
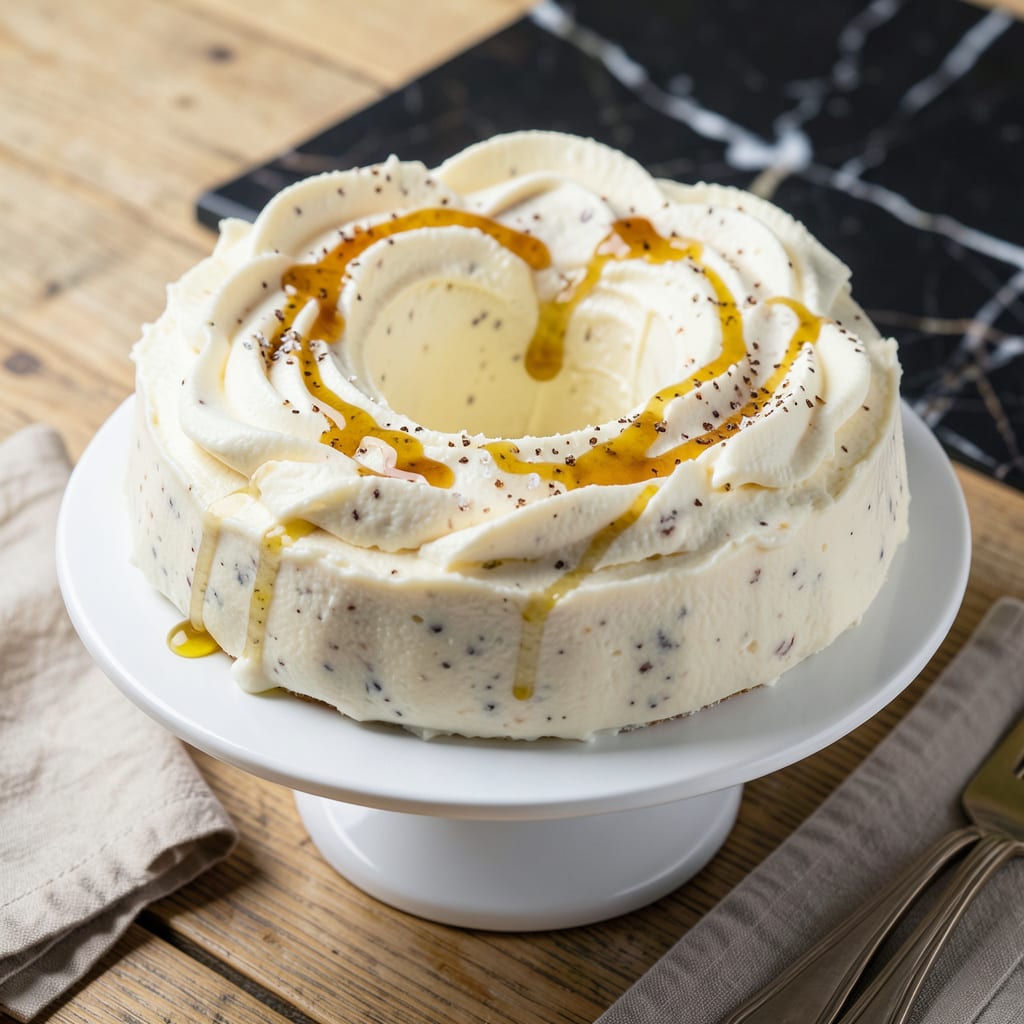
This cream cheese frosting delivers the signature rich, velvety texture that Nothing Bundt Cakes are known for. The perfect balance of sweet and tangy makes it ideal for topping any cake or cupcake.
With just a few simple ingredients and 10 minutes of mixing, you’ll have a smooth, spreadable frosting that pipes beautifully and holds its shape. No special equipment required.
Ingredients for Nothing Bundt Frosting
Seven essential ingredients create this luscious, signature-style cream cheese frosting with perfect balance.
| Ingredient | Amount | Notes |
|---|---|---|
| Full-Fat Cream Cheese 🧀 | 8 oz | Softened to room temperature |
| Unsalted Butter 🧈 | ½ cup | Softened to room temperature |
| Powdered Sugar ❄️ | 4 cups | Sifted for smooth texture |
| Pure Vanilla Extract 🌿 | 1 tsp | High-quality for best flavor |
| Heavy Whipping Cream 🥛 | 2 tbsp | Optional for lighter texture |
| Fine Sea Salt 🧂 | ¼ tsp | Balances sweetness |
| Lemon Juice 🍋 | ½ tsp | Freshly squeezed preferred |
The cream cheese is non-negotiable here—Philadelphia brand is the gold standard for that ultra-smooth texture. Always use full-fat; the reduced-fat versions add too much moisture and ruin the consistency. The butter should be real unsalted (Land O’Lakes or Challenge) to control the salt content precisely. Powdered sugar quality matters less, but C&H or Domino are reliable supermarket options.
No cream cheese on hand? Mascarpone at equal weight works in a pinch, though it’s slightly sweeter. Swap butter for coconut oil if dairy-free (but texture will differ). Skip the cream if you prefer denser frosting. The vanilla can be vanilla bean paste at half the amount for visible specks. For extra tang, a pinch of citric acid mimics that signature Nothing Bundt zing.
Frosting keeps airtight in the fridge for 5 days. Freeze in portions for 3 months—thaw overnight before rewhipping. Bring to room temp before using; cold frosting tears cakes. Always sift the powdered sugar first (worth the extra minute).
Why You’ll Love This Recipe
- Five Minute Whip: I can mix this in my stand mixer before the oven even preheats—cream cheese, butter, and powdered sugar beat together like a dream.
- Rich & Velvety: The vanilla and heavy cream turn it into this ridiculously good, ultra-smooth frosting that clings to every crumb.
- Endless Pairings: I’ve slathered it on bundt cakes, cupcakes, even graham crackers for a quick treat when the kids beg for something sweet.
- Stays Fresh: Honestly, it keeps in the fridge for days without getting weird, so I can make a double batch and use it all week.
Step-by-Step Instructions for Cream Cheese Frosting
Master this technique and you’ll achieve silky, spreadable frosting with perfect consistency every time.
Step 1: Cream the Base Ingredients
In a stand mixer fitted with the paddle attachment, combine the 8 oz Full-Fat Cream Cheese and 0.5 cup Unsalted Butter. Both should be softened to room temperature—this ensures smooth incorporation without lumps.
Beat on medium speed for 2-3 minutes until the mixture becomes light, fluffy, and pale in color. You’re looking for a completely homogeneous base with no visible streaks of cream cheese or butter. Scrape down the sides of the bowl as needed to ensure even mixing.
Step 2: Gradually Incorporate the Powdered Sugar
With the mixer on low speed, gradually add the 4 cups Powdered Sugar, about 1 cup at a time. This prevents a cloud of sugar from erupting and ensures even distribution throughout the mixture.
After each addition, pause to scrape the bowl and allow the sugar to fully incorporate before proceeding. The mixture will appear dry and crumbly at first but will come together into a thick, spreadable consistency as you continue. This gradual addition is crucial for achieving that signature smooth texture.
Step 3: Add Flavorings and Adjust Consistency
Once the powdered sugar is fully incorporated, add the 1 tsp Pure Vanilla Extract, 0.25 tsp Fine Sea Salt, and 0.5 tsp Lemon Juice. Mix on low speed for 30 seconds until just combined.
Now add the 2 tbsp Heavy Whipping Cream and beat on medium speed for 1-2 minutes until the frosting becomes light and fluffy. The cream helps achieve that perfect spreadable consistency. If the frosting appears too thick, add additional cream 1 tablespoon at a time, but be careful not to over-thin it.
Step 4: Final Adjustments and Testing
Taste the frosting and adjust seasoning if needed. The salt should balance the sweetness without being noticeable, while the lemon juice adds a subtle brightness that complements the richness of the cream cheese and butter.
Check the consistency by lifting the paddle—it should hold its shape briefly before slowly settling back into the bowl. If it’s too runny, add a bit more powdered sugar; if too stiff, incorporate a splash more cream. The ideal texture should spread easily over a cake without tearing the crumb.
Use immediately or store in an airtight container in the refrigerator for up to 5 days, bringing to room temperature and re-whipping briefly before use.
Pro Tips For Making Nothing Bundt Frosting
- Soften Properly: Let the cream cheese and butter sit at room temperature for at least 2 hours—cold lumps ruin the texture. I learned this the hard way after my first batch looked like cottage cheese.
- Sift the Sugar: Powdered sugar can clump, so sift it first to avoid grainy frosting. Sounds tedious, but it actually changes the outcome.
- Skip the Overmixing: Once the frosting comes together, stop mixing—overbeating adds air bubbles that make it look lumpy when spread.
- Splash of Cream: If the frosting is too thick, add heavy cream 1 tablespoon at a time. My grandmother swore by this, and she was right: it fixes stiff frosting without thinning it too much.
Essential Equipment for Great nothing bundt frosting
Stand Mixer Essentials
A stand mixer with a paddle attachment is your best friend for this recipe. I rely on my KitchenAid 5-Quart—it handles the thick frosting without straining. The paddle attachment ensures even mixing and proper aeration for that light, fluffy texture we all love.
Hand Mixer Alternative
No stand mixer? A hand mixer works too, though it requires more effort. Use a large, deep bowl to minimize mess. I recommend a Cuisinart 9-Speed for its power and durability. Expect to spend an extra 2-3 minutes mixing. 💡
Measuring Tools
Accurate measurements are key for consistent results. I use OXO Good Grips measuring cups for dry ingredients and a Pyrek glass measuring cup for liquids. A kitchen scale isn’t essential here, but it helps if you want to weigh the cream cheese for precision.
Spatula for Scraping
A good rubber spatula is indispensable for scraping down the bowl between additions. I prefer the GIR brand—it’s heat-resistant and flexible enough to get into all the corners. This ensures every bit of cream cheese and butter gets incorporated evenly.
Piping Bags for Decorating
For professional-looking results, use a 18-inch piping bag with a large star tip. I love Wilton products for their quality and affordability. If you don’t have one, a zip-top bag with a corner snipped off works in a pinch. 🔥
Chilling Equipment
If you need to chill your frosting before use, transfer it to an airtight container. I use Glasslock containers—they’re durable and don’t absorb odors. Let it sit at room temperature for 30 minutes before re-whipping to restore the perfect consistency.
Nutrition Facts
Frequently Asked Questions
Can I substitute reduced-fat cream cheese?
Not recommended. Reduced-fat cream cheese adds too much moisture, making the frosting thin and runny. Stick with full-fat cream cheese for the best texture and stability.
Why does my frosting look grainy?
Graininess usually means the powdered sugar wasn’t sifted or fully dissolved. Always sift your sugar first and mix thoroughly on low speed to avoid this issue.
How far in advance can I make this?
You can prepare it up to 5 days ahead. Store in an airtight container in the fridge, then bring to room temperature and re-whip before using.
Can I freeze leftover frosting?
Yes! Freeze in portions for up to 3 months. Thaw overnight in the fridge, then re-whip to restore the creamy texture.

- BBQ Sausage Recipe Oven: Smoky Depth Without the Grill - September 28, 2026
- BBQ Chicken Bowl Recipe Rice: Smoky Sweetness Over Fluffy Grains - September 28, 2026
- Beef Cutlet Recipe Ideas: Crispy Breaded Patties With Bold Seasonings - September 28, 2026