
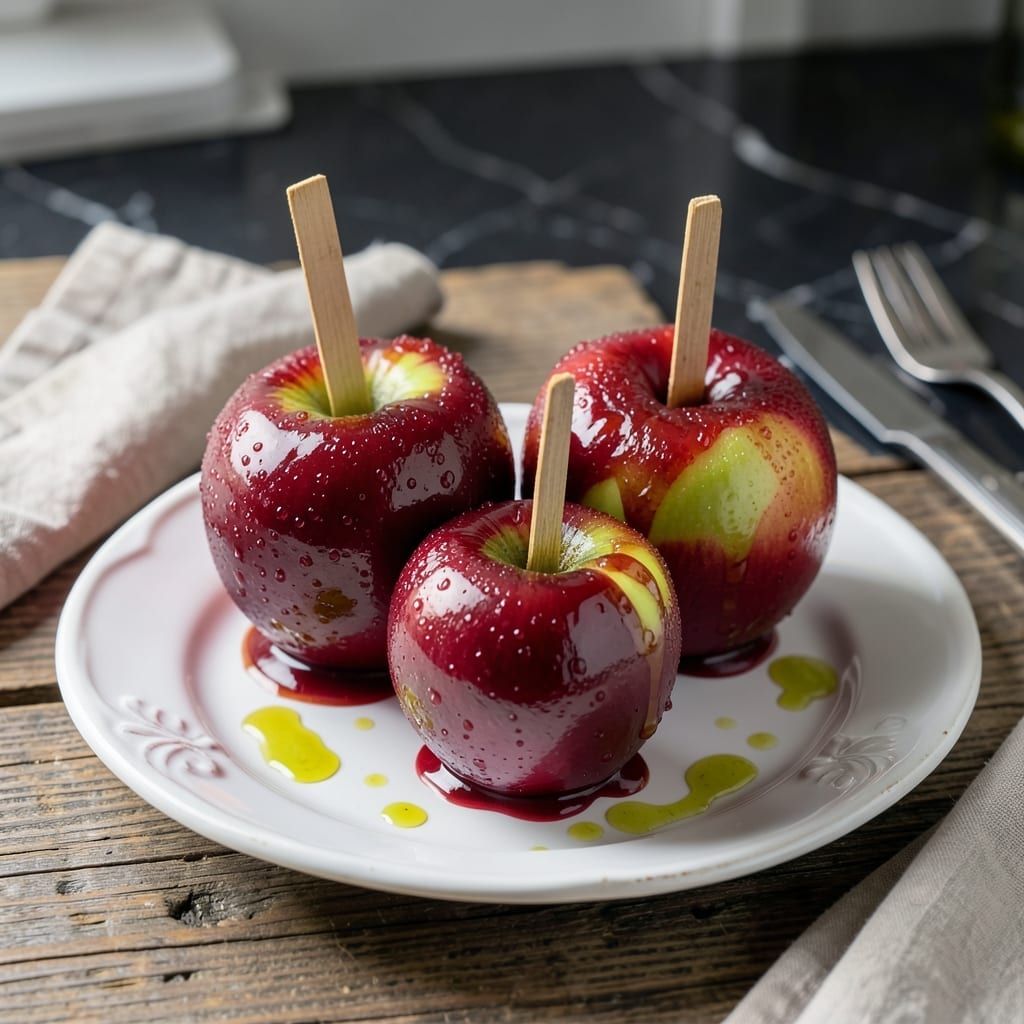
There’s something nostalgic about making candy apples the old-fashioned way, especially with tart green apples that perfectly balance the sweet coating. This traditional method delivers that classic holiday treat we all remember.
With a few simple ingredients and careful timing, you’ll create shiny, crisp candy apples that crackle with every bite. The green apples provide the ideal tangy contrast to the hard candy shell.
Ingredients for Old Fashioned Candy Apple Recipe with Green Apples
A handful of pantry staples transforms into nostalgic holiday magic with these crisp, candy-coated apples.
| Ingredient | Amount | Notes |
|---|---|---|
| Granny Smith Apples 🍏 | 4 whole | Medium-sized, tart and firm |
| Granulated Sugar 🧂 | 2 cups | Fine white sugar for candy coating |
| Light Corn Syrup 💧 | ½ cup | Prevents crystallization for smooth coating |
| Water 💧 | ½ cup | For sugar syrup base |
| White Vinegar 💧 | 1 tsp | Adds shine to candy shell |
| Red Food Coloring 🎨 | 1 tsp | Gel-based preferred for vibrant color |
| Vanilla Extract 🌿 | ½ tsp | Pure extract for best flavor |
| Wooden Skewers 🪵 | 4 pieces | Food-safe for dipping apples |
| Unsalted Butter 🧈 | 1 tbsp | Optional for richer candy coating |
| Baking Sheet 🍪 | 1 piece | Lined with parchment paper |
| Parchment Paper 📜 | 1 sheet | Prevents sticking during drying |
The apples are everything here. Granny Smith is the gold standard—tart, crisp, and sturdy enough to hold the thick candy shell. Look for medium-sized fruits (about 3 inches in diameter) without blemishes. Most supermarkets stock them year-round, but local orchards often have the freshest picks during apple season. Avoid overly waxed varieties as the coating won’t adhere properly.
Out of corn syrup? Honey or agave can substitute in a pinch (though the texture will differ slightly). For a deeper red hue, add a few drops of liquid food coloring along with the gel. Skip the vinegar if you prefer a more traditional flavor, but it does add that signature gloss. The butter is optional but recommended for a smoother, richer candy layer. Use pure vanilla extract—imitation can leave an aftertaste.
Store finished apples in a cool, dry place on the lined baking sheet—they’ll keep for 2-3 days but are best eaten fresh. Avoid refrigeration as moisture will make the coating sticky. If saving for later, wrap individually in parchment paper to prevent sticking. Perfect for holiday gifting or party displays.
Why You’ll Love This Recipe
- No Fuss Boil: I love that the syrup comes together in one pot with just sugar, corn syrup, water, and a splash of vinegar—no fancy techniques.
- Tart Meets Sweet: Granny Smiths hold their crispness under that glassy coating, with their sharpness cutting right through the candy shell.
- Fair Favorite at Home: Honestly, I make these for Halloween, birthday treats, or just because Tuesday needs a little magic.
- Pantry Staples Only: All the ingredients are already in my cupboard, so I can decide to make a batch on a whim without a store run.
Step-by-Step Instructions for Old Fashioned Candy Apples
This traditional method delivers glossy, crackly candy apples with that nostalgic holiday appeal.
Step 1: Prepare the Apples and Workspace
Begin by thoroughly washing and drying the 4 whole Granny Smith Apples. Any moisture will prevent the candy coating from adhering properly, so ensure they are completely dry. Remove stems and insert the 4 pieces Wooden Skewers firmly into the core where the stems were.
Line the 1 piece Baking Sheet with the 1 sheet Parchment Paper and set it near your workspace. This preparation prevents the hot candy from sticking during the drying process. I arrange everything within arm’s reach before starting the syrup—this candy sets quickly once poured.
Step 2: Create the Candy Syrup Base
In a medium heavy-bottomed saucepan, combine the 2 cups Granulated Sugar, 0.5 cup Light Corn Syrup, and 0.5 cup Water. Stir just until the sugar dissolves, then stop stirring to prevent crystallization. The corn syrup is crucial here—it interrupts sugar crystal formation for a smooth, glass-like finish.
Cook over medium-high heat until the mixture reaches 300°F on a candy thermometer. This hard crack stage is essential for that classic candy apple snap. Avoid stirring during cooking, but gently swirl the pan if needed to even out hot spots.
Step 3: Finish and Color the Syrup
Once at temperature, remove from heat and carefully stir in the 1 tsp White Vinegar, 1 tsp Red Food Coloring, 0.5 tsp Vanilla Extract, and 1 tbsp Unsalted Butter. The mixture will bubble vigorously—this is normal. The vinegar adds that signature shine while the butter creates a richer texture.
Let the syrup sit undisturbed for 1-2 minutes to allow the bubbles to subside. This brief rest makes dipping safer and more controlled. The color should be a vibrant, even red throughout the syrup.
Step 4: Dip and Coat the Apples
Working quickly but carefully, dip each apple into the hot syrup, turning to coat completely. Hold the skewer at an angle and rotate the apple for 10-15 seconds to ensure full coverage. The syrup should drip off in thick ribbons, creating that iconic ridged texture as it cools.
Allow excess syrup to drip off for 5-10 seconds before placing on the prepared baking sheet. If the coating seems too thin, briefly dip a second time. Space the apples at least 2 inches apart to prevent sticking together as they harden.
Step 5: Set and Store the Candy Apples
Let the apples cool at room temperature for 20-30 minutes until the candy shell is completely hard. You’ll hear a faint crackling sound as it sets—this indicates proper crystallization. Resist the urge to touch or move them during this time.
Once fully set, the candy apples will have a glossy, deep red finish with a firm snap when bitten. Store in a cool, dry place for up to 3 days, though they’re best enjoyed the same day. The contrast between the crisp candy shell and tart Granny Smith apple is what makes this treat unforgettable.
Pro Tips For Making Old Fashioned Candy Apple Recipe With Green Apples
- Use Cold Apples: Start with apples straight from the fridge—I learned this the hard way after my first batch slid right off the sticks because the syrup set too fast on warm fruit.
- Skip the Stirring: Once the sugar mixture hits a boil, resist the urge to stir or you’ll end up with grainy candy coating instead of that glossy, smooth finish.
- Add Vinegar Last: Mix in the white vinegar only after the sugar and corn syrup have fully dissolved, or it can cause the syrup to crystallize prematurely.
- Dry the Apples: Pat the Granny Smiths completely dry before dipping—any moisture will make the candy coating slide right off, and nobody wants that.
Troubleshooting This Recipe
Syrup Crystallization
If your syrup crystallizes during cooking, it’s likely because you stirred it after dissolving the sugar or the mixture hit the pan sides. I prevent this by using a pastry brush dipped in water to wash down any sugar crystals on the pan walls. If it happens, add 1-2 tbsp hot water and gently swirl to dissolve, then continue cooking. 💡
Coating Too Thin
Thin coating usually means the syrup wasn’t hot enough. Always use a candy thermometer and ensure the mixture reaches 300°F before dipping. If needed, return the syrup to heat until it thickens. Also, let excess syrup drip for 5-10 seconds—this builds up the layers.
Apples Floating
When apples float in the syrup, they’re not fully submerged. I tilt the saucepan and use the skewer to push the apple under the surface. Alternatively, use a deeper pot. This ensures even coating. If they still float, your apples may need a second quick dip.
Candy Shell Cracking
Cracking often happens if the apples aren’t completely dry before dipping. Pat them with paper towels after washing. Also, avoid refrigerating finished apples—store at room temperature on parchment paper. The temperature change can cause the hard candy to fracture. ❄️
Sticky Syrup
If your syrup is too sticky, it may not have reached the hard crack stage. Reheat to 300-310°F and try again. Humidity can also cause stickiness, so work on dry days. If storing, keep apples separated by parchment paper to prevent sticking.
Dull Finish
The vinegar is key for that glossy finish, so don’t skip it. If your coating looks dull, try adding ½ tsp more vinegar to the syrup next time. Also, avoid touching the apples while they set—fingerprints can leave marks. They’ll shine beautifully when fully cooled.
Frequently Asked Questions
Why use green apples instead of red?
Green apples like Granny Smith provide the perfect tart contrast to the sweet candy shell. Their firm texture also holds up better to the hot syrup than softer red varieties.
What if I don’t have a candy thermometer?
You can test the syrup by dropping a small amount in cold water. If it forms hard, brittle threads, it’s ready. This takes practice though—a thermometer is more reliable.
Can I make these ahead of time?
They’re best eaten within 2-3 days. Store them in a cool, dry place on parchment paper, not touching each other. Avoid refrigeration as moisture makes the coating sticky.
How do I prevent the coating from sliding off?
Ensure apples are completely dry before dipping. Remove all wax and moisture with a thorough washing and drying. The syrup won’t adhere properly to wet surfaces.
Nutrition Facts

- BBQ Sausage Recipe Oven: Smoky Depth Without the Grill - September 28, 2026
- BBQ Chicken Bowl Recipe Rice: Smoky Sweetness Over Fluffy Grains - September 28, 2026
- Beef Cutlet Recipe Ideas: Crispy Breaded Patties With Bold Seasonings - September 28, 2026