
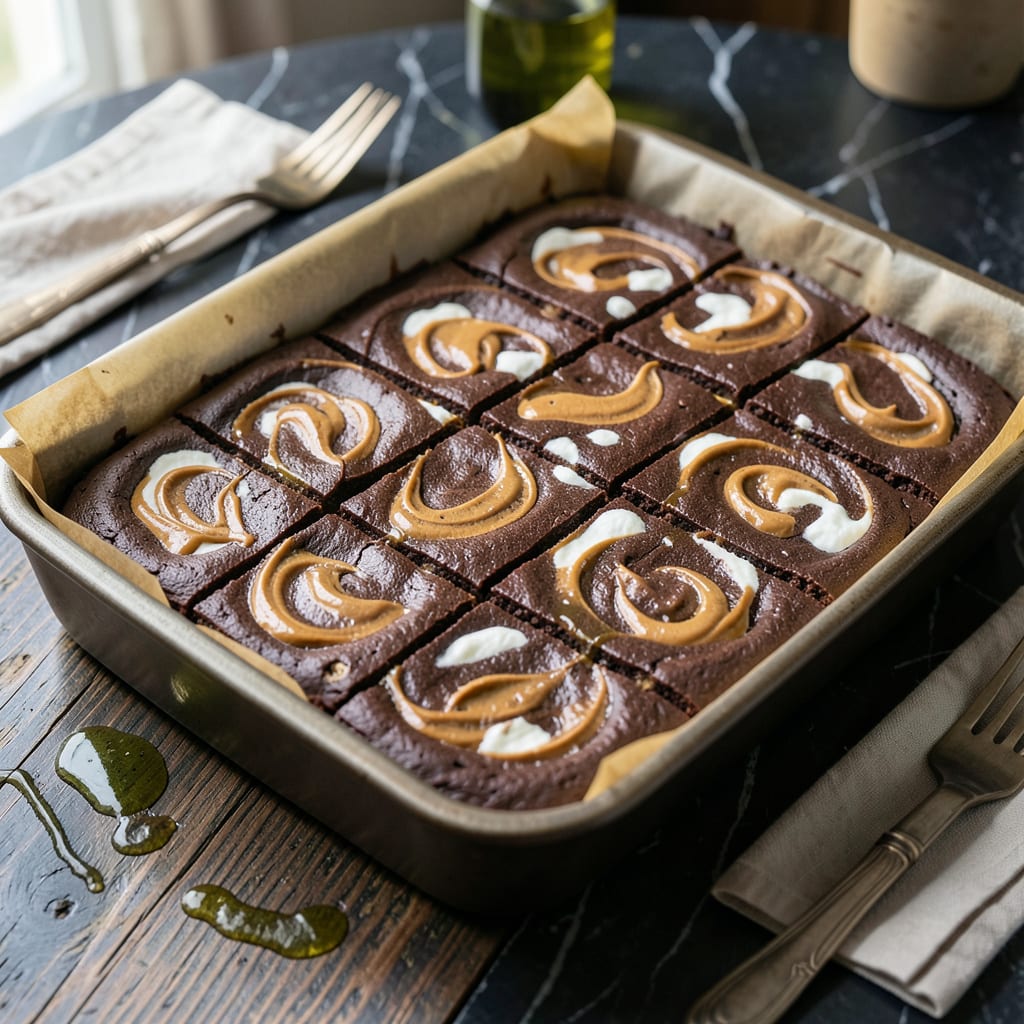
This timeless fudge recipe brings together chocolate, peanut butter, and marshmallow cream for a melt-in-your-mouth treat. The old-fashioned method ensures a smooth, creamy texture that’s hard to resist.
With just a few simple ingredients and a little patience, you’ll create a nostalgic candy that’s rich, decadent, and perfect for sharing. The swirls of marshmallow cream add a sweet contrast to the deep chocolate and nutty flavors.
Ingredients for Old Fashioned Chocolate Peanut Butter Fudge Recipe with Marshmallow Cream
A handful of ingredients creates this decadent fudge with rich swirls of nostalgia.
| Ingredient | Amount | Notes |
|---|---|---|
| Semi-Sweet Chocolate Chips 🍫 | 2 cups | High-quality for smooth melting |
| Creamy Peanut Butter 🥜 | 1 cup | Natural or commercial variety |
| Marshmallow Cream 🍬 | 1 ½ cups | Full 7 oz jar plus extra |
| Unsalted Butter 🧈 | ½ cup | Cut into small pieces |
| Granulated Sugar 🍚 | 2 cups | Fine white granulated |
| Evaporated Milk 🥛 | 1 can | 12 oz size, full-fat |
| Vanilla Extract 🌿 | 1 tsp | Pure vanilla, not imitation |
| Salt 🧂 | ¼ tsp | Fine table salt |
| Chopped Walnuts 🌰 | ½ cup | Optional, for texture contrast |
| Heavy Cream 🥛 | ¼ cup | For extra creaminess |
The chocolate quality is non-negotiable here. Ghirardelli or Guittard semi-sweet chips melt beautifully without seizing. For peanut butter, Jif or Skippy provide the right consistency—natural brands can separate. The marshmallow cream must be the classic Fluff brand (7 oz jar) for proper texture. Most grocery stores carry all three in the baking aisle. Don’t substitute chocolate bars unless you’re prepared to chop them finely.
Need nut-free? Skip the walnuts entirely—they’re optional anyway. Out of evaporated milk? Heavy cream at half the volume works, but the texture will be denser. No marshmallow cream? Mini marshmallows melted with extra butter can mimic the effect, though the swirls won’t be as defined. For a darker fudge, swap semi-sweet chips for bittersweet, but add an extra tablespoon of sugar.
Fudge keeps at room temperature in an airtight container for 2 weeks (if it lasts that long). For longer storage, refrigerate for up to 1 month or freeze for 3 months. Cut into squares only after fully set—premature slicing causes crumbling.
Why You’ll Love This Recipe
- No-Fuss Melting: Honestly, you just melt chocolate chips, peanut butter, and marshmallow cream together—no candy thermometer, no stress.
- Decadent Duo: That rich semi-sweet chocolate with the creamy peanut butter swirl? It’s like a Reese’s cup but better.
- Holiday Staple: I make this for cookie swaps and it’s always the first to disappear—no one guesses how simple it is.
- Budget-Friendly Batch: Five ingredients, most of which I already have, and it makes enough to share (or not).
Step-by-Step Instructions for Old Fashioned Chocolate Peanut Butter Fudge With Marshmallow Cream
This method ensures smooth texture and perfect swirls every time.
Step 1: Prepare the Chocolate Base
Line a 9×13-inch baking pan with parchment paper, leaving overhang on the sides. In a large saucepan, combine the 2 cups Granulated Sugar, 1 can Evaporated Milk, and 0.5 cup Unsalted Butter cut into small pieces.
Cook over medium heat, stirring constantly with a wooden spoon, until the mixture reaches a full rolling boil. This should take about 8-10 minutes—you’ll see the mixture thicken slightly and turn a light caramel color.
Step 2: Incorporate Chocolate and Marshmallow
Once boiling, remove the saucepan from heat immediately. Add the 2 cups Semi-Sweet Chocolate Chips and the 1.5 cups Marshmallow Cream. Stir vigorously until the chocolate chips are completely melted and the marshmallow cream is fully incorporated into the mixture.
The mixture will become thick and glossy. This is where the signature fudge texture begins to form. If any chocolate pieces resist melting, place the saucepan back over low heat for 10-15 seconds while stirring constantly.
Step 3: Add Flavorings and Nuts
Stir in the 1 tsp Vanilla Extract and 0.25 tsp Salt until evenly distributed. Then add the 1 cup Creamy Peanut Butter and 0.25 cup Heavy Cream, mixing until the peanut butter is fully blended and no streaks remain.
Fold in the 0.5 cup Chopped Walnuts if using, reserving a small handful for garnish. The mixture should now be thick, shiny, and pull away slightly from the sides of the pan when stirred.
Step 4: Set and Swirl the Fudge
Pour half of the fudge mixture into your prepared pan and spread evenly with a spatula. Drop spoonfuls of the remaining mixture on top, then use a knife to create swirls for a marbled effect. This step creates the signature rich swirls of chocolate and peanut butter.
Sprinkle the reserved chopped walnuts over the top if desired. Press them in lightly so they adhere to the fudge as it sets.
Step 5: Chill and Cut
Refrigerate the fudge for at least 2 hours or until completely firm. The fudge is ready when it holds its shape when pressed lightly with a finger. Use the parchment paper overhang to lift the fudge out of the pan.
Cut into 1-inch squares using a sharp knife. For clean cuts, wipe the knife with a hot, damp cloth between slices. Store in an airtight container at room temperature for up to 1 week, or refrigerate for longer storage.
Pro Tips For Making Old Fashioned Chocolate Peanut Butter Fudge Recipe With Marshmallow Cream
- Melt Slowly: I learned this the hard way—melt the chocolate chips and butter over low heat, stirring constantly, or they’ll seize up. About 5 minutes of patience saves you from a grainy mess.
- Use Name-Brand Peanut Butter: Skip the natural or off-brand stuff here. The consistent texture of name-brand creamy peanut butter blends smoothly into the fudge without separating.
- Don’t Overboil Sugar: After burning three batches, I finally figured out the sugar mixture only needs to reach a rolling boil for exactly 2 minutes—no longer, or it turns brittle.
- Grease the Pan Well: Sounds obvious, but butter the 8×8 pan generously, even the sides, or your fudge will stick like cement. I use about 1 tablespoon, rubbed in with a paper towel.
Troubleshooting old fashioned chocolate peanut butter fudge recipe with marshmallow cream
Grainy Texture Fix
If your fudge turns out grainy, it likely reached too high a temperature too quickly. I always use a candy thermometer and stop heating at 234-238°F (soft-ball stage). Stir constantly with a wooden spoon to prevent hot spots.
Separated Mixture
If the chocolate or peanut butter separates, remove from heat immediately and stir vigorously. Adding 1-2 tsp hot water can help re-emulsify. Avoid high heat which causes oil separation in peanut butter.
Fudge Won’t Set
Undercooking is usually the culprit. Return to medium-low heat and cook until it reaches 234°F. If you overshot, add 1-2 tbsp powdered sugar and stir well before chilling. 💡
Marshmallow Swirls Disappear
For distinct swirls, cool the base mixture for 5 minutes before adding marshmallow cream. Use a butter knife to create deep swirls immediately after pouring. Work quickly before it sets.
Overly Sweet Fudge
Balance the sweetness by adding ¼ tsp salt or using bittersweet chocolate next time. The salt enhances the chocolate flavor and cuts the sugar intensity.
Sticky Cutting Problems
Chill completely before cutting—at least 2 hours. Use a sharp knife dipped in hot water and wiped clean between cuts. This prevents dragging the fudge. ✨
Nutrition Facts
Frequently Asked Questions
Why does my fudge get grainy?
Graininess usually happens when the mixture heats too fast. Use a candy thermometer and stop at 234-238°F. Stir constantly to prevent hot spots.
Can I use natural peanut butter?
It’s not recommended. Natural peanut butter can separate and make the texture oily. Stick with commercial brands like Jif or Skippy for best results.
How do I keep the marshmallow swirls visible?
Let the base cool for 5 minutes before adding marshmallow cream. Swirl immediately with a knife for defined patterns.
How long can I store this fudge?
It keeps at room temperature in an airtight container for 2 weeks. For longer storage, refrigerate for up to 1 month.

- BBQ Chicken Bowl Recipe Rice: Smoky Sweetness Over Fluffy Grains - September 28, 2026
- Beef Cutlet Recipe Ideas: Crispy Breaded Patties With Bold Seasonings - September 28, 2026
- Bluefin Tuna Recipe Ideas: Sushi-Grade Seared and Sesame-Crusted - September 28, 2026