
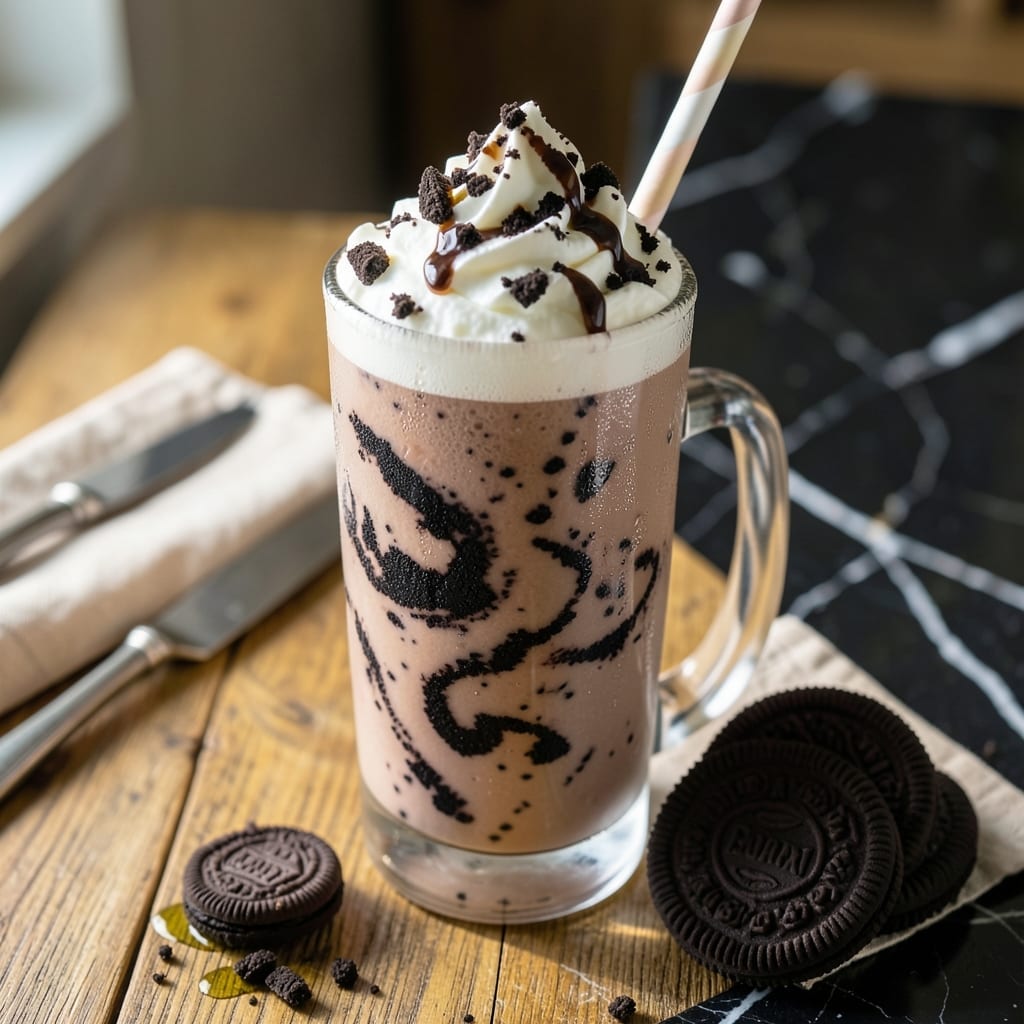
This Oreo milkshake delivers the classic cookies and cream experience without a single scoop of ice cream. The secret lies in a simple combination of ingredients that create a thick and creamy texture you won’t believe is dairy-free.
I’ve perfected this method using just milk, Oreos, and a few pantry staples to achieve that signature milkshake consistency. The key is patience—letting the ingredients blend long enough to break down the cookies completely.
What you get is a rich, velvety drink packed with Oreo crunch in every sip. It’s the ideal treat for when you’re craving something indulgent but want to skip the ice cream aisle.
Serve it chilled with extra cookie crumbles on top for the full experience.
Ingredients for Oreo Milkshake Recipe Without Ice Cream
Just a handful of pantry staples and fridge basics for this dreamy drink.
| Ingredient | Amount | Notes |
|---|---|---|
| Oreo Cookies 🍪 | 12 whole | Regular or Double Stuf, divided |
| Whole Milk 🥛 | 1 ½ cups | Cold for best texture |
| Heavy Whipping Cream 🥛 | ½ cup | Chilled, for richness |
| Vanilla Extract 🌿 | 1 tsp | Pure extract preferred |
| Granulated Sugar 🧂 | 2 tbsp | Adjust to taste preference |
| Ice Cubes ❄️ | 6 pieces | For chilling and thickness |
| Salt 🧂 | ¼ tsp | Enhances cookie flavor |
| Whipped Cream 🍦 | ½ cup | Optional for topping |
| Chocolate Syrup 🍫 | 2 tbsp | For garnish drizzle |
| Additional Oreo Crumbs 🍪 | 2 tbsp | For topping garnish |
The cookies are everything here. Oreo Thins work but give you less crunch—stick with classic Double Stuf for maximum creaminess. I grab mine from Target or any grocery store. The milk needs to be whole milk for that thick, creamy texture (2% won’t cut it). Heavy cream is non-negotiable—skip the half-and-half or you’ll lose that luscious mouthfeel.
No Oreos? Store-brand chocolate sandwich cookies work in a pinch. For a thinner shake, use less ice or add more milk. Want it sweeter? Vanilla syrup instead of extract gives you more sugar. The whipped cream topping is optional but highly recommended—use the canned stuff if you’re lazy (no shame).
This is best served immediately—it thickens as it sits. Leftovers? Not a thing. But if you must, store in the fridge for up to 1 day (stir well before re-serving). The Oreo crumbs on top get soggy fast, so add those fresh.
Why You’ll Love This Recipe
- No Churn Needed: I just toss Oreos, milk, cream, and a splash of vanilla in the blender—no ice cream maker, no waiting.
- Rich Oreo Flavor: The crushed cookies blend into every sip, and the heavy cream makes it luxuriously thick.
- Kid-Approved Treat: My boys beg for this after school, and honestly, it’s way better than the diner version.
- Budget Friendly: A sleeve of Oreos and pantry staples make two big servings for under $5.
Step-by-Step Instructions for Oreo Milkshake Without Ice Cream
Here’s the method. Simple, quick, and delivers that perfect creamy texture without the ice cream.
Step 1: Blend Oreo Cookies into Fine Crumbs
Place all 12 whole Oreo Cookies into your blender. I use a high-powered blender for this, but any standard model works fine. Pulse until the cookies break down into a fine, even crumb texture with no large chunks remaining.
You want the consistency to be almost powder-like. This ensures every sip of your shake has that signature Oreo flavor evenly distributed. Don’t worry if it looks like too much at first—trust the process.
Step 2: Combine Liquids and Sweeteners
Add the 1.5 cups Whole Milk, 0.5 cup Heavy Whipping Cream, 1 tsp Vanilla Extract, 2 tbsp Granulated Sugar, and 0.25 tsp Salt to the blender with the cookie crumbs. The chilled milk and cream are crucial here—they create that thick, frosty texture you expect from a milkshake.
I’ve found that the combination of whole milk and heavy cream gives the perfect balance between richness and drinkability. The sugar enhances the cookie flavor, while the salt keeps it from being cloyingly sweet. Give it a quick pulse just to start combining everything.
Step 3: Add Ice Cubes and Blend to Creamy Perfection
Toss in all 6 pieces Ice Cubes and blend on high for 30-45 seconds. The ice cubes are doing double duty here—they chill the shake further and add the thickness that would normally come from ice cream.
Watch the mixture carefully. You want it to reach a smooth, creamy consistency that’s thick enough to require a straw but still pourable. If it’s too thin, add one or two more ice cubes and blend again. If it’s too thick, a splash of cold milk will loosen it up.
Step 4: Serve with Toppings for Maximum Indulgence
Pour the milkshake into two chilled glasses. The cold glasses help maintain that perfect frosty temperature a little longer. Now comes the fun part: the toppings.
Drizzle 2 tbsp Chocolate Syrup along the inside of each glass before pouring for a pretty swirl effect. Top each serving with 0.5 cup Whipped Cream divided evenly, then sprinkle 2 tbsp Additional Oreo Crumbs over the whipped cream for that essential crunch contrast.
Serve immediately with a long spoon so you can get every last bit of that creamy, cookie-filled goodness from the bottom of the glass.
Pro Tips For Making Oreo Milkshake Recipe Without Ice Cream
- Chill the Milk: Use ice-cold whole milk straight from the fridge—warm milk makes a thin, sad milkshake. I learned this the hard way after my first attempt tasted like Oreo soup.
- Crush Finely: Pulverize those Oreos into near-powder in a food processor or sealed bag with a rolling pin. Big chunks mean a lumpy texture, and nobody wants to chew their milkshake.
- Skip the Overmixing: Blend just until smooth, about 20-30 seconds. Overdoing it warms the mixture and turns your shake into a bubbly, watery mess—yes, even if you’re impatient like me.
- Add Cream Last: Start with milk, Oreos, sugar, and vanilla, then fold in the heavy whipping cream at the end. This keeps the texture thick and creamy instead of thin and greasy.
Essential Equipment for oreo milkshake recipe without ice cream
Blender Selection
A high-powered blender like my Vitamix 5200 is ideal for pulverizing Oreos into fine crumbs and achieving that ultra-smooth texture. The powerful motor handles ice cubes effortlessly without leaving chunks.
Chilled Glasses
Serve your shake in pre-chilled glasses—I keep mine in the freezer for 10 minutes before serving. This keeps the drink colder longer, maintaining that perfect frosty consistency through the last sip. 🥤
Long Spoons
Use 12-inch milkshake spoons—the long, flat design reaches the bottom of tall glasses. I love the stainless steel ones from WebstaurantStore. They’re sturdy enough to scrape up every bit of Oreo goodness.
Measuring Tools
Precision matters for texture. I use OXO Good Grips measuring cups for the milk and cream, and a 1 tbsp scoop for the sugar. The angled design lets me read measurements at eye level.
Whipped Cream Dispenser
For restaurant-quality toppings, a nitrous whipped cream dispenser creates fluffy, stable peaks. I use the iSi Twist’n’Sparkle with 1 pint of heavy cream and 1 tbsp sugar. It’s a game-changer for presentation. ✨
Ice Cube Trays
Use extra-large ice cube trays—the bigger cubes blend more smoothly and chill without watering down the shake. I prefer silicone molds that release cubes easily without cracking.
Nutrition Facts
Frequently Asked Questions
Can I use almond milk instead of whole milk?
Yes, but expect a thinner texture. For best results, use barista-style almond milk and add 1 extra ice cube to compensate for the lack of fat.
Why do I need heavy cream?
Heavy cream adds richness and body to replace the ice cream. Skip it and your shake may taste watery. Half-and-half works in a pinch but won’t be as thick.
What if my shake is too thick?
Add cold milk 1 tbsp at a time and blend until smooth. Avoid warm milk—it’ll melt your ice and thin it too much.
Can I make this ahead of time?
It’s best served immediately, but you can refrigerate for up to 1 hour. Stir well before serving as it will separate slightly.

- Peach Barbecue Sauce Recipe for Ribs: Sweet and Smoky Glaze for Grilled Meat - October 9, 2026
- Oreo Milkshake Recipe Without Ice Cream: Thick And Creamy Dream With Oreo Crunch - October 9, 2026
- Suman Recipe Rice Cooker: Hands-Free Sticky Sweetness - October 9, 2026