
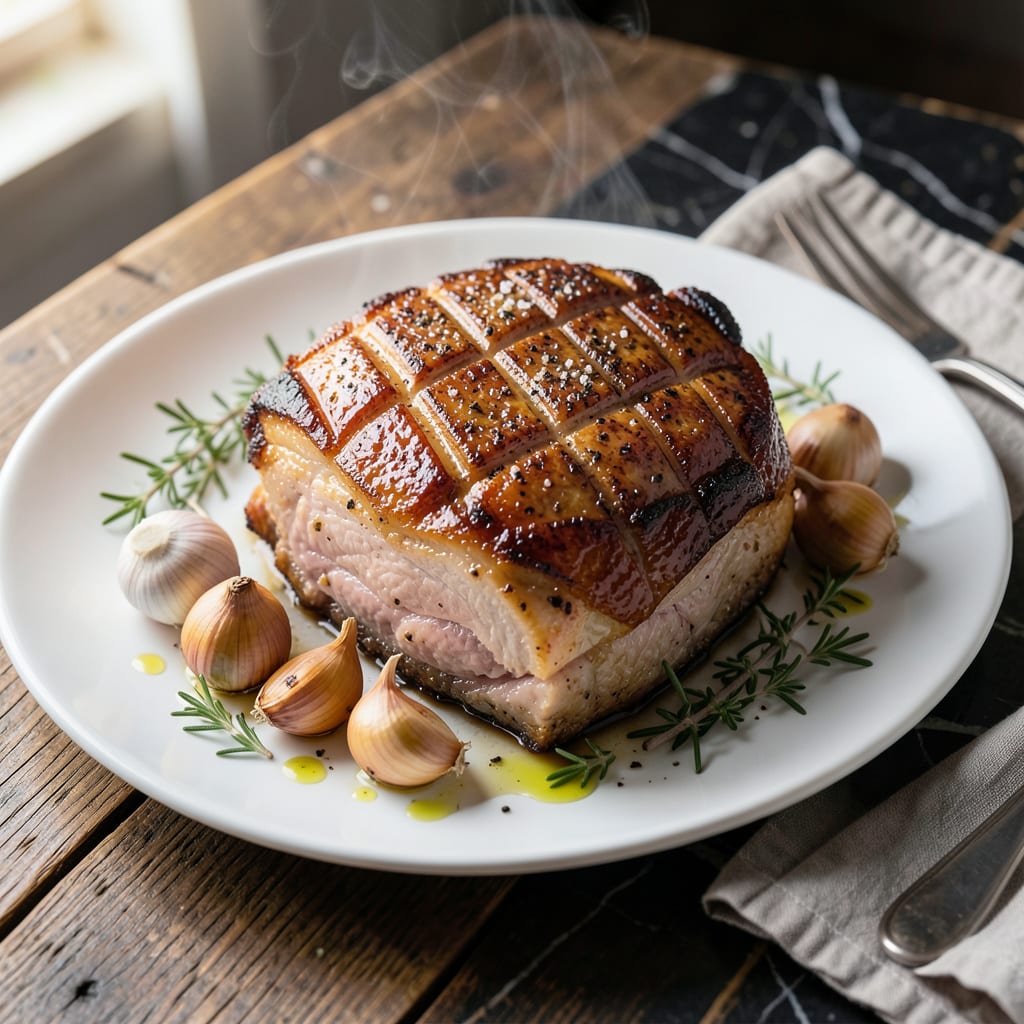
I’ve spent years perfecting this pork belly method, and the secret is in the slow roast followed by a high-heat finish. This delivers crispy crackling on top with layers so tender they practically dissolve.
No fancy equipment needed—just patience and a hot oven. The result is restaurant-quality pork belly with that perfect balance of fat and meat, every single time.
Ingredients for Oven Roasted Pork Belly
A few quality ingredients transform into that perfect balance of fat and meat.
| Ingredient | Amount | Notes |
|---|---|---|
| Pork Belly 🥓 | 2 lb | Skin-on, even thickness |
| Kosher Salt 🧂 | 2 tbsp | Diamond Crystal preferred |
| Black Pepper 🌶️ | 1 tsp | Freshly ground |
| Garlic Cloves 🧄 | 6 cloves | Crushed, not minced |
| Fresh Rosemary 🌿 | 4 slices | Sprigs, stems removed |
| Fresh Thyme 🍃 | 4 slices | Sprigs, stems removed |
| Fennel Seeds 🌿 | 1 tsp | Lightly crushed |
| Apple Cider Vinegar 🍏 | 2 tbsp | For acidity balance |
| Olive Oil 🫒 | 1 tbsp | For rubbing skin |
| Honey 🍯 | 2 tbsp | For glaze finish |
| Dijon Mustard 🟡 | 1 tbsp | For depth in glaze |
| Bay Leaves 🌿 | 2 pieces | For aromatic layering |
The pork belly is the star here—look for skin-on with even fat layers. Most butchers can order it if not in stock, or Costco often has it in the fresh meat section. Ask for a slab about 2 inches thick for even cooking. Don’t trim the skin yourself; that’s where the crackling magic happens (trust me on this). If you see pre-sliced pork belly, walk away—it won’t give you the same texture.
No fresh herbs? Dried at half the amount works, but fresh rosemary and thyme really shine here. Fennel seeds can be swapped for coriander or caraway if that’s what’s in your pantry. Apple cider vinegar adds the tang you need—white wine vinegar is a good backup. For the glaze, maple syrup can replace honey (but the flavor will be slightly different).
Pork belly freezes beautifully for up to 6 months. Thaw it overnight in the fridge before cooking. Leftovers keep 4-5 days and make killer sandwiches. The herbs will lose potency after a week, so use them fresh if possible (or freeze extras in olive oil).
Why You’ll Love This Recipe
- One Pan Magic: I toss the pork belly with salt, pepper, garlic, and rosemary, then let the oven do the work.
- That Crispy Bite: The skin crackles like the best kind of addiction while the meat stays tender and juicy.
- Feeds a Hungry Crowd: I serve this at gatherings and watch it disappear—always the first thing gone.
- Leftovers for Days: Honestly, the sandwiches I make with the leftovers might be even better than the first meal.
Step-by-Step Instructions for Oven Roasted Pork Belly
This method delivers crackling skin and tender meat with minimal effort but maximum flavor.
Step 1: Score and Cure the Pork Belly
Pat the 2 lb Pork Belly dry with paper towels, then use a sharp knife to score the skin in a crosshatch pattern, cutting through the skin but not into the fat. This allows the skin to crisp evenly and helps the 2 tbsp Kosher Salt and 1 tsp Black Pepper penetrate deeply.
Rub the salt and pepper aggressively into every crevice of the scored skin and the flesh side. Place the pork belly skin-side up on a wire rack set over a baking sheet. Refrigerate uncovered for 12-24 hours—this drying step is non-negotiable for achieving that perfect crackle later.
Step 2: Build the Aromatic Base
Preheat your oven to 300°F. In a food processor, combine the 6 cloves Garlic Cloves, 4 slices Fresh Rosemary, 4 slices Fresh Thyme, 1 tsp Fennel Seeds, and 2 pieces Bay Leaves with the 2 tbsp Apple Cider Vinegar until it forms a coarse paste. This aromatic blend infuses the meat with layers of complexity.
Remove the pork belly from the fridge and rub this paste all over the flesh side (not the scored skin). The vinegar helps tenderize while the herbs create a fragrant crust as it roasts. Let the pork sit at room temperature for 30 minutes before roasting to ensure even cooking.
Step 3: Slow Roast for Tender Layers
Place the pork belly skin-side up on the wire rack in the oven. Roast at 300°F for 2 hours. The low temperature renders the fat slowly, creating those melt-in-your-mouth layers without drying out the meat.
Baste the pork with its rendered fat every 30 minutes. You’ll notice the skin start to puff and tighten—that’s exactly what you want. Don’t be tempted to turn up the heat yet; patience here ensures the fat renders completely while keeping the meat juicy.
Step 4: Crisp the Skin and Glaze
Increase the oven temperature to 425°F. Mix the 1 tbsp Olive Oil, 2 tbsp Honey, and 1 tbsp Dijon Mustard in a small bowl. Brush this glaze over the skin side of the pork belly, making sure to get it into all the scored crevices.
Return the pork to the oven and roast for another 20-25 minutes until the skin is deep golden brown and crackles when pressed. Watch closely during this final stage—the honey in the glaze can burn if left too long.
Step 5: Rest and Serve
Transfer the pork belly to a cutting board and let it rest for 15 minutes. This allows the juices to redistribute and the skin to set—cutting too soon will cause the crispy skin to soften from the steam.
Slice against the score marks into 1-inch thick pieces. Each piece should have a perfect ratio of crispy skin to unctuous fat to tender meat. Serve immediately while the skin is still at its peak crispness.
Pro Tips For Making Oven Roasted Pork Belly
- Score the Skin: Use a sharp knife to cut 1/4-inch slits across the fat cap—I learned this the hard way after my first few batches came out rubbery instead of crisp.
- Dry It Overnight: Pat the pork belly dry, then leave it uncovered in the fridge for 12 hours. This pulls out moisture so the skin gets crackling-crisps instead of chewy.
- Start Hot, Finish Low: Blast it at 425°F for 30 minutes first, then drop to 300°F for the rest. Sounds extreme, but it’s the only way to get that perfect crust without drying the meat.
- Smash the Garlic: Crush the garlic cloves lightly before stuffing them under the skin—this releases way more flavor than whole cloves, and you’ll taste the difference.
Essential Equipment for This Dish
Oven and Rack
A reliable oven with even heat distribution is crucial for this dish. I use my convection oven for better air circulation, which helps crisp the skin evenly. A wire rack set over a baking sheet is non-negotiable—it allows air to circulate underneath, preventing soggy bottoms. 🔥
Baking Sheet
Invest in a heavy-duty half-sheet pan (like Nordic Ware). It won’t warp under high heat and catches all that rendered fat. Line it with aluminum foil for easy cleanup—trust me, you’ll thank yourself later when dealing with sticky pork fat.
Knife for Scoring
A sharp chef’s knife (I swear by my 8-inch Wüsthof) is essential for scoring the skin cleanly. Dull knives tear the skin, ruining your crackling. Keep a honing steel nearby to touch up the edge between score marks.
Food Processor
For the herb paste, a mini food processor works perfectly. I use my Cuisinart 3-cup model—just pulse the garlic, herbs, and vinegar until coarsely blended. No food processor? A mortar and pestle works, but requires more elbow grease.
Basting Tools
A pastry brush is ideal for applying the glaze, but a spoon works in a pinch. For basting with rendered fat, I use a heatproof silicone brush that won’t melt. Keep a small bowl nearby to collect the fat for easy basting.
Thermometer
While not strictly necessary, an instant-read thermometer takes the guesswork out of doneness. I check that the internal temp reaches 195°F in the thickest part before the final crisping stage. This ensures the fat is fully rendered. 🌡️
Nutrition Facts
Frequently Asked Questions
Why score the skin before cooking?
Scoring helps render fat and creates more surface area for crisping. 1/4-inch cuts in a crosshatch pattern allow heat to penetrate evenly for perfect crackling.
Can I skip the overnight drying step?
No, this is crucial for crispy skin. The 12-24 hour uncovered fridge drying removes moisture from the skin surface, which is essential for that signature crackle.
What if my skin isn’t crispy enough?
Return it to 425°F for 5-10 minutes more. For extra crunch, broil for 2-3 minutes watching closely. The glaze’s honey can burn quickly.
How do I store leftovers?
Keep in an airtight container for up to 5 days. Reheat in the oven at 350°F for 10-15 minutes to revive crispiness.

- Beefaroni Recipe With Tomato Soup: One-Pot Nostalgic Comfort - September 28, 2026
- Bread Recipe KitchenAid Mixer: Foolproof Loaf With Perfect Rise - September 28, 2026
- BBQ Oysters Recipe Grill: Smoky Garlic Butter Bliss - September 28, 2026