
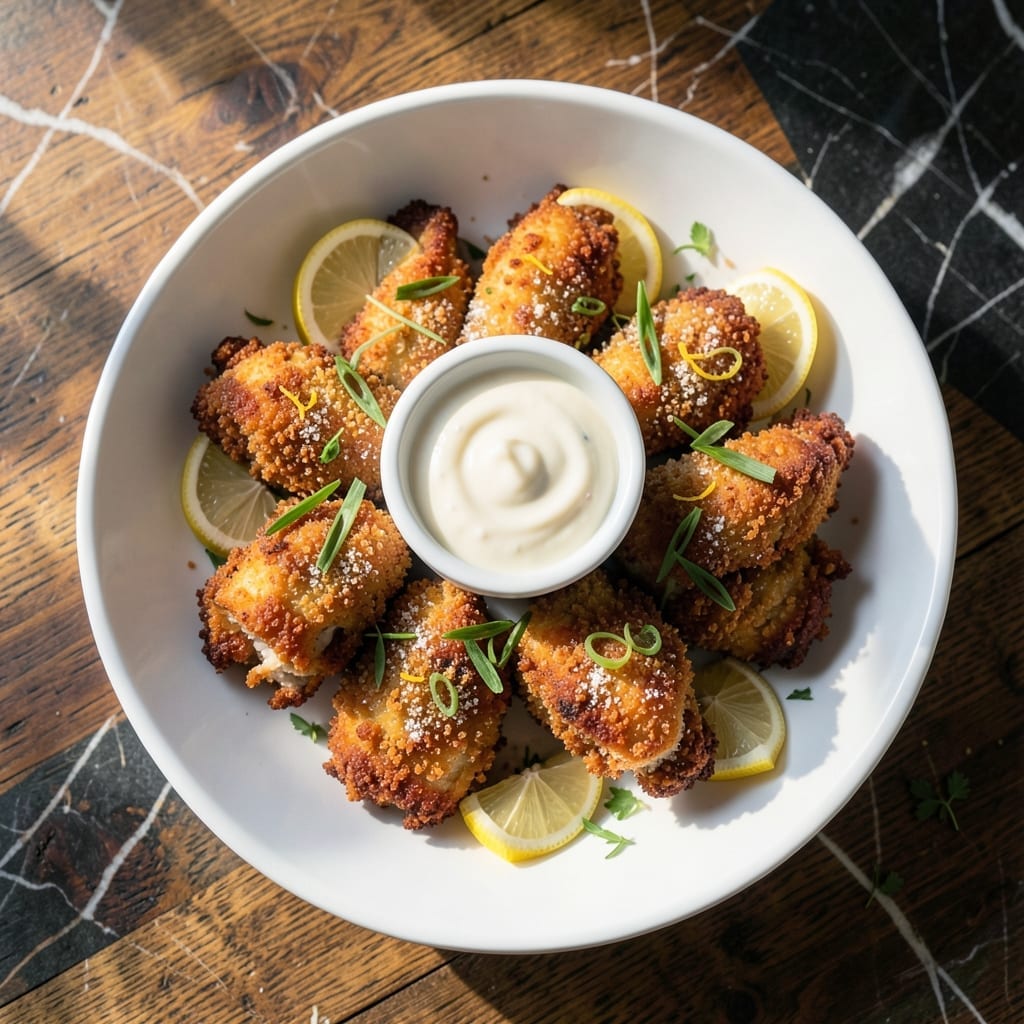
There’s an art to achieving golden, crispy chicken tenders that stay juicy inside every single time. This method delivers restaurant-quality results with a simple, proven technique.
The secret lies in the double-dredge process and maintaining the right oil temperature. I’ve perfected this approach through years of testing to ensure the coating stays put and the meat remains tender.
You’ll end up with chicken that’s perfectly cooked through, with a shatteringly crisp exterior giving way to moist, flavorful meat. The contrast in textures makes each bite irresistible.
Serve these tenders hot with your favorite dipping sauces for a meal that satisfies every craving. The technique works for both quick weeknight dinners and special occasions.
Ingredients for Pan Fried Chicken Tenders
Golden, crispy perfection starts with these carefully selected ingredients for restaurant-quality results at home.
| Ingredient | Amount | Notes |
|---|---|---|
| Chicken Tenderloins 🍗 | 1 ½ lb | Boneless, skinless, pounded evenly |
| All-Purpose Flour 🌾 | 1 ½ cups | Divided for double-dredging |
| Large Eggs 🥚 | 2 whole | Beaten for egg wash |
| Buttermilk 🥛 | 1 cup | Full-fat for tang and moisture |
| Panko Breadcrumbs 🍞 | 2 cups | Japanese-style for extra crispiness |
| Cornstarch 🌽 | ¼ cup | For extra crunch in coating |
| Paprika 🌶️ | 1 tbsp | Sweet or smoked variety |
| Garlic Powder 🧄 | 1 tsp | Freshly ground if possible |
| Onion Powder 🧅 | 1 tsp | Fine grind for even distribution |
| Salt 🧂 | 1 tsp | Diamond Crystal kosher salt |
| Black Pepper 🌶️ | ½ tsp | Freshly ground preferred |
| Vegetable Oil 🫒 | 4 cups | High smoke point for frying |
| Cayenne Pepper 🔥 | ¼ tsp | Optional for subtle heat |
The chicken tenderloins are the foundation—source from a trusted butcher or look for air-chilled options at Whole Foods for superior texture. Pounding them to an even thickness ensures uniform cooking. For the Panko, Kikkoman or Progresso brands deliver consistent crispness. Buttermilk should be full-fat; Organic Valley is a reliable choice. The cornstarch is non-negotiable for that shatteringly crisp exterior.
No buttermilk? Whole milk plus 1 tbsp lemon juice works in a pinch. Swap Panko for regular breadcrumbs if needed, though the texture won’t be as crisp. For a gluten-free version, crushed cornflakes or gluten-free panko at one-to-one ratio substitutes well. The spices can be adjusted—add smoked paprika for depth or omit cayenne if serving kids. Always use fresh oil for frying to avoid off-flavors.
Store chicken in the coldest part of the fridge and use within 2 days for optimal freshness. The breading mixture can be prepped a day ahead. Leftovers keep in the fridge for 3-4 days but are best eaten fresh. Reheat in an oven at 375°F to revive crispness—microwaving will make them soggy.
Why You’ll Love This Recipe
- 20-Minute Meal: So easy. I mean, genuinely coat, fry, and serve while the kids set the table easy.
- Crispy Outside, Juicy Inside: That buttermilk dip and panko crunch? Honestly, it’s the only way I’ll eat chicken tenders now.
- Kid-Approved Dinner: Between us, even my pickiest eater cleans her plate with these.
- Budget Stretcher: One pound of tenders feeds my family of four with leftovers for lunch.
Step-by-Step Instructions for Pan Fried Chicken Tenders
Here’s the method I use to achieve that perfect golden crust with juicy meat every time.
Step 1: Prepare and Season the Chicken Tenderloins
Pat the 1.5 lb Chicken Tenderloins completely dry with paper towels. This is crucial for the coating to adhere properly. Season both sides lightly with 1 tsp Salt and 0.5 tsp Black Pepper, ensuring even coverage without over-seasoning at this stage.
I’ve found that pounding the tenderloins to an even thickness ensures uniform cooking. Use a meat mallet to gently pound them to about ½-inch thickness. This prevents the thinner ends from overcooking while the thicker parts finish.
Step 2: Create the Perfect Dredging and Breading Station
Set up three shallow bowls. In the first, combine 1.5 cups All-Purpose Flour, 0.25 cup Cornstarch, 1 tbsp Paprika, 1 tsp Garlic Powder, 1 tsp Onion Powder, and 0.25 tsp Cayenne Pepper. Whisk until fully incorporated—the cornstarch adds extra crunch to the final product.
In the second bowl, whisk together 2 whole Large Eggs and 1 cup Buttermilk until smooth. The buttermilk’s acidity helps tenderize the chicken while adding moisture. Place the 2 cups Panko Breadcrumbs in the third bowl, keeping them separate until ready to use.
Step 3: Bread the Chicken with Precision
Dredge each tenderloin in the flour mixture, pressing gently to ensure full coverage. Shake off any excess—you want a thin, even layer. Next, dip it into the egg wash, allowing any excess to drip off for 3-5 seconds. This prevents a gummy coating.
Finally, press the chicken into the panko breadcrumbs, turning to coat all sides completely. I use my fingers to press the crumbs into the meat firmly. Place the breaded tenders on a wire rack set over a baking sheet and let them rest for 10 minutes—this helps the coating set before frying.
Step 4: Pan Fry to Golden Perfection
Heat 4 cups Vegetable Oil in a large, heavy-bottomed skillet over medium-high heat until it reaches 350°F. Use a deep-fry thermometer for accuracy. The oil should shimmer but not smoke. Working in batches to avoid crowding, carefully place the breaded tenders in the hot oil.
Fry for 3-4 minutes per side until golden brown and the internal temperature reaches 165°F. Avoid flipping too early—the coating should release easily when ready. Transfer the cooked tenders to a paper towel-lined plate to drain excess oil while you finish the remaining batches.
Here’s the thing—maintaining the oil temperature is key. If it drops too low between batches, the tenders will absorb oil and become greasy. Let the oil return to 350°F between each addition.
Pro Tips For Making Pan Fried Chicken Tenders
- Heat the Oil First: I learned this the hard way—adding chicken to cool oil gives you soggy, greasy tenders. Get it shimmering hot before the first piece goes in.
- Dry the Chicken: Pat those tenderloins bone-dry with paper towels before dredging. Sounds tedious, but it’s the only way to get that crust to actually stick.
- Double-Dredge for Crisp: Dip in flour, then buttermilk, then back in flour before the egg and panko. My grandmother swore by this, and she never served a limp tender.
- Rest Before Frying: Give the breaded tenders 5-10 minutes on a wire rack before frying. I skip this when I’m lazy, but the coating holds together way better when I don’t.
Wine and Beer Pairings for These Flavors
Crisp White Wines
A chilled Sauvignon Blanc from New Zealand cuts through the richness with its bright acidity and citrus notes. I love Kim Crawford or Oyster Bay for their consistent quality. These wines won’t overpower the chicken’s flavor. 🍷
Light Bodied Reds
For red wine lovers, a light Pinot Noir from Oregon works beautifully. Try Belle Pente or A to Z Wineworks. The red fruit flavors complement without overwhelming. Serve slightly chilled for best results.
Classic Lager Beers
A crisp American lager like Budweiser or Coors Banquet provides the perfect refreshing contrast to the crispy coating. The carbonation cleanses your palate between bites. I always keep a few cold for this exact purpose. 🍺
Wheat Beers
Hefeweizen beers with their banana and clove notes pair surprisingly well. Weihenstephaner or Paulaner are my go-to choices. The slight sweetness balances the savory seasoning of the tenders.
Non-Alcoholic Options
For a non-alcoholic pairing, try sparkling lemonade or iced tea with mint. The effervescence and acidity work just like wine to cut through the richness. I make mine with fresh lemons and raw honey. ✨
Nutrition Facts
Frequently Asked Questions
What oil temperature should I use?
Maintain 350°F for perfect frying. Use a thermometer to check—oil that’s too cool makes greasy tenders, while too hot can burn the coating before the chicken cooks through.
How do I keep the coating from falling off?
Pat the chicken completely dry first, then let breaded tenders rest for 10 minutes before frying. This helps the coating adhere properly. Avoid overcrowding the pan too.
Can I bake these instead of pan-frying?
Yes! Bake at 400°F for 15-20 minutes, flipping halfway. Spray with oil for extra crispiness. The texture won’t be identical, but you’ll still get great flavor.
Why did my tenders turn out dry?
Overcooking is the most common culprit. Use a meat thermometer and pull them when they reach 165°F internally. Pounding to even thickness also prevents dry spots.

- BBQ Sausage Recipe Oven: Smoky Depth Without the Grill - September 28, 2026
- BBQ Chicken Bowl Recipe Rice: Smoky Sweetness Over Fluffy Grains - September 28, 2026
- Beef Cutlet Recipe Ideas: Crispy Breaded Patties With Bold Seasonings - September 28, 2026