
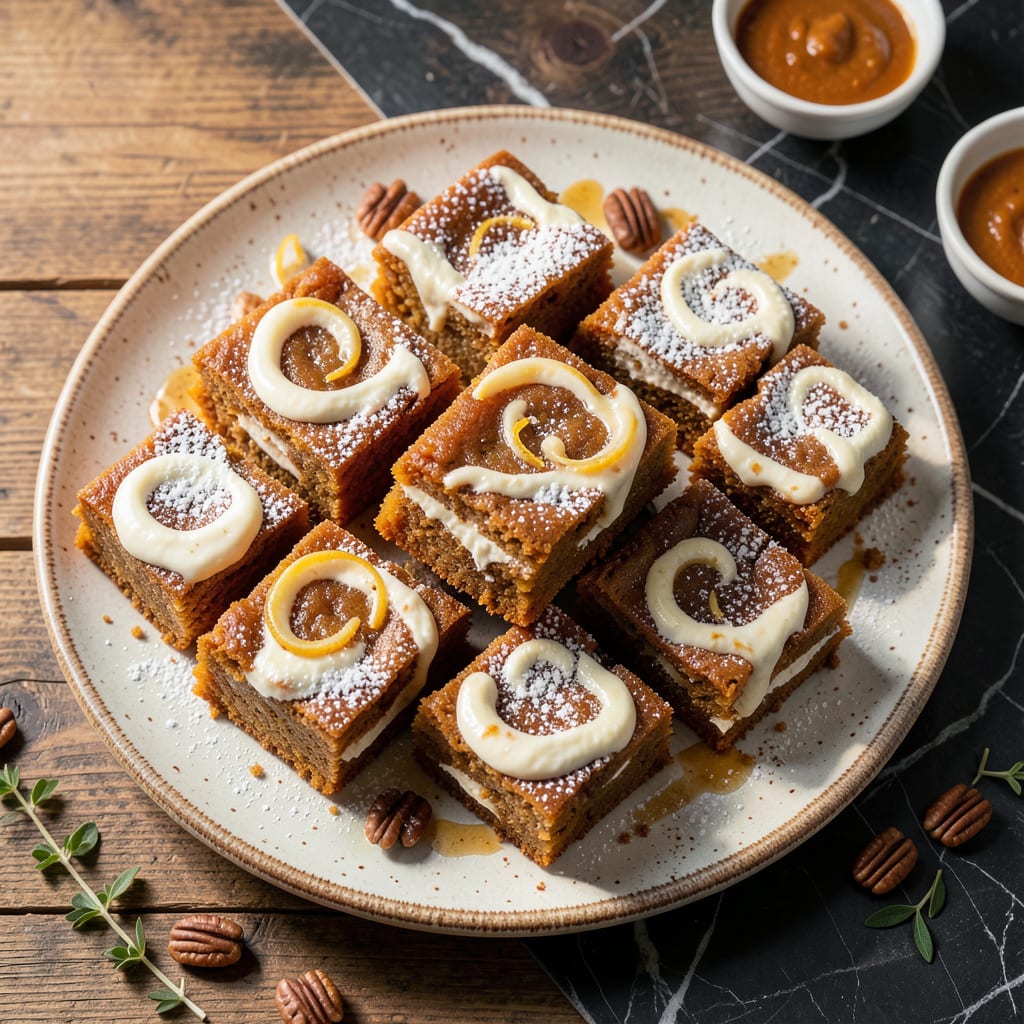
These pumpkin bars combine warm spices with a smooth cream cheese layer for a dessert that’s both comforting and impressive.
Baking them creates a moist, cake-like base with a slightly tangy swirl that balances the sweetness. The result is a treat perfect for fall gatherings or anytime you crave a taste of the season.
Ingredients for Paul’s Pumpkin Bars
Pantry staples plus a few fresh additions for these layered bars.
| Ingredient | Amount | Notes |
|---|---|---|
| Canned Pumpkin Puree 🎃 | 1 can | 15 oz, not pumpkin pie filling |
| All-Purpose Flour 🌾 | 1 ½ cups | Spoon and level for accuracy |
| Granulated Sugar 🍚 | 1 cup | For sweetness in base |
| Brown Sugar 🟤 | ½ cup | Packed, for depth of flavor |
| Large Eggs 🥚 | 2 whole | Room temperature preferred |
| Vegetable Oil 🫒 | ½ cup | Neutral flavor, like canola |
| Ground Cinnamon 🌿 | 1 tsp | Warm spice for base |
| Ground Nutmeg 🌿 | ½ tsp | Freshly ground if possible |
| Ground Ginger 🌿 | ½ tsp | Adds warmth to batter |
| Baking Powder 🧂 | 1 tsp | For rise in cake base |
| Baking Soda 🧂 | ½ tsp | Helps with leavening |
| Salt 🧂 | ½ tsp | Balances sweetness |
| Cream Cheese 🧀 | 8 oz | Full-fat for creaminess |
| Powdered Sugar 🍚 | ½ cup | For cream cheese layer |
| Vanilla Extract 🌿 | 1 tsp | Pure extract for best flavor |
The pumpkin puree is key here—Libby’s is my go-to at any grocery store, but any 100% pure pumpkin (not pie filling) works. The cream cheese should be full-fat Philadelphia for that perfect tangy swirl. I grab mine from Kroger or Walmart—no need for specialty stores. Make sure your baking powder and soda are fresh (check the expiration date) or your base won’t rise right.
No pumpkin puree? Roast and blend fresh sugar pumpkin if you’re feeling ambitious, but canned is honestly easier. Swap the spices for pumpkin pie spice at a 1:1 ratio. Brown sugar out? All granulated sugar works fine, just less depth. The oil can be melted butter (same amount) if you prefer that flavor. Cream cheese layer too thick? Thin it with a splash of milk.
Bars keep 4-5 days in the fridge, covered. Freeze individual squares for up to 3 months (thaw at room temp). The cream cheese layer softens as it sits, so serve chilled for clean slices.
Why You’ll Love This Recipe
- One Bowl Wonder: I dump everything in a single bowl—pumpkin, sugars, eggs, flour—and mix. No fancy tools, no fuss.
- Sweet Spice Magic: That combo of brown and white sugar with pumpkin? Warm, caramel-like depth with every bite.
- Potluck MVP: I’ve brought these to book clubs, office parties, and even my kid’s bake sale. Always the first to disappear.
- Stays Fresh: Honestly, they taste even better the next day. I’ll make a double batch just to have leftovers for the week.
Step-by-Step Instructions for Pumpkin Bars With Cream Cheese Swirl
Here’s the method I use for layers of spiced cake and creamy swirls.
Step 1: Prepare the Pumpkin Cake Batter
Preheat your oven to 350°F. In a large bowl, whisk together the 1 can Canned Pumpkin Puree, 1 cup Granulated Sugar, and 0.5 cup Brown Sugar until smooth. I like to press the brown sugar into the pumpkin to eliminate lumps.
Add the 0.5 cup Vegetable Oil and 2 whole Large Eggs, whisking until fully incorporated. The mixture should look glossy and thick. Stir in the 1 tsp Ground Cinnamon, 0.5 tsp Ground Nutmeg, and 0.5 tsp Ground Ginger—this is where that warm spice flavor develops.
In a separate bowl, combine the 1.5 cups All-Purpose Flour, 1 tsp Baking Powder, 0.5 tsp Baking Soda, and 0.5 tsp Salt. Gradually fold the dry ingredients into the wet mixture until just combined. Don’t overmix—the batter should be thick but pourable.
Step 2: Make the Cream Cheese Layer
In another bowl, beat the 8 oz Cream Cheese until smooth. Add the 0.5 cup Powdered Sugar and 1 tsp Vanilla Extract, mixing until creamy and free of lumps. The cream cheese should be at room temperature for easiest blending.
This layer adds a tangy contrast to the sweet pumpkin base. I always use full-fat cream cheese for the richest texture. If your mixture seems too thick, a splash of milk can help, but I’ve found it’s usually perfect as is with these amounts.
Step 3: Assemble and Swirl the Layers
Spread the pumpkin batter evenly into a greased 9×13-inch baking pan. I use a silicone spatula to get it into the corners. The batter will be thick, so don’t worry if it looks a bit rustic.
Drop spoonfuls of the cream cheese mixture evenly across the pumpkin layer. Then, using a butter knife, gently swirl the two together to create a marbled effect. Don’t overmix—you want distinct ribbons of cream cheese throughout.
Step 4: Bake to Perfection
Bake for 25-30 minutes until the edges pull away slightly from the pan and a toothpick inserted in the center comes out clean. The top should be light golden brown with the cream cheese swirls looking set but still slightly jiggly.
I start checking at 25 minutes—ovens vary, and you don’t want to overbake. The bars will continue to set as they cool. Let them cool completely in the pan on a wire rack before slicing into squares.
Pro Tips For Making Paul’S Pumpkin Bars
- Room Temp Eggs: Pull your eggs out 30 minutes before mixing—I learned this the hard way after my first batch turned out denser than a hockey puck.
- Drain the Pumpkin: Give that canned pumpkin a quick strain in a fine-mesh sieve for 5 minutes to remove excess liquid, or your bars will bake up gummy instead of cakey.
- Don’t Overmix: Stir the batter just until the flour disappears; after overworking my first batch, I realized the tough, chewy texture wasn’t worth the extra 30 seconds of mixing.
- Brown the Butter: Swap the regular butter for browned butter in the frosting—sounds like an extra step, but it adds a nutty depth that plain butter just can’t match.
Storing and Reheating This Dish
Room Temperature Cooling
Let the bars cool completely in the pan on a wire rack for at least 2 hours. This prevents the cream cheese layer from smearing when you slice. I often bake them in the morning and let them cool while I run errands. 💡
Fridge Storage
Once cooled, cover the pan tightly with plastic wrap or transfer squares to an airtight container. They’ll keep in the fridge for 4-5 days. The cream cheese layer softens as it sits, so serve chilled for clean slices.
Freezing for Later
For longer storage, cut into individual squares and wrap each tightly in plastic wrap, then place in a freezer bag. They freeze well for up to 3 months. Thaw at room temperature for 30-60 minutes before serving. ❄️
Reheating Options
Microwave individual squares on 50% power for 15-20 seconds to take the chill off. For a fresh-baked taste, warm in a 300°F oven for 5-10 minutes covered with foil.
Serving Temperature
These taste best slightly cool or at room temperature. If reheated, let them sit for 5 minutes after warming to allow the cream cheese layer to set slightly. The flavors meld beautifully overnight, making leftovers a treat.
Nutrition Facts
Frequently Asked Questions
Can I use fresh pumpkin instead of canned?
Yes, but roast and blend 1.5 cups fresh sugar pumpkin puree as a substitute. Strain excess liquid first to maintain proper texture. Canned is more consistent for baking.
Why did my cream cheese layer sink to the bottom?
This happens if the cream cheese mixture is too thin. Make sure it’s thick before dropping spoonfuls. Also, don’t over-swirl the layers during assembly.
How do I get clean slices?
Chill completely for 2 hours before slicing. Use a sharp knife dipped in hot water and wiped clean between cuts for perfect squares.
Can I make these gluten-free?
Substitute 1:1 gluten-free flour blend for the all-purpose flour. Add 1/2 tsp xanthan gum if your blend doesn’t include it. Let batter rest 10 minutes before baking.

- BBQ Sausage Recipe Oven: Smoky Depth Without the Grill - September 28, 2026
- BBQ Chicken Bowl Recipe Rice: Smoky Sweetness Over Fluffy Grains - September 28, 2026
- Beef Cutlet Recipe Ideas: Crispy Breaded Patties With Bold Seasonings - September 28, 2026