
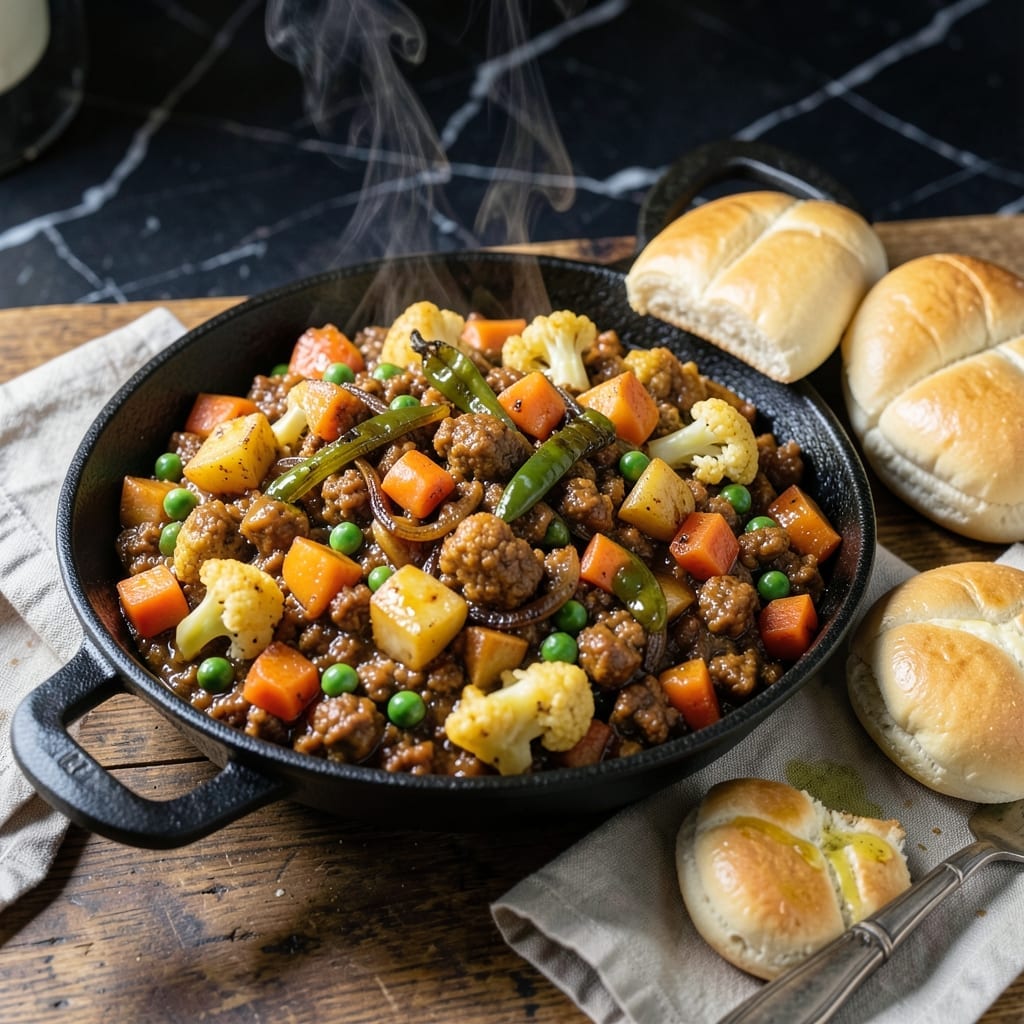
I still remember my first bite of pav bhaji on a busy Mumbai street—warm buttered bread dipped into that spiced vegetable gravy. It was love at first taste.
This recipe brings that same magic to your kitchen. The secret is in the slow-cooked vegetable mash with just the right blend of spices. I’ve simplified the process without losing any authenticity.
You’ll end up with a rich, flavorful bhaji and soft, buttery pav that’s perfect for soaking up every last bit. The aroma alone will transport you to those bustling Indian streets.
Ready to recreate this street food classic at home? Here’s how to do it right.
Ingredients for Pav Bhaji Recipe Home Cooking
Every spice and veggie you need to recreate that Mumbai street food magic at home.
| Ingredient | Amount | Notes |
|---|---|---|
| Potatoes 🥔 | 2 lb | Russet or Yukon Gold, peeled and diced |
| Cauliflower 🥦 | 1 whole | Cut into small florets |
| Green Peas 🌱 | 1 cup | Fresh or frozen, thawed |
| Carrots 🥕 | 2 whole | Peeled and chopped |
| Green Bell Pepper 🌶️ | 1 whole | Diced finely |
| Onion 🧅 | 1 whole | Finely chopped |
| Tomatoes 🍅 | 3 whole | Chopped for gravy |
| Garlic Cloves 🧄 | 6 cloves | Minced for flavor base |
| Fresh Ginger 🌿 | 1 tbsp | Grated or minced |
| Pav Bhaji Masala 🌶️ | 2 tbsp | Indian spice blend, essential |
| Ground Cumin 🌿 | 1 tsp | Toasted for aroma |
| Ground Coriander 🌿 | 1 tsp | Freshly ground preferred |
| Red Chili Powder 🌶️ | 1 tsp | Adjust to spice preference |
| Turmeric Powder 🌿 | ½ tsp | For color and earthiness |
| Butter 🧈 | ½ cup | For cooking and topping |
| Pav Buns 🍞 | 8 pieces | Soft dinner rolls, lightly toasted |
| Fresh Cilantro 🌿 | ¼ cup | Chopped for garnish |
| Lemon 🍋 | 1 whole | Wedges for serving |
| Salt 🧂 | 1 ½ tsp | Adjust to taste |
The pav bhaji masala is non-negotiable here—look for MDH or Everest brands at any Indian grocery store (or Patel Brothers if you’re in the US). Potatoes are the base, so use starchy ones like Russet. Fresh cauliflower has better texture than frozen, but frozen works in a pinch. I always grab my veggies from Trader Joe’s or the local farmers market for the best quality.
No pav bhaji masala? Garlic powder, coriander, and cumin can mimic some of the flavor, but it won’t be the same. Out of fresh ginger? Ground ginger at half the amount works. Green bell pepper can be swapped for red or yellow. For extra richness, add a spoon of heavy cream at the end (keep it vegetarian).
The bhaji thickens as it sits, so add a splash of water when reheating. Leftovers keep 3-4 days in the fridge, but the pav is best fresh. Toast the buns just before serving (don’t skip this part).
Why You’ll Love This Recipe
- One Pot Magic: I just dump all the veggies—potatoes, cauliflower, peas—in one pan and let them cook down into that thick, buttery mash.
- Buttery Heaven: The toasted pav soaking up that rich, spiced tomato gravy with the sweetness of carrots and bell peppers? Ridiculously good.
- Crowd Pleaser: I serve this at game nights, and honestly, even the pickiest eaters go back for seconds.
- Budget Hero: A big batch costs pennies per serving, and leftovers taste even better the next day.
Step-by-Step Instructions for Pav Bhaji
This is how I recreate Mumbai’s iconic street food with bold flavors right in my own kitchen.
Step 1: Prepare the Vegetable Base
Boil the 2 lb Potatoes, 1 whole Cauliflower florets, 1 cup Green Peas, and 2 whole Carrots in salted water until fork-tender, about 8-10 minutes. You want them soft enough to mash but not falling apart. Drain and set aside.
Meanwhile, finely chop the 1 whole Onion, 1 whole Green Bell Pepper, and 3 whole Tomatoes. I like to keep the tomato pieces slightly larger as they’ll cook down into the gravy. Having all your vegetables prepped before cooking makes the process smooth and stress-free.
Step 2: Build the Flavor Foundation
In a large pot, melt 2 tablespoons of the 0.5 cup Butter over medium heat. Add the chopped onion and cook for 3-4 minutes until translucent and lightly golden. This is where the magic starts—don’t rush this step.
Add the minced 6 cloves Garlic Cloves and 1 tbsp Fresh Ginger, cooking for 30 seconds until fragrant. Then stir in the 1 whole Green Bell Pepper and cook for another 2 minutes. The aroma at this point should be incredible—this is the base of your pav bhaji.
Step 3: Spice and Simmer the Bhaji
Add the chopped 3 whole Tomatoes and cook until they soften, about 4-5 minutes. Now stir in the 2 tbsp Pav Bhaji Masala, 1 tsp Ground Cumin, 1 tsp Ground Coriander, 1 tsp Red Chili Powder, 0.5 tsp Turmeric Powder, and 1.5 tsp Salt. Cook the spices for 1-2 minutes to toast them slightly.
Add the boiled vegetables and mash everything together with a potato masher or the back of a spoon. Pour in ½ cup water and simmer for 5-7 minutes until the mixture thickens slightly. The bhaji should be creamy but not dry.
Step 4: Finish with Butter and Serve
Stir in the remaining 0.5 cup Butter (minus the 2 tablespoons already used) and adjust the seasoning with more salt if needed. The butter gives it that rich, authentic Mumbai taste. Garnish with 0.25 cup Fresh Cilantro.
Lightly toast the 8 pieces Pav Buns in a dry pan with a little butter until golden brown. Serve the hot bhaji with the toasted pav, lemon wedges from the 1 whole Lemon, and extra chopped cilantro on the side. The contrast of the soft, buttery pav with the spicy, tangy bhaji is what makes this dish unforgettable.
Pro Tips For Making Pav Bhaji Recipe Home Cooking
- Boil Potatoes Separately: I learned this the hard way—boil and mash the potatoes before adding them to the bhaji. It saves 15 minutes of stirring and prevents a gluey, uneven texture. —
- Fine Chop the Veggies: Sounds tedious, but finely dicing the cauliflower, carrots, and bell pepper means they cook faster and blend into the masala better. No one wants chunky bhaji. —
- Skip the Water: Resist the urge to thin the bhaji with water—use a splash of milk or cream instead for richness. Water just dilutes the flavor and makes it taste bland. —
- Toast the Pav: Lightly butter and toast the pav on a hot griddle until golden. It adds a crucial crispness that contrasts perfectly with the soft bhaji.
Common Mistakes When Making Great pav bhaji recipe home cooking
Overcooking Vegetables
Boiling your veggies too long turns them mushy, making the bhaji watery and flavorless. Aim for fork-tender—8-10 minutes max. Drain them immediately to stop the cooking process. I learned this the hard way with my first few attempts. 🌡️
Skipping the Spice Toast
Adding spices directly to the wet mixture without toasting dulls their flavor. Always cook the pav bhaji masala, cumin, and coriander in hot oil or butter for 1-2 minutes first to wake up their aromas. This step makes all the difference.
Under-Buttering the Bhaji
Authentic pav bhaji is rich and buttery—don’t be shy! Use the full ½ cup butter for that signature Mumbai taste. I add 2 tablespoons at the start for cooking and the rest at the end for that glossy finish. Trust me on this one.
Not Mashing Enough
Lumpy bhaji ruins the texture. Mash the boiled vegetables thoroughly with a potato masher until smooth but still slightly chunky. The consistency should be like thick porridge—neither watery nor dry. It’s worth the extra effort.
Dry Toasting Pav
Toast your pav buns with a little butter in the pan for 1-2 minutes per side until golden. Dry toasting makes them hard instead of soft and buttery. The buttered version soaks up the bhaji beautifully. 🧈
Ignoring Salt Balance
Taste as you go—especially after adding tomatoes and mashing the vegetables. The 1.5 tsp salt is a starting point, but you may need more. The potatoes and cauliflower absorb salt differently, so adjust carefully before serving.
Nutrition Facts
Frequently Asked Questions
Can I use frozen mixed vegetables?
Yes, frozen mixed veggies work fine as a shortcut. Thaw and drain them well before boiling to prevent excess water. The texture may be slightly softer, but the flavor remains delicious.
How do I make it spicier?
Add extra red chili powder or a pinch of cayenne when toasting the spices. For heat lovers, a finely chopped green chili or dash of hot sauce at the end works wonders.
What if I don’t have pav bhaji masala?
Mix 1 tsp garam masala, ½ tsp cumin, ½ tsp coriander, and ¼ tsp turmeric as a substitute. It won’t be identical but will still taste great.
Can I prepare it ahead of time?
The bhaji reheats well—store it in the fridge for up to 3 days. Toast the pav fresh just before serving to keep them soft. Warm the bhaji with a splash of water to loosen it.

- Pav Bhaji Recipe Food Lab: Mumbai Street Food Magic at Home - October 6, 2026
- Peach Jelly Recipe Without Pectin: Naturally Set Sweet Spread - October 6, 2026
- Pasta Salad Recipe With Zesty Italian Dressing: Bright Herb-Kissed Medley for Picnics - October 6, 2026