
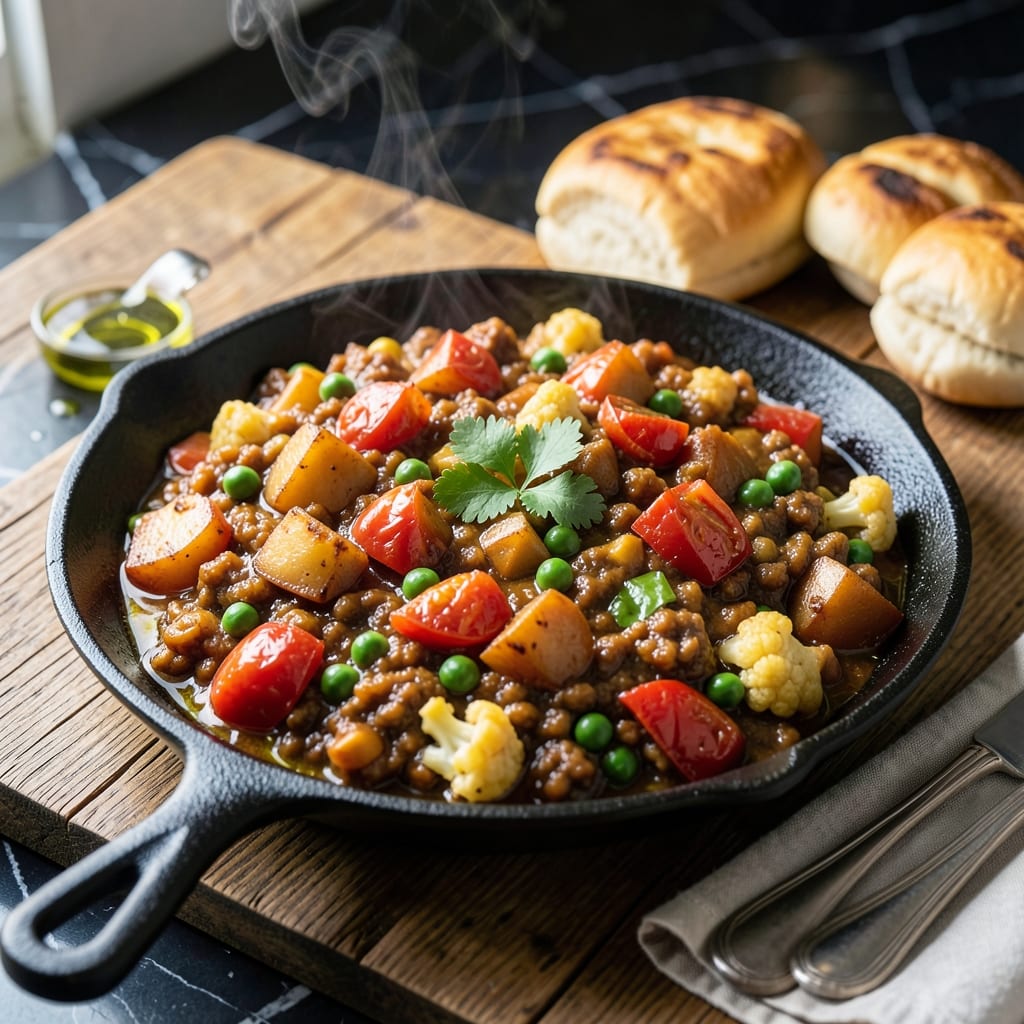
Mumbai’s beloved street food comes to your kitchen in 30 minutes with this Instant Pot adaptation. The pressure cooker transforms potatoes and cauliflower into a rich, spiced vegetable mash while perfectly steaming the bread rolls.
Traditional techniques meet modern convenience as we layer aromatic spices with butter, tomatoes, and vegetables. The Instant Pot maintains authentic flavors without the hours of stovetop cooking, delivering the same restaurant-quality results.
What emerges is a vibrant, buttery vegetable curry served with soft, toasted bread rolls. The dish captures the essence of Mumbai’s bustling streets in every bite, with perfectly balanced spices and textures.
This method preserves the soul of pav bhaji while adapting to today’s fast-paced kitchens. The result is a satisfying meal that brings the taste of India to your table with minimal effort.
Ingredients for Pav Bhaji Recipe Instant Pot
Authentic Mumbai street food requires bold spices, fresh vegetables, and buttery bread for balance.
| Ingredient | Amount | Notes |
|---|---|---|
| Cauliflower Florets 🥬 | 4 cups | Fresh or frozen, chopped small |
| Russet Potatoes 🥔 | 1 ½ lb | Peeled and diced evenly |
| Yellow Onion 🧅 | 1 whole | Finely diced for base |
| Tomatoes 🍅 | 3 whole | Ripe, diced with seeds |
| Green Peas 🌱 | 1 cup | Fresh or frozen, no thawing |
| Garlic Cloves 🧄 | 6 cloves | Minced finely for depth |
| Fresh Ginger 🌿 | 1 tbsp | Grated for aromatic base |
| Green Chilies 🌶️ | 2 whole | Serrano or Thai, minced |
| Pav Bhaji Masala 🌶️ | 2 tbsp | Store-bought or homemade blend |
| Ground Turmeric 🌿 | ½ tsp | For color and earthiness |
| Ground Cumin 🌿 | 1 tsp | Toasted for nuttiness |
| Ground Coriander 🌿 | 1 tsp | Balances the spice blend |
| Unsalted Butter 🧈 | ½ cup | Divided for bhaji and pav |
| Lemon Juice 🍋 | 2 tbsp | Freshly squeezed for brightness |
| Dinner Rolls 🍞 | 8 pieces | Pav or soft potato buns |
| Fresh Cilantro 🌿 | ¼ cup | Chopped for garnish |
The potatoes and cauliflower form the base—Russet potatoes break down perfectly, while fresh cauliflower adds texture. Pav Bhaji Masala is non-negotiable; find it at Indian grocery stores or online. I source mine from Patel Brothers, but any well-stocked international aisle works. Ginger and garlic should be fresh—pre-minced lacks the punch needed for authentic flavor.
No pav bhaji masala? Combine garam masala, red chili powder, and amchur for a close substitute. Frozen cauliflower works in a pinch (thaw and drain first). Out of fresh ginger? Ground ginger at half the amount suffices. The tomatoes can be canned if fresh are underripe—just drain excess liquid. Low-sodium butter keeps the dish from becoming too salty.
The bhaji thickens as it cools. Store leftovers in an airtight container for up to 3 days in the fridge. Reheat with a splash of water to restore consistency. The pav toasts best fresh—keep rolls at room temperature and warm just before serving. Garnishes like cilantro and lemon are best added fresh each time.
Why You’ll Love This Recipe
- Set It & Forget: I toss in the cauliflower, potatoes, and peas, press a button, and walk away—no babysitting the stove required.
- Spice-Kissed Comfort: The tomatoes and onions caramelize together in the Instant Pot, creating that deep, tangy-sweet base that makes every bite addictive.
- Crowd-Pleasing Feast: Honestly, it’s my go-to for game nights or lazy Sundays—everyone ends up going back for seconds with those buttery pav rolls.
- Budget-Friendly Batch: One pot, a handful of pantry staples, and it stretches to feed four with leftovers that taste even better the next day.
Step-by-Step Instructions for Pav Bhaji
Transform these humble ingredients into Mumbai street food magic in under an hour.
Step 1: Sauté the Aromatic Base
Set your Instant Pot to Sauté mode and melt ¼ cup unsalted butter. Add the finely diced yellow onion and cook for 5-6 minutes until translucent and lightly golden. This builds the flavor foundation.
Stir in the 6 cloves minced garlic, 1 tbsp grated fresh ginger, and 2 minced green chilies. Cook for 1-2 minutes until the raw aroma disappears. The mixture should be fragrant but not browned.
Step 2: Build the Spice and Vegetable Layer
Add the 1.5 lb diced russet potatoes, 4 cups cauliflower florets, 1 cup green peas, 3 diced tomatoes, 2 tbsp pav bhaji masala, ½ tsp ground turmeric, 1 tsp ground cumin, and 1 tsp ground coriander. Stir thoroughly to coat every piece with the aromatic butter and spices.
Here’s the thing—this might look like a lot of vegetables, but they’ll break down beautifully. Pour in ½ cup water, scraping the bottom to deglaze and prevent burning. The liquid should just barely cover the bottom of the pot.
Step 3: Pressure Cook to Perfection
Secure the lid, set the valve to Sealing, and cook on High Pressure for 8 minutes. Let the pressure release naturally for 5 minutes, then quick-release any remaining pressure. You’ll know it’s done when the float valve drops and the lid unlocks easily.
Open the lid carefully (steam will escape!) and use a potato masher to break down the vegetables into a thick, chunky mash. The consistency should be rustic, not smooth—you want texture in every bite.
Step 4: Finish with Butter and Acid
Stir in the remaining ¼ cup unsalted butter and 2 tbsp lemon juice. The butter enriches the bhaji, while the lemon juice brightens all those deep, spiced flavors. Taste and adjust seasoning—you might want a pinch more salt or pav bhaji masala.
The mixture should glisten enticingly and smell irresistibly tangy and spiced. If it seems too thick, add 2-3 tablespoons warm water to reach your desired consistency.
Step 5: Toast and Serve with Pav
Lightly toast the 8 dinner rolls in a dry skillet with 1 tbsp butter until warm and golden. Slice each roll horizontally, butter the insides, and toast again for 30 seconds until crisp.
Spoon the hot bhaji into bowls, garnish with ¼ cup chopped fresh cilantro, and serve immediately with the toasted pav. The contrast of the soft, buttery rolls with the spicy, tangy vegetable mash is what makes this dish unforgettable.
Pro Tips For Making Pav Bhaji Recipe Instant Pot
- Sauté Onions First: I learned this the hard way—cook the yellow onions in the Instant Pot for 3-4 minutes before adding other veggies, or you’ll end up with a watery, raw-tasting base.
- Cut Evenly: Chop the cauliflower and potatoes into 1-inch pieces so they cook at the same rate—no one wants mushy peas and crunchy potatoes.
- Skip Overfilling: Resist the urge to dump all the veggies in at once; the Instant Pot needs room to build pressure, or you’ll get a sad, undercooked mess.
- Mash While Hot: Sounds weird, but it works: mash the potatoes and cauliflower right after pressure cooking while they’re still steaming—it blends way smoother.
Dietary Considerations for This pav bhaji recipe instant pot
Vegetarian By Nature
This dish is inherently vegetarian, packed with cauliflower, potatoes, and peas—no meat required. The protein comes from the vegetables and butter, making it a hearty plant-based meal. I love how it satisfies without any animal products.
Gluten-Free Adaptations
To make it gluten-free, simply swap the dinner rolls for gluten-free pav or certified gluten-free buns. I’ve had success with Schar’s gluten-free rolls from my local grocery store. The bhaji itself is naturally gluten-free, so no other changes are needed. 💪
Vegan Modifications
Replace the unsalted butter with vegan butter (I use Earth Balance) or coconut oil. The flavors remain rich and authentic, and the dish stays just as creamy. It’s an easy swap that doesn’t compromise taste.
Dairy-Free Options
If avoiding dairy, use olive oil or vegan butter instead of regular butter. The bhaji will still be flavorful, though slightly less rich. I often use avocado oil for a neutral taste that lets the spices shine.
Lower-Calorie Version
Cut the butter in half and use a non-stick pan for toasting the pav with minimal oil. You can also bulk up the bhaji with extra cauliflower or zucchini to reduce calorie density while keeping it filling.
Allergen Notes
This recipe contains no nuts, eggs, or soy, making it safe for many common allergies. However, always check your pav bhaji masala blend for hidden allergens, as some brands may include traces of nuts or wheat. 💡
Nutrition Facts
Frequently Asked Questions
Can I use frozen vegetables?
Yes, but thaw and drain them first to prevent excess liquid in your bhaji. Frozen cauliflower and peas work well.
Why is my bhaji too watery?
This usually happens if you skip deglazing or overfill the pot. After cooking, mash well and simmer uncovered for 5 minutes to thicken.
Can I make this ahead?
The bhaji keeps for 3 days refrigerated. Reheat with a splash of water, but toast the pav fresh for best texture.
What if I don’t have pav bhaji masala?
Combine 1 tsp garam masala, ½ tsp red chili powder, and ½ tsp amchur as a substitute. The flavor will be close!

- Peach Syrup Recipe for Ice Cream: Sweet and Silky Drizzle for Scoops - October 6, 2026
- Pav Bhaji Recipe Food Lab: Mumbai Street Food Magic at Home - October 6, 2026
- Peach Jelly Recipe Without Pectin: Naturally Set Sweet Spread - October 6, 2026