
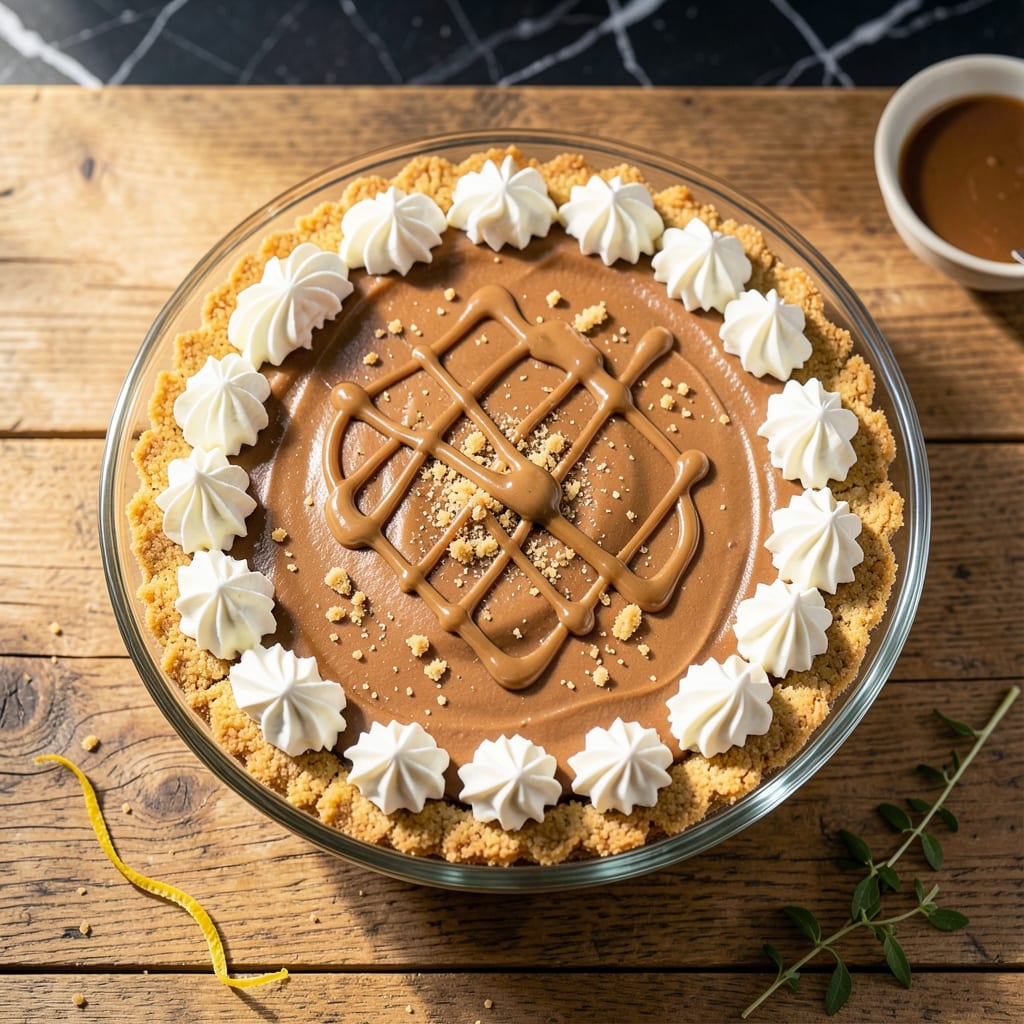
This no-bake peanut butter pie delivers a creamy texture that rivals any baked dessert. I developed this recipe for warm days when turning on the oven isn’t an option.
The filling combines smooth peanut butter with whipped cream cheese for a rich, velvety consistency. A graham cracker crust provides the perfect crunch against the silky center.
What makes this dish special is its simplicity—no baking, no complicated steps, just layers of flavor that come together effortlessly. The result is a dessert that’s both indulgent and foolproof.
Serve chilled for a satisfying treat that disappears fast. Here’s how to make it.
Ingredients for Pb Pie Recipe No Bake
Simple pantry staples and a few fridge basics create this rich, dreamy dessert.
| Ingredient | Amount | Notes |
|---|---|---|
| Creamy Peanut Butter 🥜 | 1 ½ cups | Smooth, no stir variety |
| Cream Cheese 🧀 | 8 oz | Full-fat, softened to room temperature |
| Heavy Whipping Cream 🥛 | 2 cups | Cold, for whipping |
| Powdered Sugar 🍚 | 1 ½ cups | Sifted for smoothness |
| Vanilla Extract 🌿 | 1 tsp | Pure extract preferred |
| Graham Cracker Crumbs 🍪 | 2 ½ cups | Fine crumbs, about 20 full crackers |
| Unsalted Butter 🧈 | ¾ cup | Melted for crust binding |
| Granulated Sugar 🍚 | ¼ cup | For crust sweetness |
| Salt 🧂 | ¼ tsp | Fine sea salt |
| Chopped Peanuts 🥜 | ½ cup | For topping, optional |
| Chocolate Chips 🍫 | ½ cup | Semi-sweet for garnish |
The peanut butter is key here—Jif or Skippy deliver that classic creamy texture. Cream cheese should be full-fat (Philadelphia or store brand) for the smoothest filling. Heavy cream needs to be cold (36-40°F), so leave it in the fridge until ready to whip. Graham cracker crumbs are sold pre-made, but pulsing whole crackers in a food processor gives better texture. Honey Maid is a reliable brand choice.
No cream cheese? Ricotta blended smooth works in a pinch, though the texture will be slightly different. Swap graham crackers for digestive biscuits or vanilla wafers—just adjust sugar to taste. For a lighter version, whipped topping can replace heavy cream (thaw frozen first). If you’re avoiding nuts, sunflower seed butter makes a great peanut-free alternative.
This keeps beautifully in the fridge for 4-5 days (cover tightly with plastic wrap). Freeze for up to 2 months, though the crust may soften slightly. For best results, add toppings like chopped peanuts or chocolate chips just before serving to keep them crisp.
Why You’ll Love This Recipe
- No Oven Needed: I just mix, chill, and serve—no baking required, which means no heating up the kitchen.
- Creamy Dream: The peanut butter and cream cheese blend into this ridiculously smooth, rich filling that’s hard to resist.
- Potluck Hero: I bring this to every gathering, and it’s always the first to disappear from the dessert table.
- Keeps Well: Honestly, it tastes even better the next day, so I don’t mind making it ahead.
Step-by-Step Instructions for PB Pie No Bake
This method ensures a silky filling and sturdy crust that sets perfectly every time.
Step 1: Prepare the Graham Cracker Crust
Combine the 2.5 cups graham cracker crumbs, 0.25 cup granulated sugar, and 0.25 tsp salt in a bowl. Stir until evenly distributed—this balance of sweetness and salt creates the perfect base for the rich filling.
Pour in the 0.75 cup melted unsalted butter and mix until the crumbs resemble wet sand. Press the mixture firmly into a 9-inch pie dish, using a measuring cup to compact it evenly against the bottom and sides. Chill in the refrigerator for 15 minutes to set completely.
Step 2: Whip the Cream to Stiff Peaks
In a large bowl, beat the 2 cups cold heavy whipping cream with an electric mixer on high speed. Watch for the cream to thicken to soft peaks first, then continue until it holds stiff peaks when the beaters are lifted—this takes about 3-4 minutes.
Be careful not to over-whip, or the cream will turn grainy. The cold temperature of the cream is crucial here; if it warms up, it won’t hold its shape. Set the whipped cream aside while you prepare the peanut butter mixture.
Step 3: Cream Together Peanut Butter and Sweetened Cheese
In a separate bowl, beat the 8 oz softened cream cheese until smooth and free of lumps. Add the 1.5 cups powdered sugar and beat on medium speed for 1-2 minutes until fully incorporated and fluffy.
Add the 1.5 cups creamy peanut butter and 1 tsp vanilla extract, then beat for another 1-2 minutes until the mixture is completely smooth and pale in color. The peanut butter should be fully integrated with no streaks visible.
Step 4: Fold and Assemble the Filling
Gently fold the whipped cream into the peanut butter mixture using a silicone spatula. Use a folding motion to avoid deflating the cream—this ensures the filling stays light and airy. Continue until no white streaks remain and the mixture is uniform.
Pour the filling into the chilled crust and spread it evenly with the spatula. The surface should be smooth and level. Tap the pie dish gently on the counter to remove any air bubbles for a professional finish.
Step 5: Chill and Garnish Before Serving
Refrigerate the pie uncovered for at least 4 hours, or overnight for best results. This chilling time allows the filling to set completely so it slices cleanly. The texture should be firm yet creamy when properly chilled.
Just before serving, sprinkle the top evenly with the 0.5 cup chopped peanuts and 0.5 cup chocolate chips. Use a sharp knife dipped in hot water for clean slices. Each serving should have a perfect ratio of crust to creamy filling.
Pro Tips For Making Pb Pie Recipe No Bake
- Chill the Bowl: Pop your mixing bowl and beaters in the freezer for 10 minutes before whipping the cream—it holds peaks better and prevents a soupy mess. I learned this the hard way after my filling turned into peanut butter soup twice.
- Soften the Cream Cheese: Let the cream cheese sit out for at least an hour, or microwave it in 5-second bursts if you’re in a rush. Cold chunks ruin the smooth texture you want in a no-bake pie.
- Skip the Sugar Rush: Start with half the powdered sugar, taste, then add more—peanut butter is already sweet. After over-sweetening my first three pies, I finally figured out less is more here.
- Fold, Don’t Stir: Gently fold the whipped cream into the peanut butter mixture with a spatula to keep it airy. Stirring like batter knocks out the fluff and leaves you with a dense, sad pie.
Flavor Customization for This pb pie recipe no bake
Salty-Sweet Balance
Add ½ tsp flaky sea salt to the whipped cream before folding into the peanut butter mixture. This enhances the peanut flavor without making it taste salty. I love how it brightens all the other ingredients. 💪
Chocolate Swirl
Melt 1 cup semi-sweet chocolate chips and drizzle over the filling before chilling. Use a butter knife to gently swirl it into the peanut butter mixture for a marbled effect. The chocolate adds depth and visual appeal.
Crunchy Add-Ins
Fold ½ cup crushed pretzels or toasted oats into the filling for extra texture. Press some into the crust before adding the filling for a surprise crunch in every bite. This contrasts beautifully with the creamy filling.
Spiced Version
Mix 1 tsp cinnamon and ¼ tsp nutmeg into the peanut butter mixture for warmth. A pinch of cayenne pepper adds a subtle kick that balances the sweetness. These spices complement the peanut butter perfectly.
Fruit Topping
Top with sliced bananas or fresh strawberries just before serving. The natural sweetness pairs wonderfully with the rich filling. Drizzle with 2 tbsp honey or melted chocolate for extra shine. 🍓
Nutty Variations
Swap chopped peanuts for ½ cup toasted almonds or pecans. For nut-free versions, try sunflower seeds or crispy rice cereal. Each brings a unique texture while keeping the recipe’s essence.
Nutrition Facts
Frequently Asked Questions
Can I use crunchy peanut butter instead of creamy?
Yes, but the texture will be slightly different. Crunchy peanut butter adds extra bits of peanuts throughout the filling, which some enjoy. For a smoother consistency, stick with creamy peanut butter.
How long does this pie need to chill before serving?
Refrigerate for at least 4 hours to allow the filling to set properly. Overnight chilling yields the best results for clean slices. Don’t rush this step or the pie may not hold its shape.
What can I use instead of a graham cracker crust?
Try crushed digestive biscuits, vanilla wafers, or even chocolate cookie crumbs for a different flavor. Press them with melted butter just like the original crust, and adjust sugar to taste.
Can I freeze this pie for later?
Wrap it tightly in plastic wrap and aluminum foil, then freeze for up to 2 months. Thaw in the fridge overnight before serving for best texture.

- Peanut Brittle Recipe With Dry Roasted Peanuts: Crunchy Caramelized Sweetness - October 7, 2026
- Peanut Butter and Banana Bread Recipe UK: Moist Crumb With Nutty Swirls - October 7, 2026
- Frittata Recipe Oven: Fluffy Eggs with Crisp Golden Top - October 7, 2026