
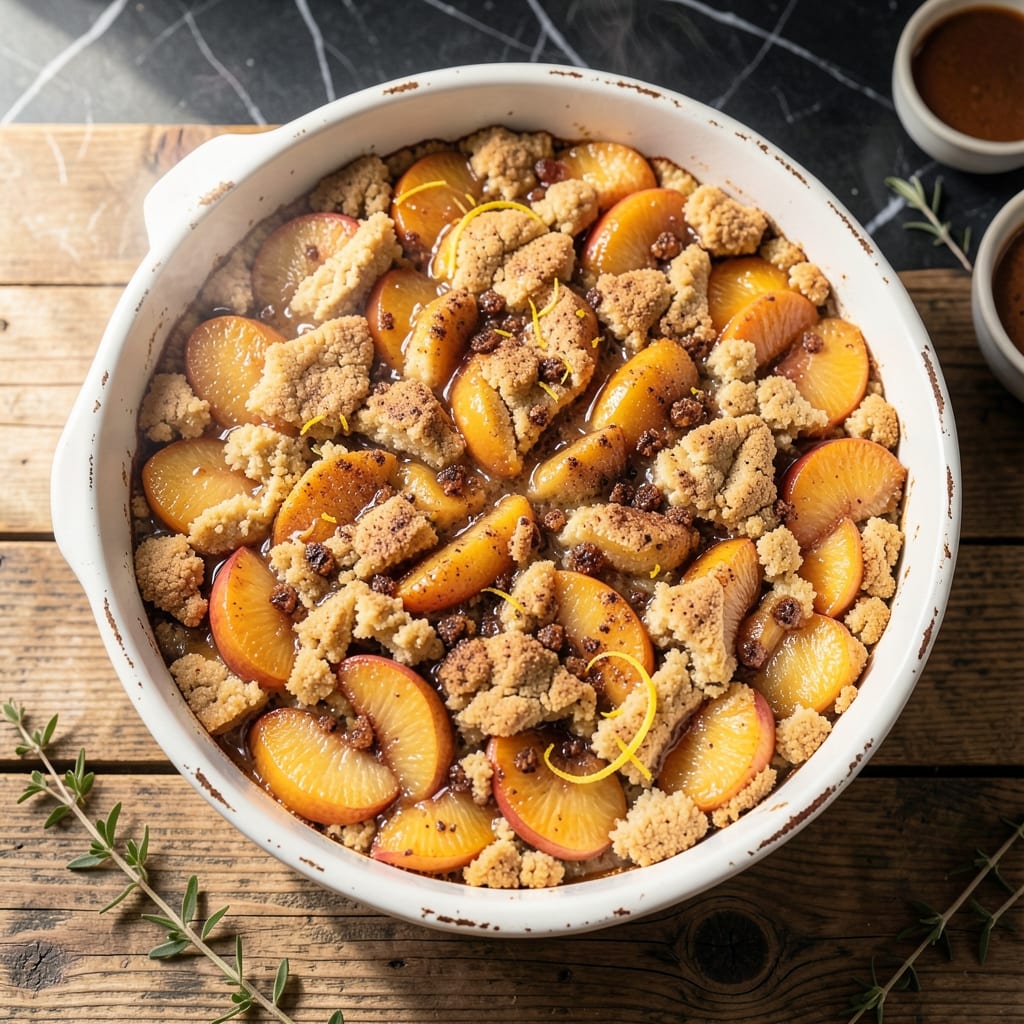
There’s something timeless about warm peach cobbler with a golden, flaky crust. This version uses gluten-free Bisquick to create that same nostalgic texture without the gluten.
I developed this recipe after years of testing, ensuring it delivers the same comfort as the classic. The spiced peaches bubble up through the biscuit topping, which stays light and tender.
Ready in under an hour, this dessert is both quick and foolproof. The gluten-free Bisquick handles just like the original, so there’s no learning curve.
Serve it warm with vanilla ice cream for the perfect finish. Here’s how to make it.
Ingredients for Peach Cobbler Recipe Using Gluten Free Bisquick
Warm spiced peaches meet a golden flaky crust with these simple ingredients.
| Ingredient | Amount | Notes |
|---|---|---|
| Gluten-Free Bisquick 🌾 | 2 cups | Plus extra for dusting |
| Canned Peaches 🍑 | 29 oz | Two 15 oz cans, drained |
| Granulated Sugar 🍚 | ¾ cup | Divided for filling and topping |
| Brown Sugar 🟤 | ¼ cup | For caramelized peaches |
| Ground Cinnamon 🌿 | 1 tsp | For warm spice |
| Ground Nutmeg 🌰 | ¼ tsp | Freshly grated preferred |
| Vanilla Extract 🌿 | 1 tsp | Pure for best flavor |
| Milk 🥛 | 0.67 cup | Dairy or plant-based |
| Unsalted Butter 🧈 | ⅓ cup | Melted, for topping |
| Baking Powder 🧂 | 1 tsp | Ensures flaky texture |
| Salt 🧂 | ¼ tsp | Balances sweetness |
| Lemon Juice 🍋 | 1 tbsp | Brightens peach flavor |
The Bisquick is key here—Betty Crocker’s gluten-free blend works perfectly and is widely available at Target or Walmart. Look for the blue box; it handles just like the original. For the peaches, canned in juice (not syrup) gives the best texture for bubbling up through the topping. Libby’s or Del Monte brands are reliable.
No gluten-free Bisquick? Homemade blend of rice flour, tapioca starch, and baking powder can work in a pinch. Swap brown sugar for coconut sugar if needed. The milk can be any variety (dairy, almond, oat)—just use what you have. For extra depth, add a pinch of cardamom alongside the cinnamon.
Store canned peaches in a cool pantry for up to 1 year. Once opened, use within 5 days. The cobbler itself keeps 2-3 days at room temperature covered with foil. Best served warm.
Why You’ll Love This Recipe
- One Bowl Wonder: I just dump the Gluten-Free Bisquick, sugars, and cinnamon right in with the canned peaches—no mixing bowls to wash.
- Warm Spiced Bliss: That cinnamon-brown sugar combo turns the peaches into this gooey, caramelized goodness.
- Feeds My Crowd: Between us, I’ve served this at potlucks and weeknight desserts with equal success.
- Leftovers? Please: Honestly, it tastes even better the next day—if it lasts that long.
Step-by-Step Instructions for Peach Cobbler Using Gluten Free Bisquick
Here’s the method. Straightforward, tested, works every time.
Step 1: Prepare the Peach Filling
Drain the 29 oz Canned Peaches and place them in a large bowl. Add 0.25 cup Brown Sugar, 1 tsp Ground Cinnamon, 0.25 tsp Ground Nutmeg, 1 tsp Vanilla Extract, and 1 tbsp Lemon Juice. Stir gently to combine, ensuring the peaches are evenly coated with the spices and sugars.
The Lemon Juice brightens the sweetness of the peaches, while the spices add a warm, aromatic depth. Let the mixture sit for 5 minutes to allow the flavors to meld together. This step ensures every bite of the filling is rich and fragrant.
Step 2: Combine the Dry and Wet Ingredients for the Topping
In a separate bowl, whisk together the 2 cups Gluten-Free Bisquick, 0.75 cup Granulated Sugar, 1 tsp Baking Powder, and 0.25 tsp Salt. The Baking Powder is crucial for creating a flaky, airy texture in the topping.
In another bowl, combine the 0.67 cup Milk and stir it into the dry mixture. The batter will be thick but pourable. Avoid overmixing—just combine until no dry spots remain. This ensures the topping stays tender and doesn’t become tough.
Step 3: Assemble and Bake the Cobbler
Pour the peach filling into a 9×13-inch baking dish and spread it evenly. Spoon the batter over the peaches, gently covering the surface. The batter will spread as it bakes, so don’t worry about perfect coverage.
Melt the 0.33 cup Unsalted Butter and drizzle it evenly over the batter. This adds richness and helps create a golden, crisp top. Bake in a preheated oven at 375°F for 35-40 minutes, or until the topping is golden brown and a toothpick inserted into the center comes out clean.
Step 4: Rest and Serve
Remove the cobbler from the oven and let it rest for 10 minutes. This allows the filling to thicken slightly and the topping to set, making it easier to serve. The aroma of warm, spiced peaches will fill your kitchen—this is the moment that matters.
Serve warm, ideally with a scoop of vanilla ice cream or a dollop of whipped cream. The contrast of the tender, spiced peaches and the flaky, buttery topping will make every bite irresistible. This dish is best enjoyed fresh from the oven, while the topping is still crisp and the filling is bubbly.
Pro Tips For Making Peach Cobbler Recipe Using Gluten Free Bisquick
- Preheat the Pan: Always heat your baking dish for 5 minutes in the oven before adding the batter—gluten-free Bisquick needs that extra boost to crisp up properly.
- Drain the Peaches: I learned this the hard way—drain and pat the canned peaches dry, or your cobbler will be soupy instead of golden and fluffy.
- Skip Overmixing: Stir the Bisquick batter just until combined, about 10-12 strokes—overworking it makes the topping dense and gummy.
- Add Cinnamon Early: Toss the peaches with cinnamon and brown sugar before baking, not after, so the spices bloom and flavor the whole dish.
Make-Ahead Tips for This Dish
Prep Ahead
Mix the dry topping ingredients (2 cups Gluten-Free Bisquick, 0.75 cup sugar, 1 tsp baking powder, 0.25 tsp salt) the night before. Store in an airtight container at room temperature. This saves 5 minutes of whisking the next day. 💡
Assemble Early
Combine the peach filling ingredients (29 oz peaches, 0.25 cup brown sugar, spices) in the baking dish up to 4 hours before baking. Cover and refrigerate. Let it sit at room temperature for 30 minutes before adding the topping.
Freeze for Later
Bake the cobbler completely, let cool, then wrap tightly in plastic wrap and aluminum foil. Freeze for up to 2 months. Thaw overnight in the fridge before reheating. ❄️
Reheat Properly
Cover the dish with foil and warm at 350°F for 15-20 minutes. Uncover the last 5 minutes to crisp the topping. Add a splash of milk to the batter if it seems dry before baking.
Portion Control
Divide the unbaked cobbler into individual ramekins for single servings. Bake at 375°F for 20-25 minutes. These freeze and reheat beautifully—perfect for impromptu desserts.
Nutrition Facts
Frequently Asked Questions
Can I use fresh peaches instead of canned?
Use 6-8 ripe peaches, peeled and sliced. Simmer them with 1/4 cup sugar for 10 minutes to soften before assembling. Fresh peaches may release more juice.
Why did my topping turn out dense?
Overmixing the batter is the most common culprit. Stir just until combined—lumps are fine. Also ensure your baking powder is fresh and not expired.
What’s the best way to store leftovers?
Cover tightly with foil and keep at room temperature for up to 2 days. For longer storage, refrigerate for 4-5 days or freeze for 2 months.

- Pav Bhaji Recipe Food Lab: Mumbai Street Food Magic at Home - October 6, 2026
- Peach Jelly Recipe Without Pectin: Naturally Set Sweet Spread - October 6, 2026
- Pasta Salad Recipe With Zesty Italian Dressing: Bright Herb-Kissed Medley for Picnics - October 6, 2026