
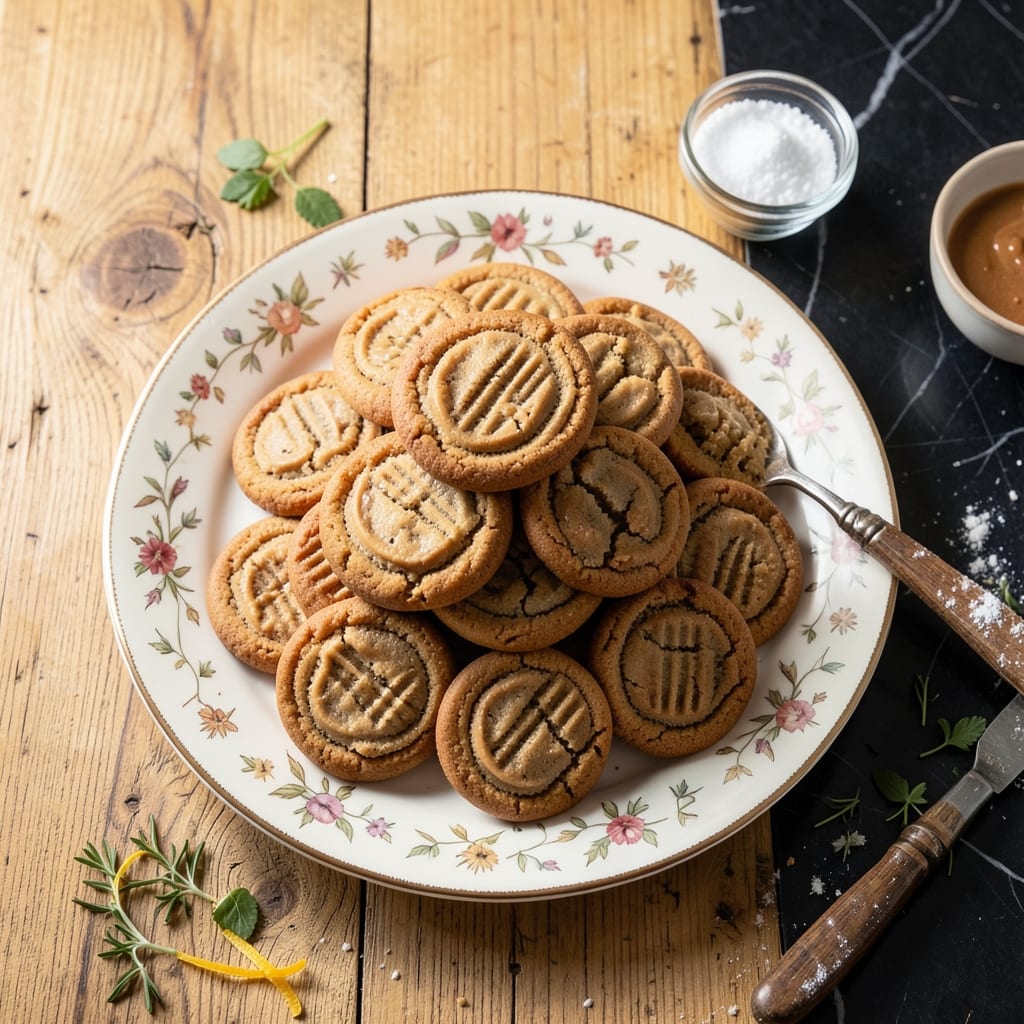
I developed this recipe after David requested sugar-free treats that didn’t taste like a compromise. The solution was Splenda, which provides sweetness without the blood sugar spike, making these cookies perfect for those watching their intake.
The dough comes together quickly with just a few ingredients, and the texture is exactly what you’d expect from a classic peanut butter cookie—soft, slightly chewy, with those signature crosshatch marks.
Baking at 350°F for 10-12 minutes ensures the edges are lightly golden while the centers stay tender. The peanut butter flavor shines through without being overly sweet.
These are the cookies I now keep on hand for Emma and Jack’s after-school snacks, knowing they’re enjoying a treat that aligns with our family’s healthier lifestyle.
Ingredients for Peanut Butter Cookie Recipe with Splenda
A handful of pantry staples transforms into soft, chewy sugar-free cookies everyone will love.
| Ingredient | Amount | Notes |
|---|---|---|
| Natural Creamy Peanut Butter 🥜 | 1 cup | Unsweetened, no added sugar |
| Splenda Granulated Sweetener 🍚 | 1 cup | Measures like sugar |
| Large Egg 🥚 | 1 whole | Room temperature preferred |
| Vanilla Extract 🌿 | 1 tsp | Pure extract for best flavor |
| Baking Soda 🧂 | 1 tsp | Ensures proper rise |
| Salt 🧂 | ¼ tsp | Fine sea salt preferred |
| All-Purpose Flour 🌾 | 1 ¼ cups | Sifted for lighter texture |
| Unsalted Butter 🧈 | ½ cup | Softened to room temperature |
Peanut butter is the star here—Jif Natural or Smucker’s Natural work perfectly. Avoid the ‘no-stir’ varieties since they can be too oily. The Splenda needs to be the granulated kind (not the powdered) so it measures like sugar. Walmart or Target carry it in the baking aisle. I always keep an extra bag in my pantry for impromptu baking sessions (trust me, you’ll use it).
No Splenda? Erythritol or monk fruit sweetener blends can work, but adjust to taste since sweetness levels vary. For a nut-free version, swap the peanut butter for sunflower seed butter—the texture stays great. If your peanut butter is salted, skip the added salt in the recipe. The dough is forgiving, so don’t stress over exact measurements.
Store baked cookies in an airtight container at room temperature for 5 days, or freeze for 3 months. The dough can be refrigerated for 24 hours or frozen for 1 month—just thaw before baking. I like to make a double batch and freeze half for later (worth the extra minute).
Why You’ll Love This Recipe
- One Bowl Wonder: I just dump everything in a single bowl—peanut butter, Splenda, egg, and vanilla—mix, and bake. No mixer, no fuss.
- Rich & Nutty: The natural creamy peanut butter gives that deep, toasty flavor without being cloyingly sweet. Honestly, the Splenda lets the nutty taste shine.
- Budget Baker: Five ingredients, most of which I already have in my pantry. I’ll be real: it’s cheaper than most cookie recipes out there.
Step-by-Step Instructions for Peanut Butter Cookies With Splenda
Here’s the method I use to create perfectly tender, sugar-free cookies every time.
Step 1: Cream the Butter and Sweetener
In a large mixing bowl, beat the 0.5 cup Unsalted Butter and 1 cup Splenda Granulated Sweetener together on medium speed for 2-3 minutes until light and fluffy. This step is critical—it incorporates air into the mixture, which helps create that classic cookie texture.
I always use softened butter, not melted, because it traps air better during creaming. If the mixture looks grainy, keep beating until it smooths out. You’ll know it’s ready when it’s pale and doubled in volume.
Step 2: Incorporate the Peanut Butter and Wet Ingredients
Add the 1 cup Natural Creamy Peanut Butter, 1 whole Large Egg, and 1 tsp Vanilla Extract to the bowl. Mix on medium speed for 1-2 minutes until everything is fully combined and smooth.
Here’s the thing—I use natural creamy peanut butter for this recipe because it blends seamlessly into the dough without leaving oil separation. Scrape down the sides of the bowl as needed to ensure even mixing. The dough will look thick and slightly sticky at this stage.
Step 3: Combine the Dry Ingredients
In a separate bowl, whisk together the 1.25 cups All-Purpose Flour, 1 tsp Baking Soda, and 0.25 tsp Salt. This ensures the baking soda and salt are evenly distributed throughout the flour.
Gradually add the dry ingredients to the wet mixture, mixing on low speed until just combined. Don’t overmix—stop as soon as the flour disappears. Overworking the dough can make the cookies tough instead of tender.
Step 4: Shape and Bake the Cookies
Preheat your oven to 350°F and line two baking sheets with parchment paper. Roll the dough into 1-inch balls and place them 2 inches apart on the prepared sheets. I like to flatten them slightly with a fork in a crisscross pattern—this creates those classic peanut butter cookie ridges.
Bake for 10-12 minutes until the edges are light golden brown. The centers might look slightly underdone, but that’s okay—they’ll firm up as the cookies cool. Rotate the pans halfway through baking for even browning.
Step 5: Cool and Enjoy
Let the cookies cool on the baking sheets for 5 minutes before transferring them to a wire rack to cool completely. This short rest allows them to set without crumbling.
These cookies are best enjoyed once fully cooled—the texture improves as they sit. Store leftovers in an airtight container at room temperature for up to 5 days, though I doubt they’ll last that long.
Pro Tips For Making Peanut Butter Cookie Recipe With Splenda
- Chill the Dough: After mixing, refrigerate the dough for 20-30 minutes—Splenda can make cookies spread too thin if baked right away. I learned this the hard way after my first batch turned into peanut butter pancakes.
- Use Room-Temp Egg: Crack your egg into a small bowl and let it sit for 10 minutes before mixing. Cold egg can cause the peanut butter to seize up, making the dough harder to work with.
- Flatten Before Baking: Press each dough ball with a fork in a crisscross pattern—they won’t spread much on their own. Sounds weird, but it works: this gives them that classic peanut butter cookie look.
- Watch the Oven: Start checking at 8 minutes—Splenda browns faster than sugar, and these go from perfect to overdone in a flash. My grandmother swore by this, and she was right: pull them when the edges are just golden.
Pro Cooking Tips for Great peanut butter cookie recipe with splenda
Butter Temperature Matters
Always use room temperature butter—not melted—for the best texture. If it’s too cold, it won’t cream properly with the Splenda. I leave mine out for 1-2 hours before baking. David can always tell when I’ve rushed this step (he’s my toughest critic). 💡
Even Baking Secrets
Rotate your baking sheets halfway through the 10-12 minute bake to prevent uneven browning. I also recommend an oven thermometer—many home ovens run 10-15°F hotter than their dial suggests. 350°F is the sweet spot for soft centers.
Dough Consistency Tip
If your dough feels too sticky, chill it for 20 minutes before rolling. Natural peanut butter can vary in oil content. I tested this with Jif Natural and Smucker’s—both worked perfectly. The fork crisscross should be deep enough to flatten slightly.
Cooling Patience
Let cookies cool on the pan for 5 minutes before transferring. This prevents crumbling. The centers will firm up as they cool—don’t overbake waiting for them to look done. I learned this the hard way in Nana Mae’s diner.
Equipment Check
Use light-colored baking sheets for even heat distribution. Dark pans can cause the bottoms to brown too quickly. Parchment paper is a must—it prevents sticking and makes cleanup a breeze. I keep a roll in my pantry at all times. ✨
Nutrition Facts
Frequently Asked Questions
Can I substitute regular sugar for Splenda?
Yes, but use the same 1 cup measurement. The texture may differ slightly since Splenda behaves differently when baked. For best results, stick with granulated Splenda as called for.
Why did my cookies turn out dry?
Overbaking is the most likely culprit. Pull them out at 10-12 minutes when edges are just golden. Also, natural peanut butter dries out faster than regular, so check at 10 minutes.
Can I make these gluten-free?
Swap the 1.25 cups all-purpose flour for a 1:1 gluten-free baking blend. Let the dough rest for 10 minutes before baking to improve texture.
How do I get the classic crosshatch pattern?
Use a fork to press down twice in a crisscross on each dough ball. Dip the fork in water between presses to prevent sticking. The pattern helps them bake evenly.

- Peanut Brittle Recipe With Dry Roasted Peanuts: Crunchy Caramelized Sweetness - October 7, 2026
- Peanut Butter and Banana Bread Recipe UK: Moist Crumb With Nutty Swirls - October 7, 2026
- Frittata Recipe Oven: Fluffy Eggs with Crisp Golden Top - October 7, 2026