
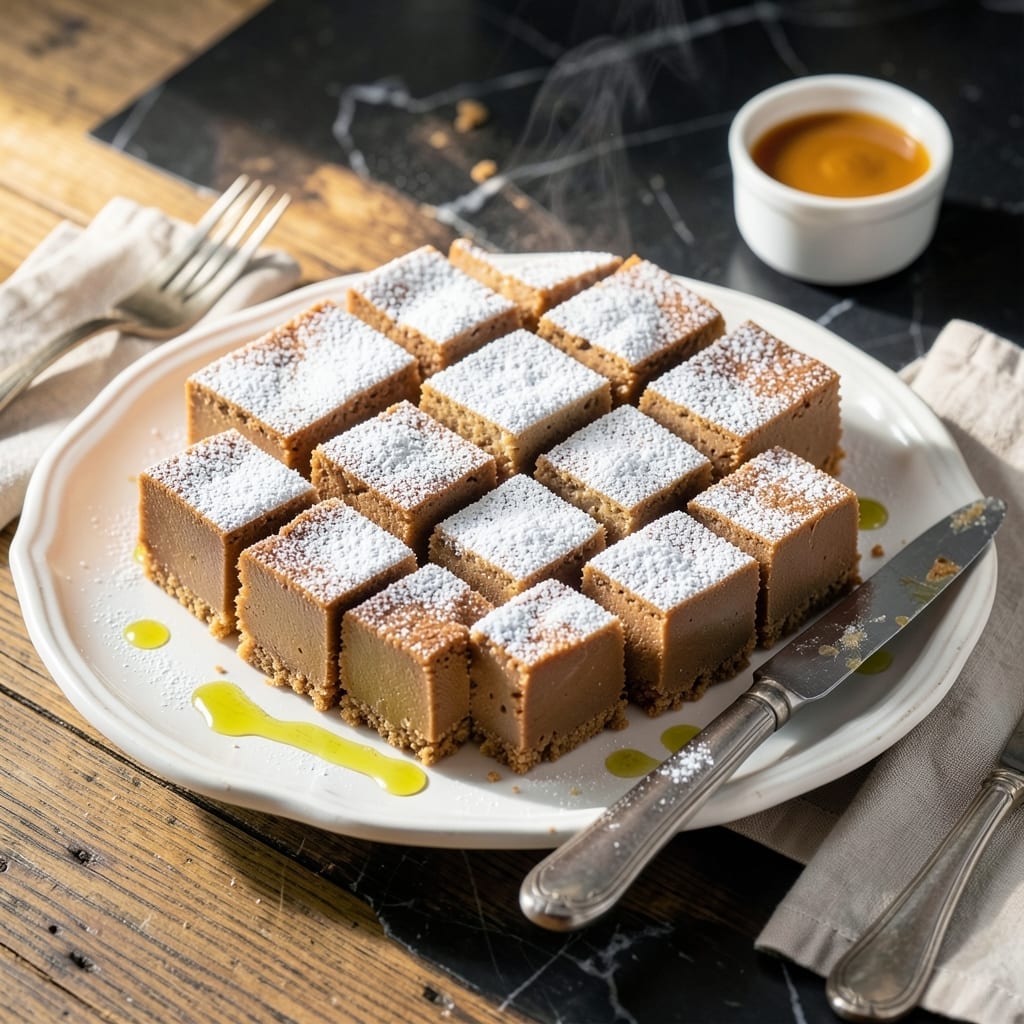
This no-bake fudge delivers rich peanut butter flavor with minimal effort. The sweetened condensed milk creates a creamy texture that melts in your mouth, while the peanut butter adds depth.
With just a few ingredients and no oven required, you can have decadent homemade candy ready in under an hour. The result is smooth, sweet, and utterly irresistible.
Ingredients for Peanut Butter Fudge Recipe Sweetened Condensed Milk
Short list. Big flavor. No oven needed for this sweet treat.
| Ingredient | Amount | Notes |
|---|---|---|
| Sweetened Condensed Milk 🥛 | 1 can | 14 oz standard size |
| Creamy Peanut Butter 🥜 | 1 ½ cups | Natural or commercial both work |
| Unsalted Butter 🧈 | ¼ cup | Cut into small pieces |
| Vanilla Extract 🌿 | 1 tsp | Pure extract recommended |
| Powdered Sugar 🧂 | 2 cups | Sifted for smooth texture |
| Sea Salt 🧂 | ¼ tsp | Fine grain preferred |
| Chopped Peanuts 🥜 | ½ cup | For garnish optional |
| Semi-Sweet Chocolate Chips 🍫 | 1 cup | Melted with butter |
The peanut butter is the star here. Jif or Skippy work perfectly, but I’m partial to the natural stuff with just peanuts and salt (the oil separation is a pain, but worth it). Sweetened condensed milk is non-negotiable—Eagle Brand is what I always grab at Walmart. Look for full-fat versions; the low-fat just doesn’t set right.
No powdered sugar? Granulated plus a minute in the blender gets you close. Out of vanilla? A pinch of cinnamon adds warmth, but it’s not the same. The chocolate chips can be swapped for white chocolate or butterscotch if that’s your thing. Butter can be salted in a pinch—just skip the added sea salt.
This keeps 2 weeks at room temp in an airtight container (trust me, it won’t last that long). Freeze for up to 3 months if you somehow have leftovers. Slice before storing so it’s easy to grab a piece whenever the craving hits.
Why You’ll Love This Recipe
- 5-Ingredient Magic: I just dump everything into one pot—sweetened condensed milk, peanut butter, butter, vanilla, powdered sugar—and stir. No candy thermometer, no fuss.
- Pure Peanut Bliss: The combo of creamy peanut butter and sweetened condensed milk makes it rich but not cloying. Honestly, it’s the vanilla that ties it all together.
- Gift-Worthy Treats: I package these in little boxes for teacher gifts or potlucks. Between us, they disappear faster than I can wrap them.
- Stays Fresh for Days: One batch lasts a week in the fridge, if it survives that long. I’ll be real: I’ve eaten it straight from the pan before it even sets.
Step-by-Step Instructions for Peanut Butter Fudge
This no-bake method delivers smooth, rich fudge with minimal effort and maximum flavor.
Step 1: Melt and Combine the Base Ingredients
In a medium saucepan, melt the 0.25 cup Unsalted Butter over low heat. I cut the butter into small pieces first—this ensures even melting without scorching. Once melted, add the 1 can Sweetened Condensed Milk and stir until fully combined.
Next, stir in the 1.5 cups Creamy Peanut Butter until the mixture is completely smooth. I like to use a silicone spatula to scrape the bottom of the pan, preventing any hot spots. You’ll notice the mixture thickens slightly as the peanut butter incorporates.
Remove the saucepan from heat and stir in the 1 tsp Vanilla Extract. The vanilla adds depth, so use pure extract for the best flavor. At this stage, the mixture should be glossy and well-blended.
Step 2: Incorporate the Dry Ingredients
Gradually add the 2 cups Powdered Sugar to the peanut butter mixture, stirring continuously to avoid clumping. I sift the powdered sugar first—this ensures a silky-smooth texture in the final fudge.
Once the powdered sugar is fully incorporated, add the 0.25 tsp Sea Salt. The salt balances the sweetness and enhances the peanut butter flavor. Stir until the mixture is uniform and no streaks of powdered sugar remain.
The consistency should be thick and slightly sticky. If it seems too dry, let it sit for a minute—the residual heat will help soften it.
Step 3: Fold in the Chocolate and Peanuts
In a microwave-safe bowl, melt the 1 cup Semi-Sweet Chocolate Chips in 30-second intervals, stirring between each, until fully smooth. I avoid overheating to prevent seizing. Once melted, fold the chocolate into the peanut butter mixture until evenly distributed.
Finally, stir in the 0.5 cup Chopped Peanuts, reserving a small handful for garnish if desired. The peanuts add texture and a subtle crunch, but you can omit them for a smoother fudge.
Step 4: Set and Chill the Fudge
Line an 8×8-inch baking dish with parchment paper, leaving an overhang on the sides for easy removal. Press the fudge mixture into the dish, smoothing the top with the spatula. I like to press down firmly to eliminate air pockets.
Refrigerate the fudge for at least 2 hours or until firm. This chilling time is crucial—it allows the fudge to set properly so it holds its shape when cut. For best results, let it chill overnight.
Once set, lift the fudge out of the dish using the parchment paper overhang and cut into 1-inch squares. Store in an airtight container in the refrigerator for up to 1 week.
Pro Tips For Making Peanut Butter Fudge Recipe Sweetened Condensed Milk
- Melt Butter Slowly: Use low heat when melting the butter and peanut butter together—high heat can cause the mixture to separate or scorch, ruining the smooth texture.
- Sift Powdered Sugar: Lumps in powdered sugar lead to grainy fudge, so sift it first even if the bag says “pre-sifted.” I learned this the hard way after a batch turned out sandy.
- Skip the Substitutes: Sweetened condensed milk is non-negotiable here—evaporated milk or regular milk won’t give you the right creamy, dense consistency.
- Chill Before Cutting: Let the fudge set in the fridge for at least 2 hours before slicing, or it’ll crumble. Sounds obvious, but I used to rush this part and ended up with a messy, sticky disaster.
Essential Equipment for Perfect Results
Mixing Essentials
A medium saucepan with a heavy bottom is ideal for melting butter and combining ingredients without scorching. I prefer All-Clad stainless steel for even heat distribution. A silicone spatula helps scrape every bit of mixture from the pan.
Measuring Tools
Accurate measurements are key for perfect texture. I use OXO Good Grips measuring cups for dry ingredients and a liquid measuring cup for condensed milk. A kitchen scale ensures precision for peanut butter.
Baking Dish
An 8×8-inch baking dish is the standard size for this recipe. I line mine with parchment paper for easy removal. A glass dish works well too, letting you monitor the setting process through the sides. 💡
Cooling Setup
Your refrigerator needs enough space for the dish to chill undisturbed for at least 2 hours. I clear a shelf beforehand to ensure proper airflow. A wire rack helps if you’re setting multiple batches.
Cutting Tools
A sharp chef’s knife makes clean cuts through the fudge. I warm the blade slightly under hot water between cuts for smoother slices. A ruler helps maintain consistent 1-inch squares. 🔥
Storage Solutions
An airtight container keeps fudge fresh for up to 1 week. I use glass containers with snap-on lids. Wax paper between layers prevents sticking if stacking pieces.
Frequently Asked Questions
Can I use crunchy peanut butter instead of creamy?
Yes, but the texture will be different. Crunchy peanut butter adds extra nut pieces throughout. For best results, use 1 cup creamy and 0.5 cup crunchy to balance texture.
Why did my fudge turn out grainy?
Graininess usually means the powdered sugar wasn’t fully dissolved. Always sift it first and stir continuously while adding. Low heat helps prevent sugar from seizing.
How long does it take to set in the fridge?
Minimum 2 hours for proper firmness, but overnight is ideal. Don’t rush it—cutting too soon will make it crumbly. Patience pays off!
Can I make this without chocolate chips?
Skip the chocolate entirely or swap for white chocolate or butterscotch chips. Each variation offers a unique twist while keeping that creamy texture.
Nutrition Facts

- BBQ Sausage Recipe Oven: Smoky Depth Without the Grill - September 28, 2026
- BBQ Chicken Bowl Recipe Rice: Smoky Sweetness Over Fluffy Grains - September 28, 2026
- Beef Cutlet Recipe Ideas: Crispy Breaded Patties With Bold Seasonings - September 28, 2026