
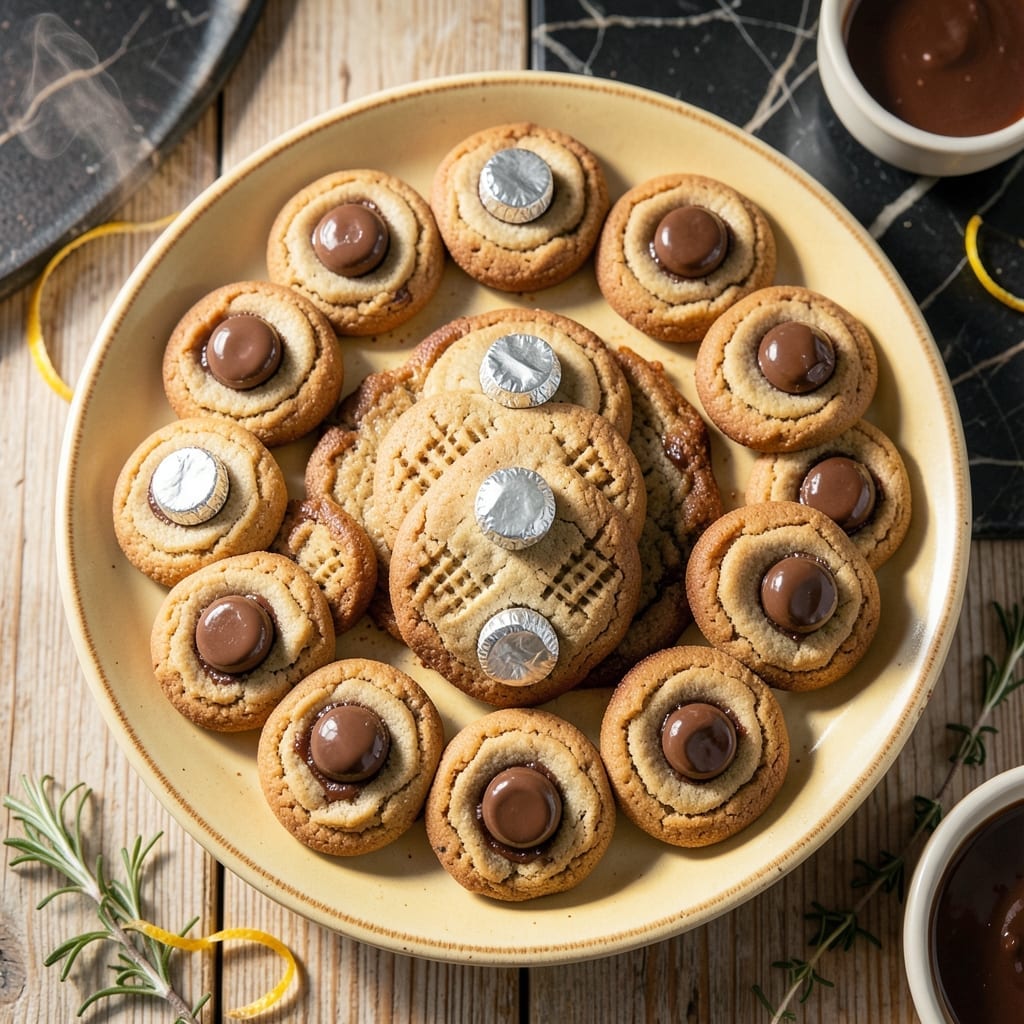
These holiday cookies bring together two classics—peanut butter and chocolate—in one irresistible treat. I’ve refined this recipe to ensure the perfect balance of flavors and textures, with a tender cookie base and a go-to melted chocolate center.
The key is using creamy peanut butter and pressing the dough balls gently with your thumb to create the perfect well for the Hershey’s Kisses. Baked at 350°F, they emerge golden and fragrant, ready for their chocolate crowns.
Each bite delivers a rich, nutty cookie with a melted chocolate surprise in the middle. The contrast between the soft cookie and the creamy chocolate makes these a standout addition to any holiday spread.
Simple to make yet impressive to serve, these treats are sure to become a seasonal favorite.
Ingredients for Peanut Butter Thumbprint Cookie Recipe with Hershey Kisses
Classic ingredients create these holiday cookies with a chocolate surprise in every bite.
| Ingredient | Amount | Notes |
|---|---|---|
| Creamy Peanut Butter 🥜 | 1 cup | Natural or commercial variety |
| Unsalted Butter 🧈 | ½ cup | Softened to room temperature |
| Granulated Sugar 🍚 | ¾ cup | For sweetness and texture |
| Brown Sugar 🍯 | ¾ cup | Packed, light or dark |
| Large Egg 🥚 | 1 whole | Room temperature preferred |
| Vanilla Extract 🌿 | 1 tsp | Pure extract for best flavor |
| All-Purpose Flour 🌾 | 2 cups | Spoon and level for accuracy |
| Baking Soda 🧂 | ½ tsp | For proper cookie rise |
| Salt 🧂 | ¼ tsp | Fine grain, table salt |
| Hershey's Kisses 🍫 | 36 pieces | Unwrapped for centers |
| Granulated Sugar 🍚 | ¼ cup | For rolling dough balls |
The peanut butter is non-negotiable here—Jif or Skippy creamy give that perfect texture (the natural stuff can be too oily). Hershey’s Kisses are the classic choice, but any chocolate kiss works. Butter needs to be soft but not melted—leave it out for an hour or so before baking. I grab mine from Walmart since they always have the best prices on baking staples.
No peanut butter? Almond butter at a 1:1 swap works, though the flavor shifts a bit. Want a crunchier cookie? Swap half the butter for shortening. If you’re out of brown sugar, white sugar plus 1 tbsp molasses per cup gets you close. The flour can be swapped for gluten-free 1:1 if needed, but the texture will be slightly different.
Dough keeps in the fridge for 3 days (perfect for make-ahead). Baked cookies stay fresh for 1 week in an airtight container. Freeze the dough balls (without chocolate) for up to 3 months—just thaw and bake when ready.
Why You’ll Love This Recipe
- One Bowl Wonder: I love that I can mix everything—peanut butter, butter, both sugars, and the egg—in a single bowl. No fancy equipment, just a spatula and 10 minutes of effort.
- Melty Magic: That first bite where the Hershey Kiss melts into the warm peanut butter cookie? Pure comfort. The brown sugar adds just the right caramel note.
- Holiday MVP: These disappear at cookie swaps, but honestly I make them for random Tuesdays too. Kids go wild for the chocolate surprise inside.
- Budget Win: Peanut butter and Hershey Kisses stretch farther than you’d think. I get 24 cookies from one batch, and they freeze perfectly for unexpected guests.
Step-by-Step Instructions for Peanut Butter Thumbprint Cookies With Hershey Kisses
Here’s how I make these holiday cookies with perfect peanut butter flavor every time.
Step 1: Cream Peanut Butter and Sugars
In a large mixing bowl, combine the 1 cup Creamy Peanut Butter and 0.5 cup Unsalted Butter. Beat them together until smooth and fully incorporated. This creates the rich base for your cookies.
Add the 0.75 cup Granulated Sugar and 0.75 cup Brown Sugar, then cream everything together for 2-3 minutes until light and fluffy. You’ll notice the mixture change color slightly as air incorporates—that’s your signal it’s ready.
Step 2: Incorporate Wet and Dry Ingredients
Beat in the 1 whole Large Egg and 1 tsp Vanilla Extract until just combined. I always use room temperature eggs here—they blend more smoothly into the fat mixture.
In a separate bowl, whisk together the 2 cups All-Purpose Flour, 0.5 tsp Baking Soda, and 0.25 tsp Salt. Gradually add this to the wet ingredients, mixing on low until just combined. Don’t overmix—the dough should be thick but still workable.
Step 3: Shape Dough Balls and Add Hershey’s Kisses
Preheat your oven to 350°F. Roll the dough into 1-inch balls (you should get about 36). Roll each ball in the 0.25 cup Granulated Sugar to coat completely—the sugar creates that beautiful crackly finish.
Place the balls 2 inches apart on ungreased baking sheets. Bake for 8 minutes, then remove from the oven. Immediately press an unwrapped Hershey’s Kiss into the center of each cookie. Return to the oven for 5-7 minutes until edges are light golden brown.
Step 4: Cool and Set
Let the cookies cool on the baking sheet for 5 minutes before transferring to a wire rack. The Hershey’s Kisses will be soft at first but will firm up as they cool. This waiting period is crucial—it allows the cookies to set properly.
Cool completely before storing. The cookies will keep in an airtight container at room temperature for up to 5 days. For that perfect holiday presentation, I like to arrange them on a festive platter with the chocolate kisses facing up.
Pro Tips For Making Peanut Butter Thumbprint Cookie Recipe With Hershey Kisses
- Chill the Dough: After mixing, refrigerate the dough for at least 30 minutes—I learned this the hard way when my first batch spread into flat, sad puddles.
- Press Deep Indents: Use your thumb or the back of a spoon to make deep indentations for the Hershey Kisses; shallow ones cause the chocolate to slip off.
- Use Natural Peanut Butter: Skip the stirred or low-fat versions; creamy, no-stir peanut butter gives the right texture and richness.
- Pull at 325°F: Bake at 350°F but pull them out when edges are just golden—residual heat finishes the cooking, keeping them soft.
Best Sauces and Condiments for This peanut butter thumbprint cookie recipe with hershey kisses
Chocolate Drizzle
Melt ½ cup semi-sweet chocolate chips with 1 tsp coconut oil in the microwave in 20-second intervals, stirring between each. Drizzle over cooled cookies for extra chocolate flair. I use Ghirardelli chips for their smooth texture. ✨
Peanut Butter Glaze
Whisk ½ cup powdered sugar with 2 tbsp creamy peanut butter and 1-2 tbsp milk until smooth. Drizzle lightly over the cookies for a sweet, nutty finish. This pairs beautifully with the chocolate centers.
Caramel Sauce
Warm ¼ cup store-bought caramel sauce in the microwave for 15 seconds, then drizzle over the cookies. The salty-sweet contrast elevates the peanut butter and chocolate combo. I prefer Smucker’s brand for consistency.
Vanilla Ice Cream
Serve warm cookies alongside a scoop of vanilla bean ice cream. The cold creaminess balances the rich, warm cookies perfectly. Use Ben & Jerry’s or your favorite premium brand for the best texture.
Sea Salt Sprinkle
Lightly sprinkle flaky sea salt over the cookies just after baking. This enhances the sweet-salty balance and makes the chocolate pop. A pinch of Maldon salt adds a gourmet touch. 💫
Raspberry Jam
Add ½ tsp raspberry jam to the thumbprint before placing the Hershey’s Kiss. The fruity tang cuts through the richness and adds a vibrant pop of color. I use Bonnie’s jam for its thick consistency.
Nutrition Facts
Frequently Asked Questions
Can I use natural peanut butter?
Stick with commercial brands like Jif or Skippy for best results. Natural peanut butter can be too oily and may cause cookies to spread excessively.
Why press the Kisses in after 8 minutes?
This timing ensures the cookies are set enough to hold the chocolate but still soft enough to create a perfect well. Pressing too early or late can cause cracking or sinking.
How do I prevent the chocolate from melting too much?
Let cookies cool on the baking sheet for 5 minutes before moving. This allows the Kisses to firm up slightly while the cookies finish setting.
Can I freeze the dough?
Yes! Roll dough balls (without Kisses) and freeze for up to 3 months. Bake from frozen, adding 1-2 minutes to the baking time.

- Potato Candy Recipe 1933: Vintage Peanut Butter Roll Delight - October 30, 2026
- Potato Chip Cookie Recipe With Pecans: Buttery Crunch Meets Nutty Richness - October 30, 2026
- Potato Patty Recipe No Egg: Crispy Edges Without the Binder - October 30, 2026