
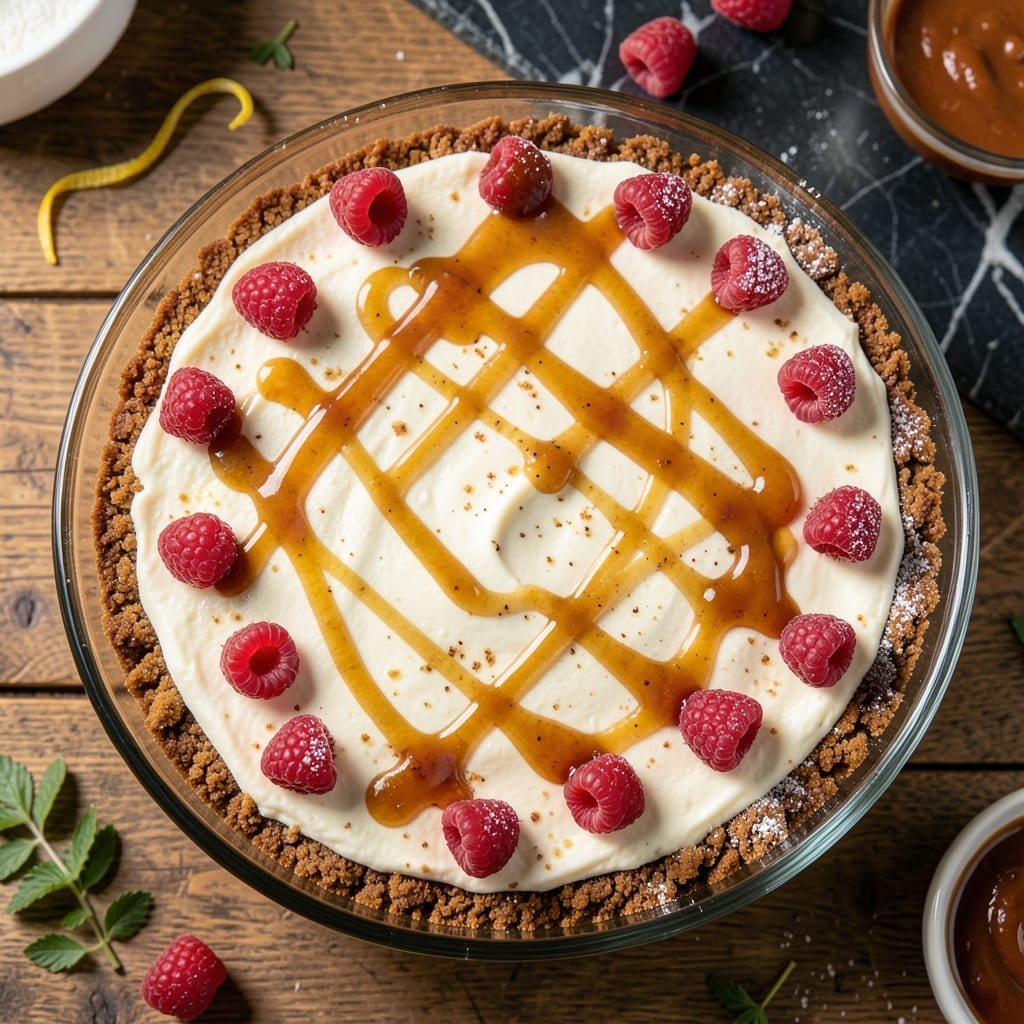
This no-bake cheesecake delivers perfect texture without turning on the oven. I developed this method after testing countless variations to achieve that signature creamy density with minimal effort.
The crust comes together quickly with graham crackers and butter, pressed into a pan and chilled. Meanwhile, the filling combines Philly cream cheese with sweetened condensed milk for a rich, velvety base that sets beautifully in the refrigerator.
What emerges after chilling is a silky-smooth dessert with a firm yet creamy consistency. The contrast between the buttery crust and lush filling creates that classic cheesecake experience we all love.
Top with fresh berries, chocolate sauce, or a sprinkle of nuts for the finishing touch. Here’s everything you need to create this crowd-pleasing treat.
Ingredients for Philly Cream Cheese Cheesecake Recipe No Bake
A handful of pantry staples and fridge finds create this luscious chilled dessert.
| Ingredient | Amount | Notes |
|---|---|---|
| Graham Cracker Crumbs 🍪 | 2 cups | Finely crushed for crust base |
| Unsalted Butter 🧈 | ½ cup | Melted for binding crust |
| Philly Cream Cheese 🧀 | 4 packages | 8 oz each, softened to room temperature |
| Sweetened Condensed Milk 🥛 | 1 can | 14 oz, full-fat variety |
| Pure Vanilla Extract 🌿 | 2 tsp | High-quality for best flavor |
| Fresh Lemon Juice 🍋 | 2 tbsp | Brightens the filling flavor |
| Granulated Sugar 🍚 | ¼ cup | Optional, adjust to taste |
| Heavy Whipping Cream 🥛 | 1 cup | Cold, for lighter texture |
| Fresh Strawberries 🍓 | 1 lb | Hulled and sliced, for topping |
| Blueberries 🫐 | 1 cup | Fresh, for garnish |
| Chocolate Sauce 🍫 | ½ cup | Store-bought or homemade |
| Chopped Nuts 🌰 | ½ cup | Pecans or walnuts recommended |
The cream cheese is non-negotiable here—Philly brand gives that classic tang and smooth texture. Grab the full-fat blocks (not tubs) from any major grocery store. For the graham crackers, Honey Maid or store-brand work equally well (just avoid the cinnamon variety). The butter should be unsalted so you control the salt level. I always keep an extra package of cream cheese in the fridge for spur-of-the-moment desserts like this.
No graham crackers? Digestive biscuits or vanilla wafers crush up just as nicely. Out of sweetened condensed milk? Evaporated milk plus extra sugar in a pinch (though texture won’t be quite as perfect). The lemon juice can be bottled if fresh isn’t available, but fresh really brightens the filling. Want a boozy twist? A tablespoon of bourbon in the filling adds depth (trust me on this one).
The crust keeps 3 days at room temp, but assemble everything the day you plan to serve. The filling needs at least 6 hours to set properly in the fridge—overnight is even better. Leftovers? Cover tightly and refrigerate for up to 5 days (if they last that long).
Why You’ll Love This Recipe
- No Oven Needed: I just mix, chill, and serve—no baking, no stress, just a creamy Philly cheesecake ready in hours.
- Velvety Sweetness: The tang of Philly cream cheese with sweetened condensed milk hits that perfect balance every time.
- Crowd Pleaser: Honestly, it’s my go-to for potlucks, birthdays, even a random Tuesday dessert.
- Budget-Friendly Luxe: A few affordable ingredients like graham crumbs and butter give me restaurant-quality results at home.
Step-by-Step Instructions for Philly Cream Cheese Cheesecake No Bake
This method guarantees a velvety texture with minimal effort and maximum flavor in every bite.
Step 1: Create the Graham Cracker Crust Base
Combine the 2 cups Graham Cracker Crumbs with the 0.5 cup Unsalted Butter in a bowl, stirring until the mixture resembles wet sand and holds together when pressed. I always use melted butter here—it binds the crumbs better than softened butter.
Press this mixture firmly into the bottom of a 9-inch springform pan, using the bottom of a measuring cup to create an even layer. The crust should be compact and uniform—this prevents it from crumbling when you serve the cheesecake. Chill in the refrigerator for 15 minutes to set completely before adding the filling.
Step 2: Whip the Cream Cheese Filling
In a large mixing bowl, beat the 4 packages Philly Cream Cheese until completely smooth and free of lumps. I recommend using an electric mixer on medium-high speed for 2-3 minutes—this ensures a silky texture in your final product.
Gradually add the 1 can Sweetened Condensed Milk, followed by the 2 tsp Pure Vanilla Extract, 2 tbsp Fresh Lemon Juice, and 0.25 cup Granulated Sugar. Mix for another 1-2 minutes until everything is fully incorporated and the mixture is creamy. The lemon juice brightens the sweetness, so don’t skip it.
Step 3: Fold in Whipped Cream for Lightness
In a separate bowl, whip the 1 cup Heavy Whipping Cream to stiff peaks using an electric mixer. This step is crucial—it gives the cheesecake its airy, mousse-like consistency. Be careful not to over-whip, or the cream will turn grainy.
Gently fold the whipped cream into the cream cheese mixture using a silicone spatula. Use a folding motion rather than stirring to maintain as much air as possible. The filling should be smooth, thick, and spreadable. Pour this over the chilled crust and spread evenly with the back of a spoon.
Step 4: Chill and Set the Cheesecake
Cover the springform pan with plastic wrap and refrigerate for at least 6 hours, but preferably overnight. This long chill time allows the filling to set completely and develop its signature creamy texture. I know it’s hard to wait, but patience is key here.
You’ll know it’s ready when the top is firm to the touch and doesn’t jiggle when gently shaken. If you’re in a hurry, you can speed up the process by placing it in the freezer for 3-4 hours, but the texture won’t be quite as smooth.
Step 5: Add Toppings and Serve
Just before serving, top the cheesecake with the 1 lb Fresh Strawberries (sliced), 1 cup Blueberries, a drizzle of 0.5 cup Chocolate Sauce, and a sprinkle of 0.5 cup Chopped Nuts. Arrange the berries in a decorative pattern for a beautiful presentation.
Use a sharp, hot knife to slice the cheesecake cleanly—dip the knife in hot water and wipe it between each cut. Serve immediately, or store covered in the refrigerator for up to 3 days. The toppings add freshness and a delightful contrast to the rich, creamy filling.
Pro Tips For Making Philly Cream Cheese Cheesecake Recipe No Bake
- Soften the Cream Cheese: Let the Philly cream cheese sit at room temperature for at least 2 hours—I learned this the hard way after my first attempt came out lumpy. Cold cream cheese doesn’t blend smoothly with the condensed milk.
- Press the Crust Hard: Pack the graham cracker crumbs and melted butter into the pan with the flat bottom of a glass, pressing firmly for at least 30 seconds. A loose crust turns crumbly when sliced.
- Skip the Overmixing: Fold the condensed milk into the cream cheese just until combined—overmixing adds air, which can create cracks in the finished cheesecake.
- Chill Overnight: After assembling, refrigerate the cheesecake for a full 8 hours or overnight. I was skeptical until I tried it, but shorter chilling times leave the texture too soft.
Essential Equipment for Great philly cream cheese cheesecake recipe no bake
Springform Pan
A 9-inch springform pan is non-negotiable for this recipe. The removable sides make it easy to release the cheesecake without damaging the crust. I use Wilton’s—it’s durable and the non-stick coating works perfectly. David always jokes that this pan gets more use than any other in my kitchen. 💛
Electric Mixer
An electric mixer ensures your cream cheese is perfectly smooth. I recommend a stand mixer with paddle attachment for hands-free mixing, but a hand mixer works too. Beat on medium-high speed for 2-3 minutes to eliminate lumps.
Mixing Bowls
You’ll need at least two large mixing bowls—one for the crust and one for the filling. I prefer stainless steel bowls from Central Market because they’re lightweight and nest for easy storage. They also chill quickly if you need to keep ingredients cold.
Silicone Spatula
A good silicone spatula is essential for folding whipped cream into the filling. It scrapes every bit of mixture from the bowl and folds gently without deflating the cream. I keep a few in different sizes for various tasks.
Measuring Cups
Accurate measurements matter, especially for the crust. Use dry measuring cups for graham cracker crumbs and liquid measuring cups for butter and cream. I love the OXO Good Grips set—it’s what I’ve used since my Johnson & Wales days.
Plastic Wrap
Cover your cheesecake tightly with heavy-duty plastic wrap before chilling. This prevents fridge odors from seeping in and keeps the top from drying out. Press it directly onto the surface for the best seal. 💡
Nutrition Facts
Frequently Asked Questions
Can I use a different type of crust?
Yes! Try crushed vanilla wafers, digestive biscuits, or even Oreo cookies for a chocolate twist.
Why do I need to chill it so long?
The filling needs 6+ hours to set properly in the fridge. This ensures the perfect creamy texture.
What if my filling doesn’t set?
Check your cream cheese was room temperature before mixing. Under-whipped cream or insufficient chilling time are common culprits.
Can I make this ahead of time?
It keeps well covered in the fridge for up to 3 days.

- Potato Candy Recipe 1933: Vintage Peanut Butter Roll Delight - October 30, 2026
- Potato Chip Cookie Recipe With Pecans: Buttery Crunch Meets Nutty Richness - October 30, 2026
- Potato Patty Recipe No Egg: Crispy Edges Without the Binder - October 30, 2026