
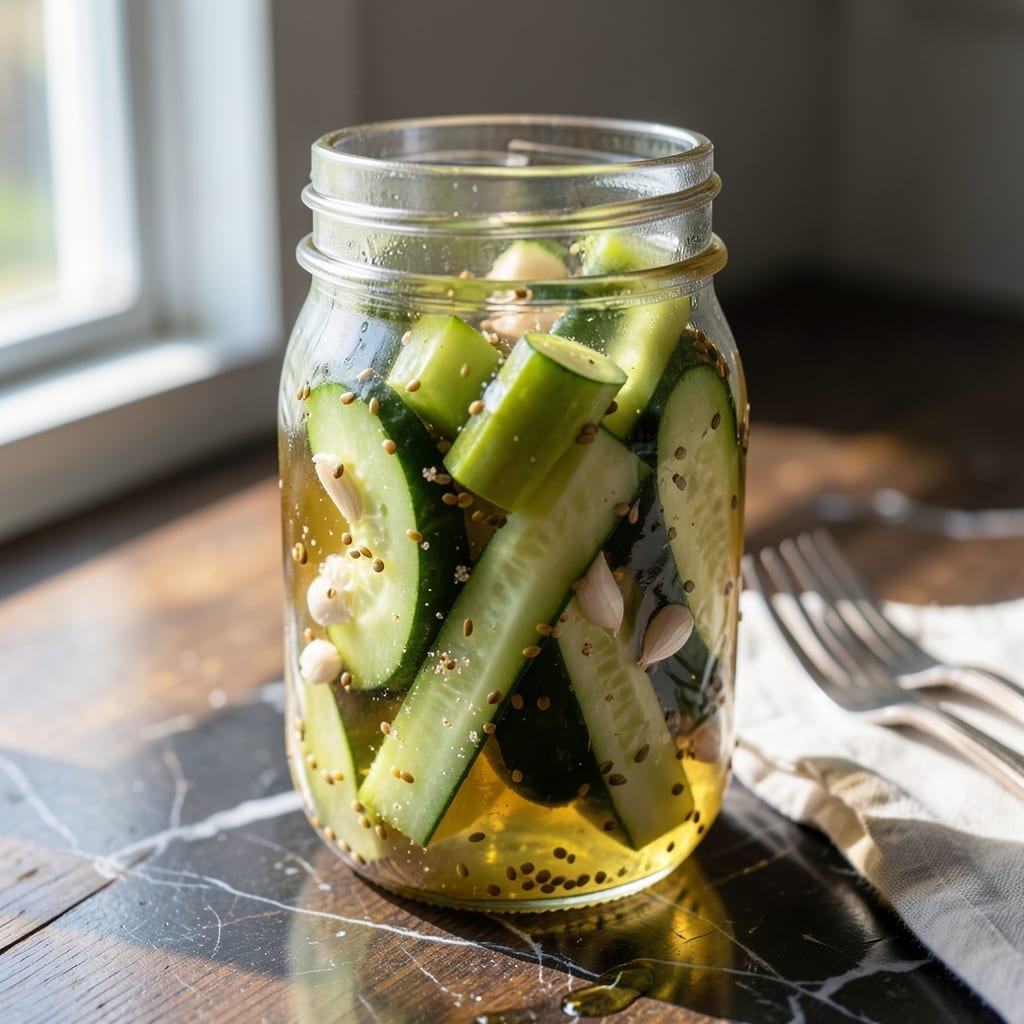
This rice vinegar brine delivers crunchy, tangy homemade pickles with minimal effort. I developed this method after years of experimenting with different vinegars, and rice vinegar consistently produces the best texture and flavor balance.
The simplicity of this approach makes it accessible for any home cook. Just combine rice vinegar with water, salt, and sugar, then pour over fresh vegetables. The gentle acidity of rice vinegar preserves the natural crunch while adding a subtle sweetness.
Within 24 hours, you’ll have pickles that outshine any store-bought version. The vegetables stay crisp, the brine remains clear, and the flavor develops beautifully over time. This technique works for cucumbers, carrots, radishes, or any vegetable you want to preserve.
Store in the refrigerator for up to one month, though they rarely last that long. The process is straightforward, and the results are consistently impressive.
Ingredients for Pickle Recipe Rice Vinegar
Ten simple ingredients create a zesty brine for crisp, tangy homemade pickles in no time.
| Ingredient | Amount | Notes |
|---|---|---|
| Rice Vinegar 💧 | 2 cups | Unseasoned variety preferred |
| Water 💧 | 2 cups | Filtered for best clarity |
| Kosher Salt 🧂 | 2 tbsp | Diamond Crystal preferred |
| Granulated Sugar 🍚 | 2 tbsp | Organic cane sugar works too |
| Garlic Cloves 🧄 | 4 cloves | Lightly crushed for infusion |
| Dill Seeds 🌿 | 1 tbsp | Or substitute fresh dill heads |
| Mustard Seeds 🌿 | 1 tsp | Yellow or brown variety |
| Black Peppercorns 🌶️ | 1 tsp | Whole, not pre-ground |
| Red Pepper Flakes 🔥 | ½ tsp | Adjust for heat preference |
| Bay Leaves 🍃 | 2 whole | Dried, for aromatic depth |
The rice vinegar is key here—unseasoned gives you that clean, gentle acidity. I grab mine from Whole Foods or any Asian market (they’ve got the good stuff). The salt matters too: Diamond Crystal kosher salt dissolves perfectly without clouding the brine. Filtered water prevents any weird aftertastes from tap minerals (worth the extra minute).
No dill seeds? Fresh dill heads work great—just tuck them into the jars. Mustard seeds can be swapped for coriander seeds if that’s what you’ve got. The sugar balances the vinegar’s tang, but maple syrup or agave keeps it vegan if you’re avoiding refined sugar. Bay leaves add depth, but skip ’em if you’re in a pinch.
This brine stays crystal clear for up to 1 month in the fridge. The pickles taste best after 24-48 hours but keep improving. Glass jars with tight lids are perfect (I reuse pasta sauce jars). Always use clean, dry veggies—moisture makes them soft.
Why You’ll Love This Recipe
- 5-Minute Brine: I toss everything in a jar and it’s ready before the water boils for pasta.
- Garlic Lovers’ Dream: Honestly, the raw garlic in the rice vinegar gives it that sharp, tangy kick I crave.
- Endless Uses: I use this brine for quick-pickled veggies, marinades, even salad dressing.
- Pantry Hero: Between us, the ingredients cost pennies and last for weeks in the fridge.
Step-by-Step Instructions for Rice Vinegar Pickles
Here’s my proven method for crisp, tangy pickles that stay crunchy for weeks.
Step 1: Prepare the Aromatics and Spices
Lightly crush the 4 cloves Garlic Cloves with the flat side of your knife—just enough to release their oils without pulverizing them. This gentle crushing allows the garlic to infuse the brine without overpowering it.
In a medium saucepan, combine the 1 tbsp Dill Seeds, 1 tsp Mustard Seeds, 1 tsp Black Peppercorns, 0.5 tsp Red Pepper Flakes, and 2 whole Bay Leaves. Toasting these spices briefly over medium heat for 1-2 minutes wakes up their flavors, but watch closely to avoid burning.
Step 2: Create the Brine Base
Add the 2 cups Water, 2 cups Rice Vinegar, 2 tbsp Kosher Salt, and 2 tbsp Granulated Sugar to the saucepan with the spices. Stir well to combine, then bring the mixture to a boil over high heat.
The sugar should dissolve completely, and the salt will create a clear, well-balanced brine. Once boiling, reduce the heat to low and let it simmer for 3-4 minutes to allow the flavors to meld together. You’ll notice the brine taking on a subtle golden hue from the spices.
Step 3: Cool and Infuse the Brine
Remove the saucepan from heat and let the brine cool to room temperature. This step is crucial—adding hot brine to your vegetables would make them soggy instead of crisp. The cooling process takes about 30-45 minutes, depending on your kitchen’s temperature.
As the brine cools, the spices continue to infuse, creating a complex, aromatic base. I like to give it an occasional stir during this time to ensure even flavor distribution. The garlic cloves will soften slightly, releasing their pungent sweetness into the mix.
Step 4: Pack and Submerge the Vegetables
While the brine cools, pack your vegetables into clean, sterile jars. Pour the cooled brine over the vegetables, ensuring they are completely submerged. Use a spoon to press down gently if needed—this prevents any exposure to air, which could lead to spoilage.
Add the 4 cloves Garlic Cloves to the jars as well, distributing them evenly. The brine should cover everything by at least ½ inch. If you find you’re short on liquid, you can top it up with a little extra Water and Rice Vinegar in the same ratio.
Seal the jars tightly and let them sit at room temperature for 24 hours before transferring to the refrigerator. This initial period allows the flavors to start penetrating the vegetables.
Step 5: Store and Wait for Perfection
Store the jars in the refrigerator for at least 48 hours before eating. I know it’s hard to wait, but this time allows the brine to work its magic, transforming the vegetables into tangy, crunchy pickles with a perfect balance of sweet, salty, and spicy notes.
Your pickles will keep in the refrigerator for up to 1 month, though they’re usually devoured long before then. The Bay Leaves and other spices will continue to develop depth over time, making each batch taste even better as it matures.
Pro Tips For Making Pickle Recipe Rice Vinegar
- Heat the Vinegar: Warm the rice vinegar slightly before mixing—about 110°F—so the sugar and salt dissolve completely without leaving grains at the bottom.
- Crush the Garlic: Lightly crush the garlic cloves with the flat of your knife instead of chopping; it releases flavor without turning the brine bitter.
- Skip the Metal: Use a glass or ceramic bowl for mixing and storing, as metal can react with the vinegar and alter the taste over time.
- Rest Overnight: Let the pickles sit in the brine for at least 12 hours before tasting—I learned this the hard way after sampling too early and getting a harsh bite.
Creative Variations of This Recipe
Asian-Inspired Variation
Swap the dill and mustard seeds for 1 tbsp ginger slices and 1 star anise pod. Add 1 tbsp soy sauce to the brine for umami depth. This creates pickles with an Asian fusion profile that pairs beautifully with sushi or rice bowls. 🌟
Sweet Heat Version
Increase the sugar to ¼ cup and add 1 sliced jalapeño to each jar. The extra sweetness balances the heat from the peppers. I love this variation with carrots and daikon for a quick pickled slaw.
Mediterranean Twist
Replace dill seeds with 1 tbsp dried oregano and 1 tsp fennel seeds. Add ½ tsp crushed dried rosemary to the brine. This works wonderfully with cucumbers, red onions, and bell peppers for a Greek-inspired flavor.
Spicy Garlic Lovers
Double the garlic to 8 cloves and increase red pepper flakes to 1 tsp. Add 1 tsp smoked paprika for depth. This creates bold, garlicky pickles with serious kick. Perfect for sandwiches and charcuterie boards. 🔥
Herb Garden Blend
Add 5 fresh thyme sprigs and 3 fresh basil leaves to each jar. The fresh herbs infuse the brine with aromatic complexity. I recommend using this with zucchini or green beans for a garden-fresh pickle.
Citrus Zing
Add 2 strips of lemon peel and 1 strip of orange peel to the brine. The citrus oils brighten the flavor profile. This variation works particularly well with cauliflower and broccoli florets.
Nutrition Facts
Frequently Asked Questions
Can I use seasoned rice vinegar?
Stick with unseasoned for best results. Seasoned versions contain added sugar and salt, which can throw off the brine’s balance.
How long do these pickles stay crisp?
They keep their crunch for up to 1 month in the fridge. The rice vinegar’s mild acidity preserves texture better than stronger vinegars.
What vegetables work best?
Cucumbers, carrots, and radishes are ideal. For best results, use fresh, firm veggies and pack them tightly in jars.
Why did my brine turn cloudy?
This usually happens with impure water or salt. Use filtered water and Diamond Crystal kosher salt to keep your brine crystal clear.

- Potato Candy Recipe 1933: Vintage Peanut Butter Roll Delight - October 30, 2026
- Potato Chip Cookie Recipe With Pecans: Buttery Crunch Meets Nutty Richness - October 30, 2026
- Potato Patty Recipe No Egg: Crispy Edges Without the Binder - October 30, 2026