
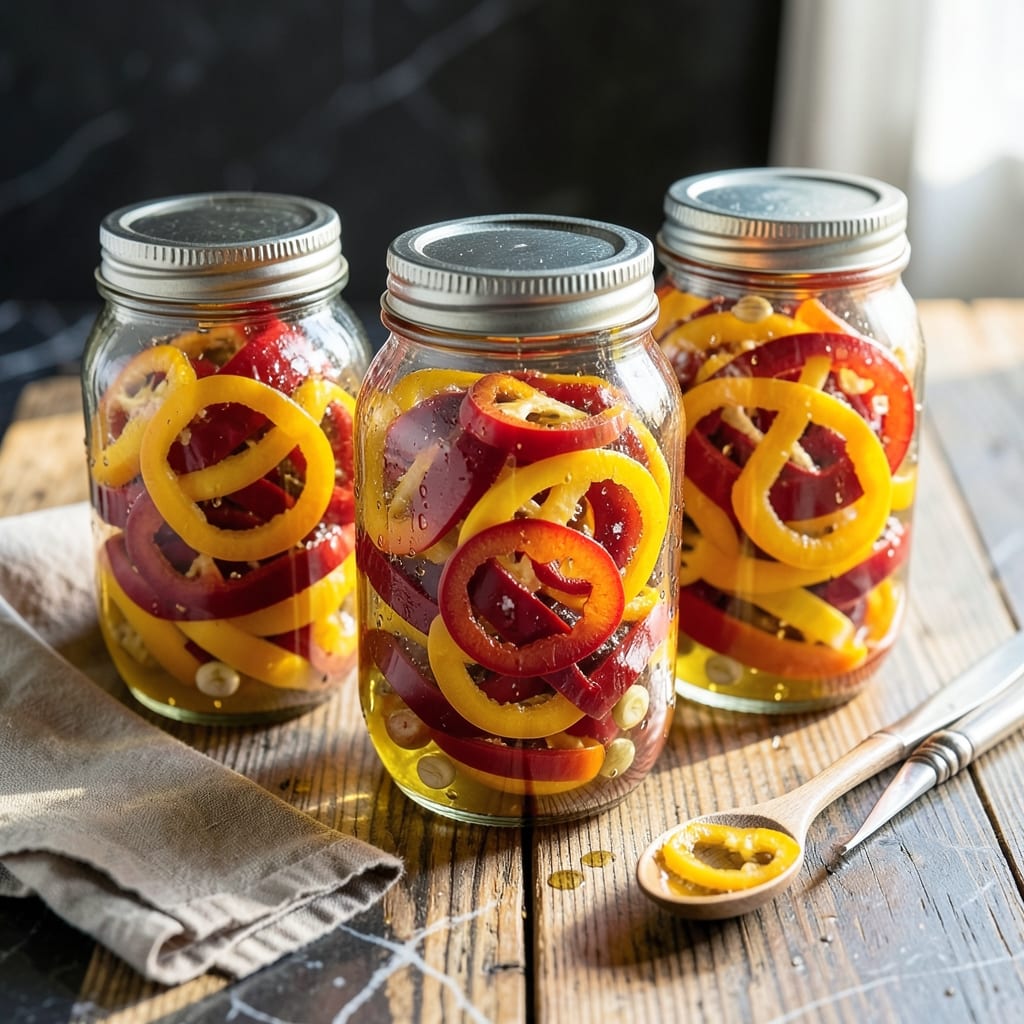
Preserving garden-fresh banana peppers at home delivers crisp, tangy heat you can enjoy all year. This trusted method uses a simple brine and proven canning techniques to lock in flavor and texture.
The process starts with fresh peppers packed into jars, then covered with a vinegar-based brine. Ball canning ensures safe preservation, so you’ll have these versatile peppers ready for sandwiches, salads, or antipasto platters.
What emerges are vibrant yellow rings with a perfect balance of sweetness and mild heat. The brine enhances their natural flavor while maintaining that satisfying crunch that store-bought versions often lack.
Make a batch today and you’ll have pantry staples that keep their quality for months. The result is consistently better than anything you’ll find on grocery shelves.
Ingredients for Pickled Banana Peppers Recipe Ball Canning
Fresh peppers, simple brine, and Ball jars transform into crisp, tangy pickled rings for your pantry.
| Ingredient | Amount | Notes |
|---|---|---|
| Banana Peppers 🌶️ | 4 lb | Fresh, firm, washed and sliced into rings |
| White Vinegar 💧 | 3 cups | 5% acidity for safe preservation |
| Water 💧 | 3 cups | Filtered preferred for clarity |
| Pickling Salt 🧂 | 3 tbsp | Non-iodized, fine grain for brine |
| Granulated Sugar 🍚 | ½ cup | Balances vinegar acidity |
| Garlic Cloves 🧄 | 6 cloves | Peeled, left whole for flavor |
| Mustard Seeds 🌿 | 2 tsp | Yellow or brown variety |
| Dill Seeds 🍃 | 1 tsp | Optional for added depth |
| Red Pepper Flakes 🔥 | 1 tsp | Adjust for heat preference |
The peppers are everything here. Farmers markets or your own garden yield the freshest, firmest banana peppers—look for vibrant yellow skins without blemishes. Ball or Mason jars are essential for safe canning. I grab my pickling salt from Walmart or Target in bulk (the Morton brand is reliable). Avoid iodized salt—it can cloud your brine. The vinegar must be at least 5% acidity for proper preservation.
No banana peppers? Pepperoncini or jalapeños work well too (adjust heat to taste). Short on vinegar? Apple cider vinegar at the same ratio is a fine swap. Skip the mustard seeds? Coriander or celery seeds add a nice twist. For a sweeter pickled pepper, increase sugar to 3/4 cup. The garlic can be omitted, but it adds a depth that’s hard to replicate.
Sealed jars keep at room temperature for up to 12-18 months. Once opened, refrigerate and use within 1 month. Always check for proper sealing before storing. The peppers taste best after 24-48 hours in the fridge—worth the wait for that perfect crunch.
Why You’ll Love This Recipe
- No-Fuss Canning: I toss the peppers and brine in jars and let the water bath do the rest—no stirring, no stress.
- Tangy Sweet Heat: The sugar balances the vinegar’s sharpness, while the peppers keep their crisp bite and gentle kick.
- Pantry MVP: These jars brighten up sandwiches, salads, and charcuterie boards for months.
- Budget Keeper: A bushel of banana peppers turns into a dozen jars for pennies—way cheaper than store-bought.
Step-by-Step Instructions for Pickled Banana Peppers Ball Canning
This method ensures crisp, flavorful peppers with the perfect balance of tang and heat.
Step 1: Prepare the Banana Peppers and Jars
Begin by washing the 4 lb Banana Peppers thoroughly and slicing them into ¼-inch rings. Remove any seeds and membranes if you prefer milder heat. Sterilize your canning jars and lids by boiling them for 10 minutes or running them through a dishwasher cycle with heated dry.
Pack the pepper rings tightly into the prepared jars, leaving ½ inch headspace at the top. Distribute the 6 cloves Garlic Cloves, 2 tsp Mustard Seeds, 1 tsp Dill Seeds, and 1 tsp Red Pepper Flakes evenly among the jars for consistent flavor in every bite.
Step 2: Create the Pickling Brine
In a large saucepan, combine the 3 cups White Vinegar, 3 cups Water, 3 tbsp Pickling Salt, and 0.5 cup Granulated Sugar. Stir well to dissolve the salt and sugar completely before heating. This balance of acidity, salt, and sweetness creates the signature tangy-sweet profile.
Bring the mixture to a rolling boil over medium-high heat, stirring occasionally to prevent the sugar from settling at the bottom. Once boiling, reduce the heat to medium-low and let it simmer for 2-3 minutes to ensure all ingredients are fully incorporated.
Step 3: Fill Jars and Process for Shelf Stability
Carefully ladle the hot brine into the jars, covering the banana peppers completely while maintaining that ½ inch headspace. Use a bubble remover or chopstick to eliminate any air pockets trapped between the pepper rings. Wipe the rims with a clean, damp cloth to ensure a proper seal.
Secure the lids and process the jars in a boiling water bath for 10 minutes (adjust for altitude if necessary). This step is critical for safe preservation. After processing, transfer the jars to a towel-lined countertop and let them cool undisturbed for 12-24 hours.
Step 4: Verify Seals and Store Properly
Once completely cool, check the seals by pressing the center of each lid. A properly sealed lid will have no give when pressed. If any jars didn’t seal, refrigerate those immediately and use within 1 month.
Store your successfully sealed jars in a cool, dark place. The peppers will be ready to enjoy after 48 hours but reach peak flavor after 2-3 weeks. The crisp texture and vibrant tang will keep for up to 1 year when stored properly.
Pro Tips For Making Pickled Banana Peppers Recipe Ball Canning
- Sterilize Jars First: I learned this the hard way—hot vinegar brine in unsterilized jars means mold in a week. Boil your Ball jars and lids for 10 minutes before packing.
- Slice Peppers Evenly: Sounds obvious, but inconsistent slices mean some pieces stay crunchy while others turn mushy. Aim for 1/4-inch thick rings for uniform texture.
- Skip the Iodized Salt: Pickling salt exists for a reason—iodized salt can turn your brine cloudy and leave a bitter aftertaste. It’s worth the extra dollar.
- Use Hot Brine: Pouring cold brine over peppers means they won’t soften properly. Heat your vinegar-water-sugar-salt mix to a boil before filling the jars.
Health Benefits of This Dish
Rich in Vitamins
Banana peppers are packed with vitamin C, providing about 95mg per cup—that’s over 100% of your daily needs. This powerful antioxidant supports immune function and skin health. I always feel a little healthier knowing I’ve got these in my pantry. 💪
Low-Calorie Crunch
These pickled peppers are a guilt-free snack or topping, with just 35 calories per cup. The brining process preserves their natural crispness without adding significant calories, making them perfect for weight-conscious diets.
Digestive Benefits
The vinegar brine in these peppers contains acetic acid, which supports gut health by promoting the growth of beneficial bacteria. This can help with digestion and may even improve nutrient absorption from other foods.
Antioxidant Boost
Banana peppers contain capsaicin and flavonoids, compounds that act as antioxidants in your body. These help combat oxidative stress and inflammation, which are linked to chronic diseases. The pickling process preserves these beneficial compounds.
Hydration Support
With a high water content, these peppers contribute to your daily hydration needs. The vinegar brine also contains electrolytes like sodium and potassium, which can help maintain fluid balance in your body.
Versatile Nutrition
These peppers provide small amounts of vitamin A, fiber, and iron. While not huge sources, they add up over time when you incorporate them into meals regularly. I love that they bring both flavor and nutrition to the table.
Nutrition Facts
Frequently Asked Questions
How long do I need to wait before eating them?
You can enjoy them after 48 hours in the fridge, but they reach peak flavor after 2-3 weeks. The longer they sit, the more the flavors meld together.
Can I use apple cider vinegar instead of white?
Yes, just ensure it has at least 5% acidity for safe preservation. The flavor will be slightly fruitier, but the process remains the same.
What if my jars don’t seal properly?
Refrigerate unsealed jars immediately and use within 1 month. Proper sealing is critical for long-term storage at room temperature.
Do I need to remove the seeds before pickling?
Not required, but removing them reduces heat. Leave some in for extra spice or remove all for a milder flavor.

- Potato Candy Recipe 1933: Vintage Peanut Butter Roll Delight - October 30, 2026
- Potato Chip Cookie Recipe With Pecans: Buttery Crunch Meets Nutty Richness - October 30, 2026
- Potato Patty Recipe No Egg: Crispy Edges Without the Binder - October 30, 2026