
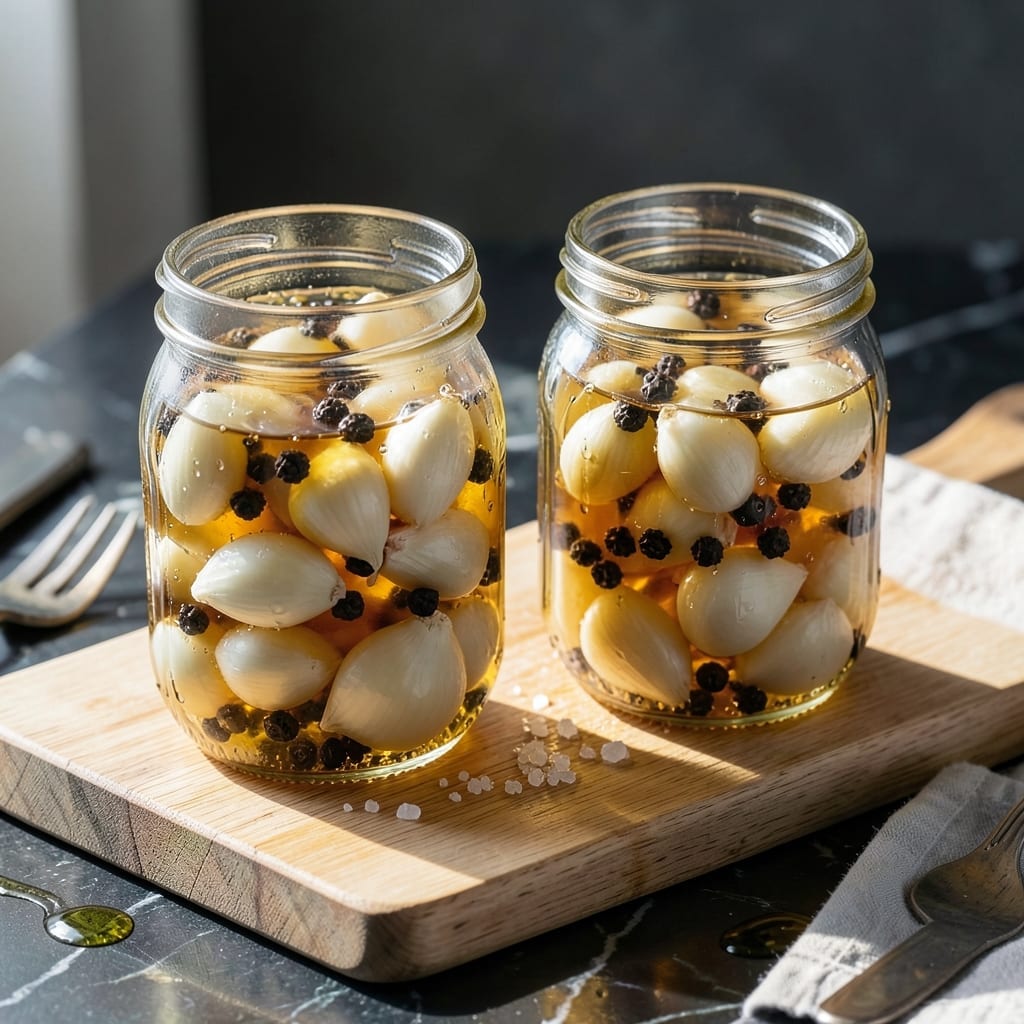
This pickling method transforms raw garlic into a tangy, versatile condiment with exceptional shelf life. The apple cider vinegar base creates a zesty flavor profile that enhances many dishes.
With a precise ratio of vinegar to water and simple seasonings, this recipe ensures consistent results. The process requires minimal hands-on time while delivering maximum flavor impact.
Store these pickled cloves in the refrigerator for up to 6 months, ready to elevate salads, sandwiches, or charcuterie boards. The flavor actually improves with time.
The crisp texture and balanced acidity make this a pantry staple worth keeping on hand. Perfect for adding brightness to any meal.
Ingredients for Pickled Garlic Recipe Apple Cider Vinegar
Nine simple ingredients create this zesty, long-lasting condiment with minimal effort required.
| Ingredient | Amount | Notes |
|---|---|---|
| Garlic Cloves 🧄 | 20 cloves | Peeled, whole or halved |
| Apple Cider Vinegar 🍏 | 1 ½ cups | Raw, unfiltered preferred |
| Water 💧 | 1 ½ cups | Filtered or distilled |
| Granulated Sugar 🍚 | 1 tbsp | Organic or white granulated |
| Sea Salt 🧂 | 1 tsp | Fine grain preferred |
| Black Peppercorns 🌶️ | 1 tsp | Whole, for pickling |
| Red Pepper Flakes 🌶️ | ½ tsp | Adjust for heat preference |
| Bay Leaves 🍃 | 2 whole | Dried, for aromatics |
| Dried Thyme 🌿 | ½ tsp | Crushed for even distribution |
The garlic quality directly impacts the final product. Organic garlic cloves from Whole Foods or your local farmers market offer superior flavor. Ensure cloves are firm and free of green sprouts. The apple cider vinegar should be raw and unfiltered—Bragg is a reliable brand. For the water, filtered or distilled produces the clearest brine. The ratio of vinegar to water must remain precise for consistent pickling results.
For heat adjustments, reduce or omit red pepper flakes entirely. The sea salt can be substituted with kosher salt at the same volume, but avoid iodized table salt. If fresh herbs are preferred, use sprigs of thyme at triple the dried amount. The sugar balances acidity—maple syrup or agave can replace it at a 1:1 ratio for a vegan-friendly option.
Store in a clean, airtight glass jar for optimal freshness. Keeps in the refrigerator for up to 6 months. The flavor profile intensifies over time. Always use a clean, dry utensil when removing cloves to prevent contamination.
Why You’ll Love This Recipe
- Five-Minute Prep: I just peel the garlic, toss it in a jar with apple cider vinegar, sugar, and salt—no chopping, no fuss.
- Sweet-Tangy Bite: The apple cider vinegar mellows the garlic’s sharpness into this addictive sweet-sour crunch I sneak from the fridge.
- Pantry Superhero: I drop these into dressings, stir into soups, or eat straight—they last weeks and brighten everything.
- Pennywise Flavor: A pound of garlic and a bottle of vinegar cost less than a fancy condiment, yet taste like a gourmet secret.
Step-by-Step Instructions for Pickled Garlic in Apple Cider Vinegar
This method ensures perfectly preserved garlic with bright acidity and complex aromatics every time.
Step 1: Prepare and Sterilize the Jars
Begin by thoroughly washing 2 pint-sized mason jars and their lids in hot, soapy water. Rinse well and place them on a clean kitchen towel to air-dry. I recommend using wide-mouth jars for easier packing of the garlic cloves.
While the jars dry, prepare a boiling water bath by bringing a large pot of water to a rolling boil. This step is crucial for creating a sterile environment that prevents spoilage and extends shelf life.
Step 2: Pack the Garlic and Aromatics
Peel all 20 cloves Garlic Cloves and pack them tightly into the sterilized jars, leaving about ½ inch of headspace at the top. For even more flavor distribution, you can halve the cloves lengthwise before packing.
Add 1 tsp Black Peppercorns, 0.5 tsp Red Pepper Flakes, 2 whole Bay Leaves, and 0.5 tsp Dried Thyme to each jar. Distribute these aromatics evenly among the garlic cloves for balanced flavor in every bite.
Step 3: Create the Pickling Brine
In a medium saucepan, combine 1.5 cups Apple Cider Vinegar, 1.5 cups Water, 1 tbsp Granulated Sugar, and 1 tsp Sea Salt. Bring this mixture to a gentle boil over medium-high heat, stirring until the sugar and salt are completely dissolved.
This brine delivers the perfect balance of tangy acidity and subtle sweetness that complements the garlic’s natural pungency. The apple cider vinegar provides a fruitier profile than white vinegar, while the sugar rounds out the sharpness.
Step 4: Fill and Seal the Jars
Carefully pour the hot brine into each jar, completely submerging the garlic cloves and aromatics. Use a clean spoon to press down gently on the contents, removing any air bubbles and ensuring all cloves are fully covered by the liquid.
Wipe the rims of the jars with a clean, damp cloth to remove any residue that might prevent a proper seal. Place the lids on the jars and screw on the bands until fingertip-tight—don’t overtighten, as this can prevent proper sealing during processing.
Step 5: Process and Store
Place the filled jars in the boiling water bath, ensuring they’re completely submerged by at least 1 inch of water. Process for 10 minutes to create a vacuum seal. After processing, carefully remove the jars and place them on a clean towel to cool completely.
You’ll hear the satisfying “ping” of the lids sealing as they cool. Once cooled to room temperature, check the seals by pressing on the center of each lid—if it doesn’t pop, the jar is properly sealed. Store in a cool, dark place for at least 24 hours before consuming to allow the flavors to fully develop. The pickled garlic will keep for up to 6 months unopened, and 1 month in the refrigerator after opening.
Pro Tips For Making Pickled Garlic Recipe Apple Cider Vinegar
- Peel the Cloves: Sounds tedious, but unpeeled garlic won’t absorb the brine as well—I learned this the hard way after finding tough, bitter cloves in my first batch.
- Boil the Brine: Dissolve the sugar and salt in the vinegar and water over medium heat first, then cool completely before pouring over the garlic. Hot brine can cook the garlic and turn it mushy.
- Use Fresh Vinegar: Apple cider vinegar loses its sharpness over time, so check the bottle’s date—old vinegar makes for dull, flat pickles.
- Wait 2 Weeks: I’ve tried eating them after 3 days, but the flavor doesn’t fully develop until at least 14 days in the fridge. Patience actually changes the outcome.
Make-Ahead Tips for This Dish
Prep Ahead Strategy
I always peel all 20 cloves Garlic Cloves the night before and store them in cold water in the fridge. This saves time and prevents the cloves from browning. The water also helps remove any lingering papery bits. 💡
Brine Preparation
You can make the brine up to 24 hours in advance and store it in the refrigerator. Just reheat it gently before pouring over the garlic. This works especially well if you’re making multiple batches.
Jar Sterilization
Sterilize your pint-sized mason jars up to 1 week ahead and store them in a clean, dust-free cabinet. When ready to use, just give them a quick rinse with hot water before packing.
Flavor Development
For the best flavor, prepare this at least 3 days before you plan to use it. The garlic mellows and the flavors meld beautifully over time. I find the taste peaks around 2 weeks. ⏰
Batch Processing
This recipe scales perfectly—just maintain the 1:1 vinegar to water ratio. I often triple the batch and process all jars at once. The water bath can handle 4-6 pint jars comfortably in a standard stockpot.
Storage Timing
After processing, let the jars cool completely (about 12 hours) before storing. This prevents temperature fluctuations that could compromise the seal. The “ping” sound is your confirmation of a perfect seal. 🎯
Nutrition Facts
Frequently Asked Questions
How long should I wait before eating?
Wait at least 24 hours for basic flavor development. For best results, let it sit for 3 days to 2 weeks—the garlic mellows and the taste becomes more complex over time.
Can I reuse the pickling liquid?
Yes, you can reuse the brine for another batch if it’s still clear and smells fresh. Bring it back to a boil first to ensure safety. The flavor will be milder the second time.
What if my jars didn’t seal?
If the lid pops when pressed, refrigerate and use within 1 month. For long-term storage, reprocess with a new lid or transfer to a clean jar with a fresh brine.
Can I adjust the spice level?
Easily modify heat by reducing or omitting red pepper flakes. For extra spice, add a pinch more or include a sliced chili in each jar.

- Potato Candy Recipe 1933: Vintage Peanut Butter Roll Delight - October 30, 2026
- Potato Chip Cookie Recipe With Pecans: Buttery Crunch Meets Nutty Richness - October 30, 2026
- Potato Patty Recipe No Egg: Crispy Edges Without the Binder - October 30, 2026