
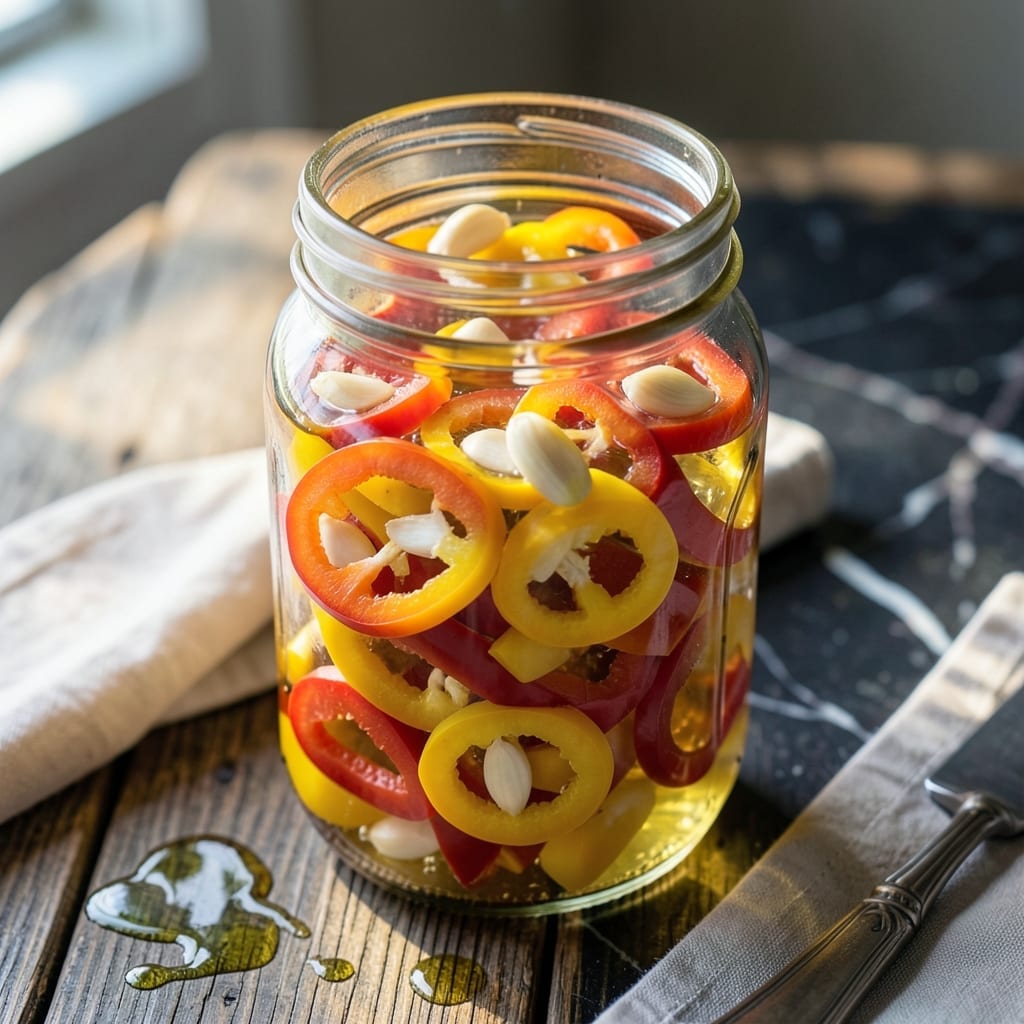
This spicy brine transforms fresh hot banana peppers into tangy, crisp pickles that elevate sandwiches and charcuterie boards. The process is straightforward, requiring only basic canning equipment and a few pantry staples.
The key is a balanced vinegar solution with just enough heat to complement the peppers’ natural spice. I’ve refined this method to ensure consistent texture and flavor every time.
Once jarred, these pickled peppers develop depth over time, making them perfect for meal prep or gifting. Their bold, tangy kick adds brightness to rich dishes.
Store in a cool, dark place for up to six months, and always use clean utensils to preserve freshness.
Ingredients for Pickled Hot Banana Peppers Recipe Pioneer Woman
Fresh banana peppers meet a tangy vinegar brine with bold spices for pickling perfection.
| Ingredient | Amount | Notes |
|---|---|---|
| Hot Banana Peppers 🌶️ | 2 lb | Fresh, stems removed, sliced into rings |
| White Vinegar 💧 | 3 cups | 5% acidity for preservation |
| Water 💧 | 1 cup | Filtered for best flavor |
| Pickling Salt 🧂 | 2 tbsp | Non-iodized, coarse grain |
| Granulated Sugar 🍚 | 2 tbsp | Balances vinegar acidity |
| Garlic Cloves 🧄 | 6 cloves | Peeled, smashed for flavor |
| Mustard Seeds 🌿 | 1 tbsp | Whole seeds for texture |
| Black Peppercorns 🌶️ | 1 tsp | Whole for infused flavor |
| Red Pepper Flakes 🔥 | 1 tsp | Adjust for desired heat level |
The peppers are everything here. Farmers markets often have the freshest hot banana peppers in late summer, but most grocery stores carry them year-round (look for bright yellow, firm skins). For the vinegar, 5% acidity is non-negotiable for safe preservation. Ball or Heinz are reliable brands. Pickling salt is a must—iodized table salt can cloud the brine.
No pickling salt? Kosher salt at a 1:1 ratio works in a pinch (just avoid table salt). Swap mustard seeds for celery seeds if you prefer a different flavor profile. Fresh garlic is best, but garlic powder at one-quarter the amount can substitute. The sugar can be reduced slightly, but don’t skip it entirely—it tempers the vinegar’s sharpness.
These pickles improve with age. Let them sit in a cool, dark place for at least 24 hours before eating, but they’re best after 2-3 weeks. Once opened, refrigerate and use within 1 month. Always use clean utensils to avoid contamination.
Why You’ll Love This Recipe
- 5-Minute Prep: I slice the peppers, boil the brine, and jar them—no fancy steps, just straightforward pickling.
- Tangy Heat: That sweet vinegar kick with a slow-building burn from the peppers? I crave it straight from the jar.
- Pantry MVP: I toss these on nachos, sandwiches, even scrambled eggs. Honestly, they brighten up everything.
- Fridge Staple: One batch lasts me months, and the cost per jar is pennies compared to store-bought.
Step-by-Step Instructions for Pickled Hot Banana Peppers
This method ensures crisp peppers with perfectly balanced heat and tang every time.
Step 1: Prepare the Peppers and Sterilize Jars
Wash the 2 lb Hot Banana Peppers thoroughly and pat them completely dry. Remove the stems and slice them into uniform ¼-inch rings. The thickness matters—too thick and they won’t absorb the brine properly; too thin and they’ll turn mushy.
While you work, place 4 pint-sized mason jars and their lids in a large pot of water. Bring to a boil for 10 minutes to sterilize. This step prevents contamination and ensures your pickles stay fresh for months. Keep the jars hot until you’re ready to fill them.
Step 2: Make the Pickling Brine
In a medium saucepan, combine the 3 cups White Vinegar, 1 cup Water, 2 tbsp Pickling Salt, and 2 tbsp Granulated Sugar. Stir well and bring to a boil over medium-high heat, stirring until the salt and sugar fully dissolve.
Once boiling, reduce the heat to low and add the 6 cloves Garlic Cloves, 1 tbsp Mustard Seeds, 1 tsp Black Peppercorns, and 1 tsp Red Pepper Flakes. Let the mixture simmer for 5 minutes to infuse the flavors. The brine should be fragrant with a visible shimmer on the surface.
Step 3: Pack the Jars and Add the Brine
Carefully pack the sliced peppers into the sterilized jars, leaving ½ inch of headspace at the top. Distribute the garlic cloves, mustard seeds, black peppercorns, and red pepper flakes evenly among the jars for consistent flavor in every bite.
Ladle the hot brine into the jars, ensuring the peppers are completely submerged. Tap the jars gently on the counter to remove any air bubbles. Wipe the rims clean with a damp cloth to ensure a proper seal.
Step 4: Process and Store the Jars
Seal the jars with their lids and place them back in the pot of boiling water. Make sure the jars are fully submerged. Process for 10 minutes to create a vacuum seal. This step is non-negotiable for shelf stability.
Remove the jars with a jar lifter and place them on a towel-lined countertop to cool. You’ll hear a satisfying “pop” as each jar seals—this is the sound of success. Let them cool completely at room temperature, then store in a cool, dark place. Wait at least 24 hours before opening to allow the flavors to develop fully.
Pro Tips For Making Pickled Hot Banana Peppers Recipe Pioneer Woman
- Slice Evenly: Cut the banana peppers into uniform rings, about 1/4-inch thick—this guarantees even pickling and a consistent texture in every bite.
- Sterilize Jars: Boil your jars and lids for 10 minutes before filling. I learned this the hard way after my first batch grew mold.
- Skip Tap Water: Use filtered or bottled water instead of tap water to avoid chlorine, which can mess with the fermentation and flavor.
- Heat the Brine: Dissolve the sugar and salt in the vinegar and water over medium heat before pouring—cold brine won’t incorporate the seasonings properly.
Make-Ahead Tips for This pickled hot banana peppers recipe pioneer woman
Prep Ahead Strategy
I always slice and pack the 2 lb Hot Banana Peppers into jars the night before. This saves 20-30 minutes on pickling day. Just cover them with cold water and refrigerate overnight to keep them crisp. 💡
Brine Prep Shortcut
Mix your 3 cups White Vinegar, 1 cup Water, and spices in a pot and store it covered in the fridge. The next day, just bring it to a boil and pour it over your peppers. This works because the flavors won’t develop until the brine is heated.
Jar Sterilization Timing
Sterilize your 4 pint-sized mason jars while the brine simmers. By the time the brine is ready, your jars will be hot and ready to fill. This parallel processing cuts your total active time nearly in half.
Batch Processing
Double or triple the recipe effortlessly—the brine ratio stays the same. I regularly do 6 lb of peppers at once. Just ensure your pot is large enough to submerge all jars during processing. ⚡
Flavor Development
For best results, prepare your pickles 2-3 weeks before you plan to serve them. The flavors meld beautifully over time. I often make a batch in early summer to enjoy through fall.
Storage Ready
Once cooled and sealed, store in a cool, dark place for up to 6 months. Label with the date so you can track their perfect aging period. The wait is always worth it.
Nutrition Facts
Frequently Asked Questions
Can I use apple cider vinegar instead of white?
Yes, but it will change the flavor profile. Apple cider vinegar adds a fruity note that works well with the peppers’ heat. Stick to 5% acidity for safety.
How do I know if my jars sealed properly?
Check the lids after 24 hours. If the center doesn’t pop up when pressed, it’s sealed. Refrigerate any unsealed jars and use within 1 month.
What’s the best way to slice the peppers?
Use a sharp knife to cut uniform ¼-inch rings. Wear gloves to protect your hands from the oils. Consistent thickness ensures even brining.
Can I add other vegetables to the jars?
Try adding onions, carrots, or cauliflower. Just ensure all veggies are fully submerged in brine and processed for 10 minutes.

- Potato Candy Recipe 1933: Vintage Peanut Butter Roll Delight - October 30, 2026
- Potato Chip Cookie Recipe With Pecans: Buttery Crunch Meets Nutty Richness - October 30, 2026
- Potato Patty Recipe No Egg: Crispy Edges Without the Binder - October 30, 2026