
There’s a science to achieving perfectly flaky pie crust, and it starts with cold butter and precise technique. This method delivers layers that shatter with every bite, creating the ideal foundation for both sweet and savory pies.
The key is cutting the butter into the flour until pea-sized crumbs form, then chilling the dough to prevent overworking. This ensures the butter stays intact, creating steam during baking that lifts the crust into distinct, delicate layers.
With a golden brown finish and tender texture, this crust holds its shape without shrinking or toughening. The result is a buttery, flaky base that elevates any filling you choose to pair with it.
Master this recipe, and you’ll never settle for store-bought crust again. The process is straightforward, but the results are anything but ordinary.
Ingredients for Pie Crust Recipe Butter
Cold butter and flour create those flaky layers everyone loves in a perfect crust.
| Ingredient | Amount | Notes |
|---|---|---|
| All-Purpose Flour 🌾 | 2 ½ cups | Spoon and level, plus extra for dusting |
| Unsalted Butter 🧈 | 1 cup | Cold, cut into small cubes |
| Ice Water 💧 | ¼ cup | Plus 1 tbsp as needed |
| Granulated Sugar 🍚 | 1 tsp | Optional, for sweet pies |
| Salt 🧂 | 1 tsp | Fine sea salt preferred |
| Apple Cider Vinegar 🍏 | 1 tsp | Or white vinegar |
| Egg 🥚 | 1 whole | Optional, for extra flakiness |
The butter is non-negotiable here. Use high-fat European-style for maximum flakiness—Plugrá or Kerrygold are ideal. It must stay cold, so cube it and chill the bowl too. The flour? Standard all-purpose works, but King Arthur has the protein content that gives you that delicate crumb. Don’t overthink it—just keep everything ice cold until baking.
No unsalted butter? Reduce added salt by half if using salted. Out of vinegar? Lemon juice works the same. For a vegan version, swap butter for cold coconut oil and skip the egg. The vinegar tenderizes the gluten—don’t skip it. If your kitchen is warm, chill the flour for 30 minutes before starting (worth the extra step).
Dough keeps wrapped tightly in plastic for 2 days in the fridge, or freeze for 3 months. Let it warm slightly before rolling—cold dough cracks. Baked crusts stay crisp for 24 hours at room temperature in an airtight container.
Why You’ll Love This Recipe
- 5-Minute Mix: I just pulse the cold butter and flour in my food processor—no fancy techniques, no fuss.
- Buttery Heaven: That rich, flaky texture from the unsalted butter? Honestly, it’s the reason I make pie at all.
- Freezer Friendly: I always double the batch and freeze one—perfect for spontaneous apple pie cravings.
- Pantry Staples: All-purpose flour, butter, sugar, salt. Between us, I already have these on hand.
Step-by-Step Instructions for Pie Crust Butter
Follow this method precisely and you’ll achieve perfectly flaky, golden brown crust every time.
Step 1: Combine Dry Ingredients and Cut in Cold Butter
In a large bowl, whisk together the 2.5 cups All-Purpose Flour, 1 tsp Granulated Sugar, and 1 tsp Salt until evenly distributed. The sugar adds a subtle sweetness while the salt enhances all the flavors in your creation.
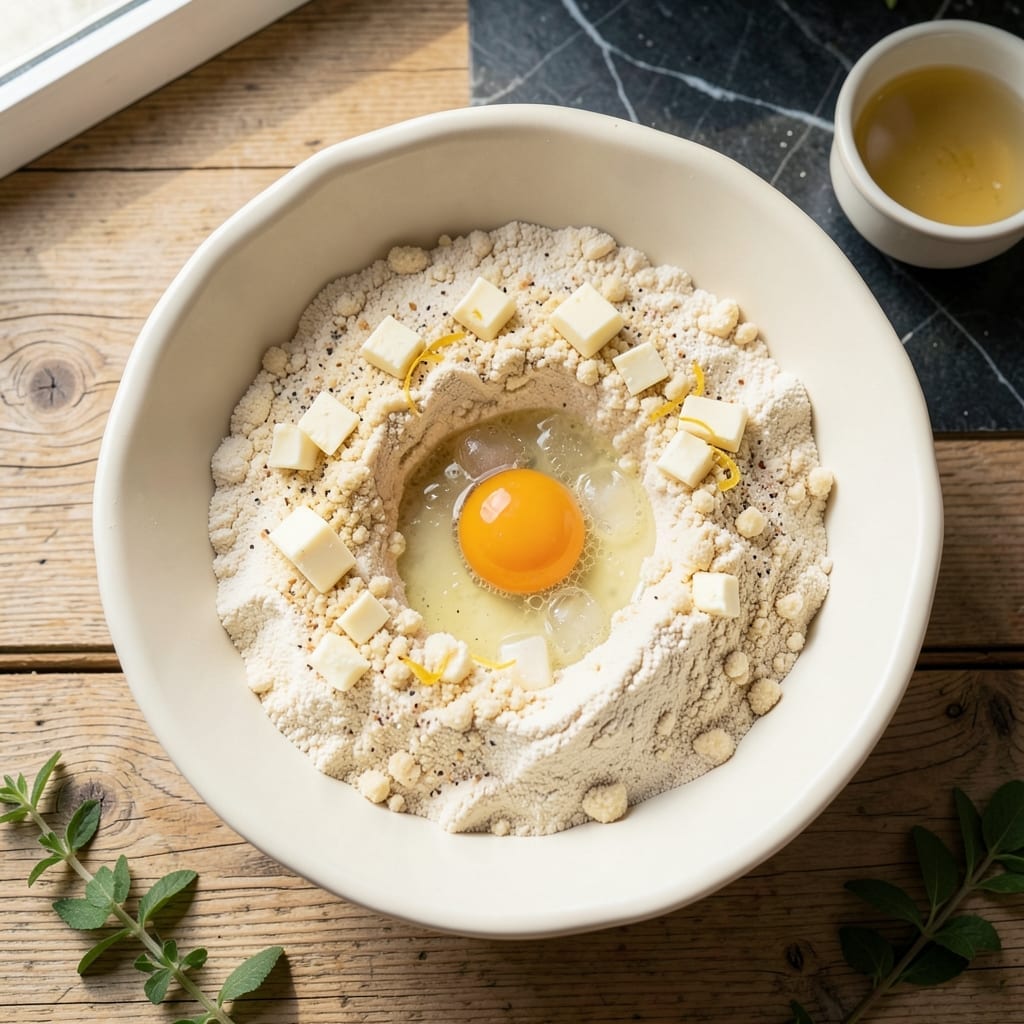
Add the 1 cup Unsalted Butter cubes to the flour mixture. Using a pastry cutter or your fingertips, work the butter into the flour until the mixture resembles coarse crumbs with pea-sized butter pieces visible. I prefer using my hands for this step—it gives me better control and helps me feel when the texture is right.
Step 2: Incorporate Wet Ingredients for Flakiness
Create a well in the center of the flour-butter mixture. Add the 1 whole Egg, 0.25 cup Ice Water, and 1 tsp Apple Cider Vinegar. The vinegar tenderizes the gluten for a more delicate texture, while the egg adds richness and structure.
Using a fork, gently mix the wet ingredients into the dry, being careful not to overwork the dough. The mixture will look shaggy and slightly dry—that’s exactly what you want at this stage. The visible butter pieces will create those coveted flaky layers as it bakes.
Step 3: Knead Briefly and Chill for Optimal Texture
Turn the dough out onto a lightly floured surface and gently knead it just until it comes together—about 4-5 folds. Overworking the dough develops gluten, which makes the crust tough instead of tender and flaky.
Shape the dough into a disk, wrap it tightly in plastic wrap, and refrigerate for at least 1 hour (or up to 2 days). This chilling step is crucial—it relaxes the gluten, solidifies the butter, and prevents shrinking during baking. The colder the dough, the flakier your crust will be.
Step 4: Roll and Shape for Perfect Fit
On a well-floured surface, roll out the chilled dough to about ⅛-inch thickness, rotating the dough 90 degrees after each pass to maintain an even shape. If the dough starts to stick, sprinkle more flour underneath—don’t be shy with the flour at this stage.
For a standard 9-inch pie plate, you’ll want to roll the dough to about 12 inches in diameter. This gives you enough overhang to create a beautiful crimped edge. Transfer the dough to your pie plate by rolling it loosely around your rolling pin, then unrolling it into the plate.
Step 5: Blind Bake for Golden Brown Finish
Preheat your oven to 375°F. For a pre-baked crust, line the dough with parchment paper and fill it with pie weights or dried beans. This prevents the crust from puffing up during baking.
Bake for 15-18 minutes until the edges are just starting to turn light golden brown. Remove the weights and parchment, then bake for an additional 5-8 minutes until the entire crust is golden brown and looks dry. For a filled pie, proceed with your filling and bake according to your recipe’s instructions.
Pro Tips For Making Pie Crust Recipe Butter
- Chill the Butter: Cut your unsalted butter into 1/2-inch cubes and refrigerate for 15 minutes before mixing—this keeps it cold enough to create flaky layers instead of a dense crust.
- Use Ice-Cold Water: I learned this the hard way: even slightly warm water can melt the butter, so keep your water icy and measure it after chilling.
- Skip Overworking: After burning three batches, I finally figured out that handling the dough too much develops gluten, making the crust tough instead of tender.
- Rest the Dough: Give it a solid 30 minutes in the fridge before rolling—this relaxes the gluten and makes it easier to shape without cracking.
Pro Cooking Tips for This Recipe
Butter Temperature Control
Keep your 1 cup Unsalted Butter ice cold—cube it and chill the bowl too. I use European-style butter like Plugrá for its higher fat content. If it softens, pop it back in the freezer for 5-10 minutes. Cold butter equals flaky layers. ❄️
Flour Selection Matters
King Arthur All-Purpose Flour is my go-to for consistent protein content. Spoon and level your 2.5 cups—don’t scoop directly from the bag. This prevents packed flour that can make your crust dense.
Perfect Cutting Technique
Use a pastry cutter or your fingertips to work the butter into the flour until pea-sized crumbs form. I prefer fingertips for better control. Avoid overmixing—visible butter pieces mean flaky layers later.
Chilling is Non-Negotiable
After mixing, wrap your dough disk tightly and refrigerate for at least 1 hour. This relaxes the gluten and prevents shrinking. For extra flakiness, chill for 24 hours—the wait is worth it. 💡
Rolling Without Tears
Roll on a well-floured surface to ⅛-inch thickness, rotating 90 degrees after each pass. If it cracks, let it warm slightly—cold dough is brittle. Use a 9-inch pie plate as your size guide.
Blind Baking Success
Preheat to 375°F and bake with pie weights for 15-18 minutes. Remove weights, then bake until golden brown. For filled pies, dock the bottom with a fork to prevent puffing.
Nutrition Facts
Frequently Asked Questions
Why must the butter stay cold?
Cold butter creates steam during baking, which lifts the layers for that perfect flaky texture. If it melts before baking, your crust will be dense and tough, not light and tender.
Can I use salted butter instead?
Yes, but reduce the added salt by ½ tsp to balance the flavor. The salt content in salted butter varies by brand, so taste as you go.
How do I prevent the crust from shrinking?
Chill the dough for at least 1 hour before rolling, and avoid overworking it. This relaxes the gluten and keeps the butter solid, preventing shrinkage during baking.
What if my dough cracks while rolling?
Let it warm slightly at room temperature for 5-10 minutes. Cold dough is brittle, but a brief rest makes it more pliable. Patch any cracks with extra dough.

- BBQ Sausage Recipe Oven: Smoky Depth Without the Grill - September 28, 2026
- BBQ Chicken Bowl Recipe Rice: Smoky Sweetness Over Fluffy Grains - September 28, 2026
- Beef Cutlet Recipe Ideas: Crispy Breaded Patties With Bold Seasonings - September 28, 2026