
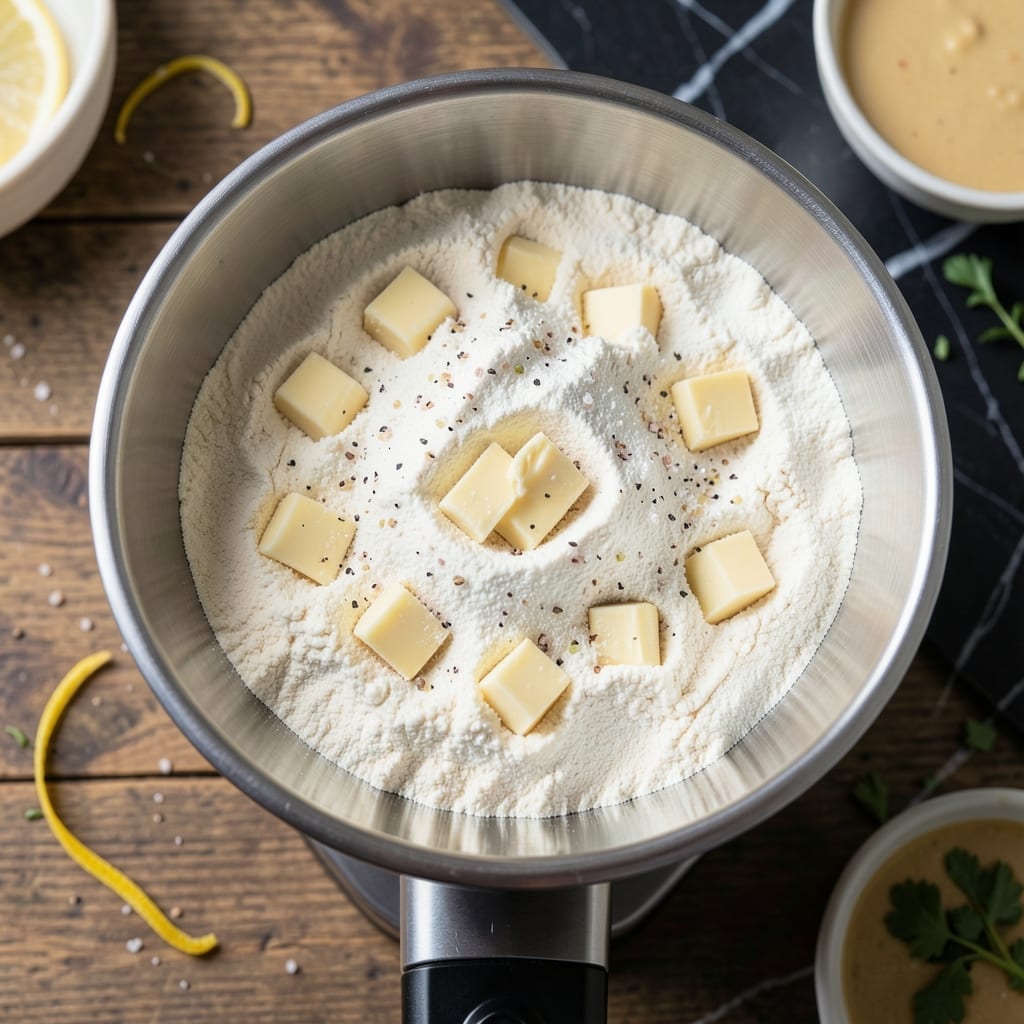
This food processor method delivers consistently flaky, tender pie crust with minimal effort. No more overworked dough or tough results.
After years of hand-cutting butter into flour, I discovered the processor creates perfect pea-sized butter pieces in seconds. The key is chilled ingredients and pulse control.
The result is a golden, restaurant-quality crust that holds its shape during baking. Ideal for pies, tarts, or quiches.
Ready in under 15 minutes with just 5 ingredients. This technique eliminates the guesswork from traditional pastry making.
Ingredients for Pie Crust Recipe Food Processor
Just five essential ingredients create this foolproof, restaurant-quality pastry base with ease.
| Ingredient | Amount | Notes |
|---|---|---|
| All-Purpose Flour 🌾 | 2 ½ cups | Spoon and level, do not pack |
| Unsalted Butter 🧈 | 1 cup | Chilled and cubed into 1/2-inch pieces |
| Ice Water 💧 | ¼ cup | Plus 1 tbsp as needed |
| Granulated Sugar 🍚 | 1 tbsp | Optional for sweet crusts |
| Kosher Salt 🧂 | 1 tsp | Diamond Crystal preferred |
The butter quality is paramount here. European-style butter (82% fat like Plugrá or Kerrygold) creates superior flakiness, but any unsalted butter works. Ensure it’s ice-cold—freeze the cubed butter for 10 minutes before processing. The flour should be all-purpose; avoid cake flour or bread flour as their protein contents will alter the texture.
Out of kosher salt? Fine sea salt at half the amount works, but avoid iodized table salt—it can impart a metallic taste. For a sweet application, the sugar can be omitted or increased to 2 tbsp. Need a gluten-free version? Cup4Cup multipurpose flour is the closest 1:1 substitute. The ice water can be vodka for extra flakiness (same amount).
The dough can be wrapped tightly in plastic and refrigerated for up to 3 days or frozen for 1 month. For best results, let chilled dough rest at room temperature for 10-15 minutes before rolling to prevent cracking. Always work on a lightly floured surface.
Why You’ll Love This Recipe
- No-Fuss Mixing: The food processor does all the work—just pulse the cold butter and flour until crumbly, then drizzle in ice water.
- Buttery, Flaky Layers: That unsalted butter and a touch of sugar create the most tender, melt-in-your-mouth crust I’ve ever made.
- Endless Pie Possibilities: Sweet or savory, this crust handles fruit pies, quiches, even hand pies without a single complaint.
- Budget-Friendly Staple: All-purpose flour and basic pantry items mean I can whip this up anytime without a special grocery trip.
Step-by-Step Instructions for Pie Crust with Food Processor
This method delivers consistent, flaky results with minimal effort and maximum precision.
Step 1: Pulse the Dry Ingredients
Add the 2.5 cups All-Purpose Flour, 1 tbsp Granulated Sugar, and 1 tsp Kosher Salt to the bowl of a food processor fitted with the blade attachment. Pulse 3-4 times until the mixture is evenly combined and no streaks of sugar remain visible.
This brief pulsing aerates the flour while distributing the sugar and salt uniformly. Avoid over-processing at this stage—you want to maintain the flour’s light texture. The mixture should look like coarse, evenly colored sand when ready.
Step 2: Incorporate the Chilled Butter
Add the 1 cup Unsalted Butter (cubed into ½-inch pieces) to the processor. Pulse in 1-second bursts until the mixture resembles coarse crumbs with pea-sized butter pieces visible throughout. This should take 8-12 pulses total.
Watch carefully through the feed tube—the butter should remain in distinct pieces rather than disappearing into the flour. The presence of visible butter flakes is what creates the flaky layers in your finished crust. If the mixture starts to clump, you’ve over-processed; stop immediately.
Step 3: Add Ice Water Gradually
With the processor running continuously, pour the ¼ cup Ice Water through the feed tube in a slow, steady stream. Process just until the dough begins to come together in a shaggy mass, about 10-15 seconds.
The dough is ready when it forms loose clumps and holds together when pressed between your fingers. If it remains crumbly, add the additional 1 tbsp Ice Water and pulse briefly. The dough should not form a smooth ball in the processor—stop before that point to prevent overworking.
Step 4: Chill and Rest the Dough
Turn the dough out onto a lightly floured surface and gently press it into a cohesive mass. Divide into two equal portions and shape each into a 1-inch thick disk. Wrap each disk tightly in plastic wrap.
Refrigerate for at least 1 hour (or up to 2 days). This resting period allows the gluten to relax and the butter to re-chill, which prevents shrinking during baking and ensures superior flakiness. The dough should feel firm but pliable when properly chilled.
Pro Tips For Making Pie Crust Recipe Food Processor
- Chill Your Butter: Cut the butter into 1/2-inch cubes and freeze for 15 minutes before pulsing—I learned this the hard way after ending up with a greasy, tough crust from butter that was too soft.
- Pulse, Don’t Blend: Use 1-second pulses, about 10-12 times, just until the mixture resembles coarse crumbs. Over-processing develops gluten, and that’s the fast track to a chewy pie crust instead of a flaky one.
- Measure Water Carefully: Start with 3-4 tablespoons of ice water and add more by the teaspoon—too much liquid makes the dough sticky and hard to roll, and I’ve ruined more than one batch by eyeballing it.
- Rest the Dough: Wrap the dough and refrigerate for at least 1 hour, or up to 2 days. Skipping this step makes the crust shrink when baking, and trust me, you’ll notice the difference in both texture and handling.
Common Mistakes When Making Great pie crust recipe food processor
Overworking the Dough
The most common mistake is over-processing. Pulse the butter until pea-sized pieces appear—8-12 pulses max. I learned this the hard way during my Charleston apprenticeship when my first batch turned into a dense hockey puck. 💪
Warm Ingredients
Always use ice-cold butter and ice water. If your kitchen is warm, chill the flour for 15 minutes too. I keep my Plugrá butter in the freezer until ready to cube.
Too Much Water
Add water gradually through the feed tube. The dough should look shaggy, not smooth. If it’s sticky, you’ve added too much—sprinkle 1 tbsp flour and pulse briefly to correct.
Skipping the Rest
Chilling for at least 1 hour is non-negotiable. This relaxes the gluten and re-solidifies the butter. I once rushed this step and my crust shrank by 25% in the oven.
Uneven Butter Distribution
Cut butter into uniform ½-inch cubes before adding. This ensures even distribution for consistent flakiness. I use my vintage Wüsthof chef’s knife for precise cuts.
Wrong Flour Measurement
Spoon flour into measuring cups and level—never pack it. Too much flour makes a dry, crumbly dough. For accuracy, I weigh mine: 300 grams for 2.5 cups. 🌾
Nutrition Facts
Frequently Asked Questions
Can I use a mini food processor?
Yes, but you may need to work in batches. A mini processor holds about 3-4 cups, so halve the recipe. Pulse carefully to avoid overworking.
Why is my dough tough?
Over-processing develops too much gluten. Stop pulsing once pea-sized butter pieces form. Chill the dough for at least 1 hour before rolling.
Can I make this ahead?
Wrap the dough tightly and refrigerate for up to 3 days or freeze for 1 month. Thaw overnight in the fridge before using.
What if I don’t have a food processor?
Use a pastry cutter or your fingers to work the butter into the flour until pea-sized crumbs form. The key is keeping everything cold.

- Potato Candy Recipe 1933: Vintage Peanut Butter Roll Delight - October 30, 2026
- Potato Chip Cookie Recipe With Pecans: Buttery Crunch Meets Nutty Richness - October 30, 2026
- Potato Patty Recipe No Egg: Crispy Edges Without the Binder - October 30, 2026