
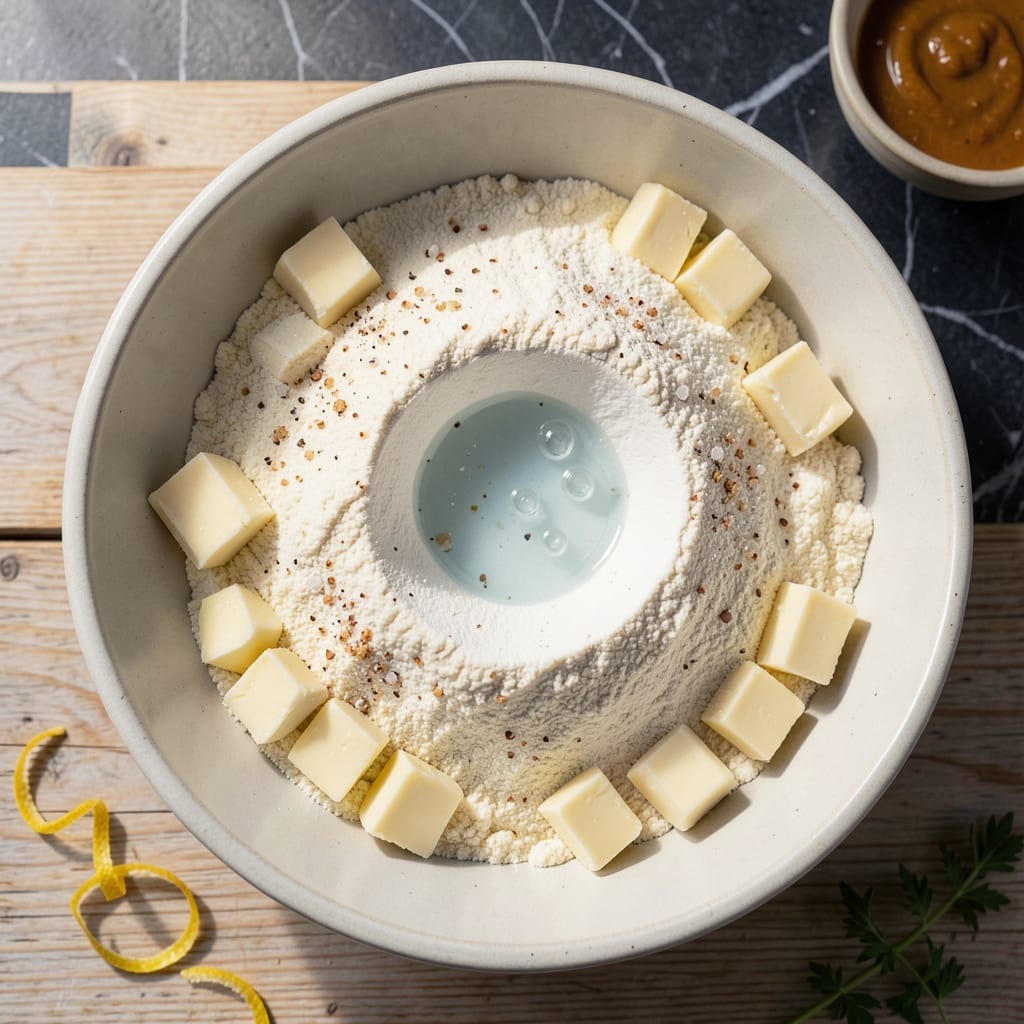
There’s nothing quite like the satisfaction of creating flaky pie dough entirely by hand. This method proves you don’t need special equipment to achieve bakery-quality results.
The secret lies in keeping your ingredients cold and working quickly. Cold butter creates those coveted layers while minimal handling prevents tough dough. The process is simpler than you might expect.
What you’ll end up with is a smooth, pliable dough that rolls out beautifully and bakes into golden, flaky layers. It’s the foundation for everything from fruit pies to pot pies.
This technique has been perfected through years of testing and delivers consistent results every time. The dough requires just a short rest before rolling.
Ingredients for Pie Dough Recipe No Food Processor
Six simple ingredients. Cold butter. Flaky layers every time. Nothing else needed.
| Ingredient | Amount | Notes |
|---|---|---|
| All-Purpose Flour 🌾 | 2 ½ cups | Plus extra for dusting surface |
| Unsalted Butter 🧈 | 1 cup | Cold, cut into small cubes |
| Ice Water 💧 | ½ cup | Plus 1-2 tbsp as needed |
| Salt 🧂 | 1 tsp | Fine sea salt preferred |
| Granulated Sugar 🍚 | 1 tbsp | Optional, for sweet pies |
| White Vinegar 💧 | 1 tsp | Or lemon juice alternative |
The butter is non-negotiable—cold and cubed. I grab Land O’Lakes or Kerrygold for this; they’ve got the right fat content. The flour? King Arthur all-purpose is my go-to for consistency (the protein content is perfect for pie dough). Don’t even think about warm butter here—it’s the cold that creates those flaky layers the intro promises. If your kitchen is warm, chill your mixing bowl too.
No vinegar? Lemon juice works the same. Skipping the sugar? Totally fine for savory pies. Out of all-purpose? Pastry flour at a 1:1 swap gives slightly more tenderness. The water amount can vary by humidity—start with 1/2 cup and add by the tablespoon. That vinegar or lemon isn’t just for flavor; it tenderizes the gluten (worth the extra 30 seconds to measure it).
Dough keeps wrapped tightly in the fridge for 2 days or freezes beautifully for 3 months. Let it warm slightly before rolling—cold dough cracks. Pro tip: Make a double batch. You’ll thank yourself later when someone asks for ‘just one more pie.’
Why You’ll Love This Recipe
- No Machine Needed: I can make this with just a bowl and my hands—no fancy equipment required.
- Buttery Flake: The cold butter and ice water create layers that are crisp, tender, and irresistibly rich.
- Endless Uses: I’ve used it for sweet pies, savory tarts, and even quick hand pies for lunches.
- Budget Friendly: Honestly, it costs pennies compared to store-bought and tastes a million times better.
Step-by-Step Instructions for Pie Dough Without a Food Processor
Here’s how I create ultra-flaky layers using just my hands and a few simple tools.
Step 1: Combine Dry Ingredients and Cut in Cold Butter
In a large mixing bowl, whisk together the 2.5 cups All-Purpose Flour, 1 tsp Salt, and 1 tbsp Granulated Sugar until evenly distributed. The sugar adds a subtle sweetness, perfect for fruit pies.
Add the 1 cup Unsalted Butter (cold and cut into small cubes) to the flour mixture. Using your fingertips, press and rub the butter into the flour until the mixture resembles coarse crumbs with some pea-sized butter pieces visible. This creates pockets of butter that will melt into flaky layers during baking.
Step 2: Incorporate Ice Water and Vinegar Gradually
Make a well in the center of the flour-butter mixture. Add the 0.5 cup Ice Water and 1 tsp White Vinegar. The vinegar helps tenderize the dough by relaxing the gluten strands, ensuring a more delicate crust.
Using a fork, gently mix the liquid into the dry ingredients, starting from the center and working outward. Stop as soon as the dough begins to come together—it will look shaggy and slightly dry. Avoid overworking the dough, which can develop tough gluten and result in a dense crust rather than a flaky one.
Step 3: Knead and Shape the Dough
Turn the dough out onto a lightly floured surface. Gently press it together into a rough ball, then divide it into two equal portions. Flatten each portion into a 1-inch thick disk—this shape makes rolling out easier later.
Wrap each disk tightly in plastic wrap and refrigerate for at least 1 hour (or up to 2 days). Chilling relaxes the gluten and firms up the butter, which is essential for achieving those coveted flaky layers. If the dough feels too dry, add 1-2 tbsp Ice Water as needed, but don’t overdo it.
Step 4: Roll and Prepare for Baking
Remove one disk from the refrigerator and let it sit at room temperature for 10-15 minutes to soften slightly. On a well-floured surface, roll the dough into a 12-inch circle, dusting with flour as needed to prevent sticking.
Check for flakiness by lifting the dough slightly—you should see visible layers. If the edges crack, press them together gently with your fingers. Transfer the rolled dough to a pie dish, trim any excess, and crimp the edges for a decorative finish. Your crust is now ready for filling and baking.
Pro Tips For Making Pie Dough Recipe No Food Processor
- Chill Your Butter: Cut the unsalted butter into small cubes and refrigerate for 15 minutes before mixing—I learned this the hard way after my first few pies turned out tough from melted butter.
- Use Ice Water: Fill a glass with water and ice cubes, then measure from that—cold water prevents the butter from melting, which is non-negotiable for flaky layers.
- Skip Overworking: Mix just until the dough comes together, even if it looks shaggy. After ruining a batch by over-mixing, I finally realized less handling means a tender crust.
- Rest the Dough: Wrap it in plastic and refrigerate for at least 30 minutes—this relaxes the gluten and makes rolling out way easier, I was skeptical until I tried it.
Pro Cooking Tips for This Recipe
Butter Temperature Control
I can’t stress this enough: your butter must stay cold. If it starts softening, pop the bowl in the freezer for 5-10 minutes. I keep my cubes in the fridge until the last second. This is non-negotiable for flaky layers. 🌡️
The Right Cutting Technique
Use your fingertips, not palms—they’re cooler. Press and rub the butter into flour until you see pea-sized bits. This creates the pockets that steam into layers. I find working in batches of 5-6 cubes at a time gives me better control.
Water Wisdom
Start with ½ cup ice water, but add gradually. In humid weather, you might need less. The dough should hold when pressed but still look shaggy. I use a spray bottle to mist extra water if needed—it’s more precise.
Resting Time
Don’t rush the 1-hour chill. This relaxes gluten and firms butter. I often rest mine overnight for convenience. For emergency dough, 20 minutes in the freezer works, but texture suffers slightly.
Rolling Pro Tips
Dust your surface and rolling pin with 1-2 tbsp flour at a time. Roll from center outward in all directions, turning the dough 90° between rolls. This prevents sticking and ensures even thickness. 💪
Edge Crimping
For perfect edges, fold the overhang under itself before crimping. Use your thumb and forefinger in a V-shape. I dip my fingers in flour to prevent sticking. A fork works great for a simple decorative edge.
Nutrition Facts
Frequently Asked Questions
What if my dough is too crumbly?
Add ice water 1 tbsp at a time until it just holds together. It should look shaggy but stick when pressed. Don’t overdo it or the crust will be tough.
Why use vinegar in pie dough?
The acid tenderizes the gluten, creating a more delicate crust. It also adds a subtle tang that balances sweet fillings perfectly. Just 1 tsp makes all the difference.
How long can I keep the dough in the fridge?
Tightly wrapped, it stays fresh for 2 days. For longer storage, freeze for up to 3 months. Thaw overnight in the fridge before using.
Can I use warm butter for faster prep?
Never! Warm butter blends into the flour, eliminating flaky layers. Cold butter creates steam pockets during baking that make the crust flaky. Keep it chilled.

- Potato Candy Recipe 1933: Vintage Peanut Butter Roll Delight - October 30, 2026
- Potato Chip Cookie Recipe With Pecans: Buttery Crunch Meets Nutty Richness - October 30, 2026
- Potato Patty Recipe No Egg: Crispy Edges Without the Binder - October 30, 2026