
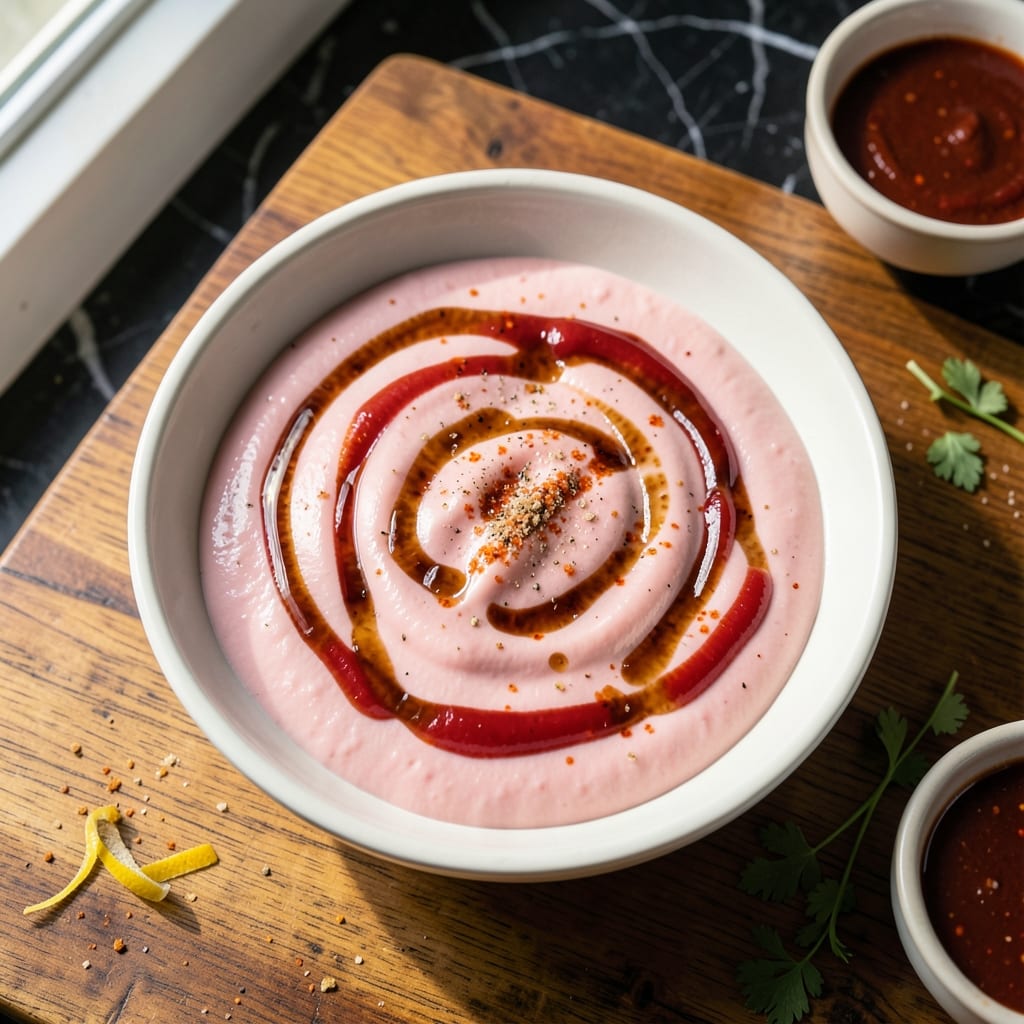
This sauce brings the authentic taste of Japanese steakhouses to your own kitchen. I developed it after years of experimenting to match the perfect balance of sweet, tangy, and creamy.
The secret lies in combining mayonnaise with ketchup and a touch of spice. This creates a smooth, vibrant pink sauce that pairs perfectly with grilled meats and vegetables.
It takes just 5 minutes to mix together, and the flavor improves as it rests. Store it in the fridge for up to a week to have that steakhouse taste ready anytime.
Use it for dipping, drizzling, or as a sandwich spread. Here’s how to make this restaurant-quality sauce at home.
Ingredients for Pink Sauce Recipe Hibachi
Nine simple ingredients blend into that signature hibachi sauce you crave.
| Ingredient | Amount | Notes |
|---|---|---|
| Mayonnaise 🥚 | 1 cup | Full-fat for creamy texture |
| Ketchup 🍅 | ½ cup | Classic tomato variety |
| Sriracha Sauce 🌶️ | 1 tbsp | Adjust for heat preference |
| Soy Sauce 🫒 | 1 tbsp | Low-sodium preferred |
| Rice Vinegar 🍚 | 1 tsp | Adds tangy brightness |
| Garlic Powder 🧄 | ½ tsp | Fine powder, not granules |
| Onion Powder 🧅 | ½ tsp | Balances sweetness |
| Granulated Sugar 🍬 | 1 tsp | Optional for sweetness |
| Lemon Juice 🍋 | 1 tsp | Freshly squeezed preferred |
The mayonnaise is the base here—Duke’s or Hellmann’s give that classic creamy texture. Ketchup should be the standard tomato kind (I grab Heinz at any grocery store). Sriracha adds the kick, but any hot sauce works. The soy sauce brings umami depth—Kikkoman is my go-to. Don’t skip the rice vinegar; it brightens everything up.
No sriracha? Frank’s RedHot or any hot sauce gets you there. Out of rice vinegar? Apple cider vinegar at half the amount works. Want it sweeter? Add another teaspoon of sugar. For a smoother sauce, whisk everything really well. If you prefer a thinner consistency, a splash of water does the trick (but go easy).
This keeps in the fridge for 1 week in an airtight container. The flavors meld and improve after 24 hours. I make double batches—it disappears fast. Don’t freeze, though; mayo separates when thawed.
Why You’ll Love This Recipe
- Five-Minute Mix: I just dump mayo, ketchup, a splash of sriracha, soy, and rice vinegar in a bowl and stir—no cooking, no fuss.
- Sweet-Spicy Kick: That tangy mayo base with a little sriracha heat and soy depth hits all the right notes for hibachi lovers.
- Drizzle on Everything: Honestly, it’s my go-to for rice, chicken, veggies, even fries—one sauce, endless uses.
- Stays Fresh a Week: I make a big batch and it keeps perfectly in the fridge, so I’m never scrambling for flavor.
Step-by-Step Instructions for Pink Sauce Hibachi
This method delivers that signature sweet-spicy flavor you love from Japanese steakhouses.
Step 1: Combine the Creamy Base
In a medium mixing bowl, whisk together the 1 cup Mayonnaise and 0.5 cup Ketchup until completely smooth. I prefer using full-fat mayonnaise here—it creates that luxuriously creamy texture authentic to hibachi restaurants.
This base should look uniform with no streaks of either ingredient. The mayonnaise provides the signature richness while the ketchup adds the essential sweet tomato foundation. Make sure your bowl is large enough to accommodate all ingredients with room to whisk.
Step 2: Add the Savory and Spicy Elements
To the mayonnaise-ketchup mixture, add the 1 tbsp Sriracha Sauce and 1 tbsp Soy Sauce. Whisk vigorously for 30 seconds until the Sriracha is fully incorporated and the sauce develops a consistent pink hue.
The Sriracha brings the subtle heat that balances the sweetness, while the soy sauce adds that umami depth characteristic of authentic Japanese flavors. I always use low-sodium soy sauce to control the saltiness—this way, the other flavors can shine through without being overpowered.
Step 3: Incorporate the Acidic and Aromatic Components
Next, add the 1 tsp Rice Vinegar, 0.5 tsp Garlic Powder, and 0.5 tsp Onion Powder. Whisk for another 20-30 seconds until everything is evenly distributed throughout the sauce.
The rice vinegar provides that bright, tangy note that cuts through the richness, while the garlic and onion powders add layers of savory complexity. Real talk: fine powder works better than granules here—it dissolves more evenly into the creamy base without leaving specks.
Step 4: Balance with Sweetness and Finish
Finally, whisk in the 1 tsp Granulated Sugar and 1 tsp Lemon Juice. Continue whisking until the sugar is completely dissolved and the sauce is silky smooth, about 15-20 seconds.
The sugar rounds out the sharp edges of the vinegar and soy sauce, creating that perfect sweet-savory balance, while the lemon juice adds a fresh brightness that makes the flavors pop. Here’s the thing—taste it now and adjust if needed. If you prefer a touch more sweetness, you can add another ½ tsp sugar, but I find the recipe perfect as written.
Step 5: Chill and Let Flavors Meld
Transfer the sauce to an airtight container and refrigerate for at least 30 minutes before serving. This resting time allows all the flavors to meld together beautifully.
You’ll notice the sauce thickens slightly as it chills, and the colors deepen into that iconic hibachi restaurant pink. The flavors become more harmonious after resting, with each component complementing the others perfectly. This sauce keeps well in the refrigerator for up to 5 days, making it perfect for meal prep.
Pro Tips For Making Pink Sauce Recipe Hibachi
- Chill the Sauce: After mixing, let it sit in the fridge for at least 30 minutes—I learned this the hard way when my first batch tasted too sharp from the rice vinegar.
- Use Full-Fat Mayo: Skip the light stuff; full-fat mayonnaise gives the sauce that creamy, rich texture that balances the Sriracha and soy perfectly.
- Balance the Sriracha: Start with half the Sriracha you think you need, taste, then add more—Sounds weird, but it’s easy to overpower the sauce with too much heat.
- Whisk, Don’t Stir: Whisking the ingredients together instead of stirring makes a real difference in getting that smooth, uniform pink color and texture.
Make-Ahead Tips for Leftovers
Batch Preparation
I always make a double batch of this sauce—it’s so popular at our family dinners. Simply multiply all ingredients by 2, using 2 cups mayonnaise and 1 cup ketchup as your base. The flavors scale perfectly without any adjustments needed.
Storage Containers
For best results, use glass mason jars or BPA-free plastic containers with tight-sealing lids. I prefer 16-ounce mason jars for single batches—they’re easy to clean and let me see the beautiful pink color. Always ensure the container is completely clean and dry before adding the sauce.
Fridge Life
This sauce stays fresh in the refrigerator for up to 5 days. The flavors actually improve after 24 hours as everything melds together. I’ve found that day 2 or 3 is when it tastes its absolute best. 💡
No Freezing
Don’t freeze this sauce—the mayonnaise base will separate and become watery when thawed. The texture never quite recovers, even with vigorous whisking. If you need longer storage, it’s better to make fresh batches as needed.
Prep Timing
You can mix the sauce up to 2 days in advance. Store it covered in the fridge until ready to use. This makes it perfect for parties or meal prep. Just
Serving Temperature
This sauce tastes best served slightly chilled or at room temperature. I take it out of the fridge about 15-20 minutes before serving. The flavors are more vibrant when it’s not ice cold, and it spreads beautifully on sandwiches or as a dip. 🌟
Nutrition Facts
Frequently Asked Questions
Can I make this sauce spicier?
Add an extra ½-1 tbsp of Sriracha or a dash of cayenne pepper. For smoky heat, try ½ tsp chipotle powder instead.
What can I use instead of rice vinegar?
Apple cider vinegar works well, but use ½ tsp since it’s stronger. White vinegar is another good substitute in a pinch.
How do I fix a sauce that separated?
Vigorously whisk in 1 tsp cold water at a time until smooth. This usually brings it back together. Avoid overheating.
Is this sauce gluten-free?
Only if you use gluten-free soy sauce (like tamari). All other ingredients are naturally gluten-free.

- Potato Candy Recipe 1933: Vintage Peanut Butter Roll Delight - October 30, 2026
- Potato Chip Cookie Recipe With Pecans: Buttery Crunch Meets Nutty Richness - October 30, 2026
- Potato Patty Recipe No Egg: Crispy Edges Without the Binder - October 30, 2026