
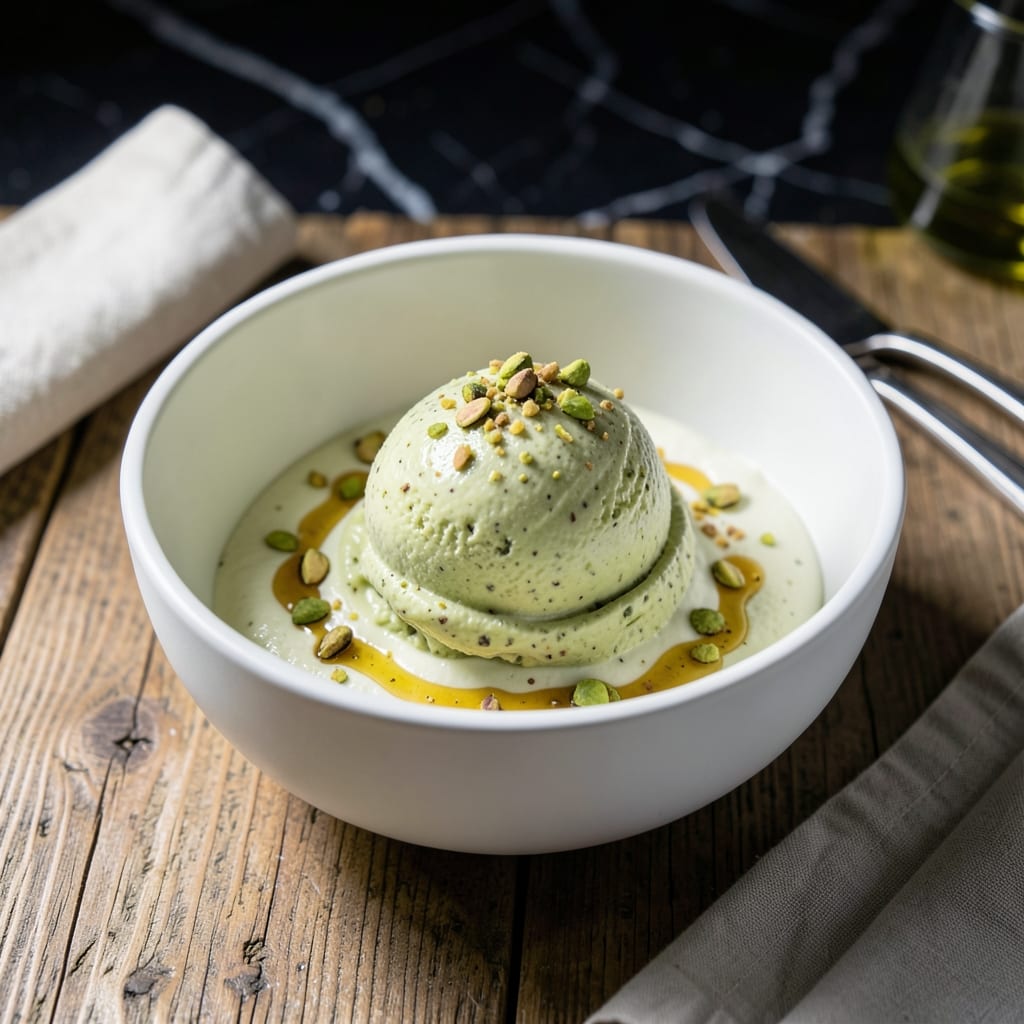
This egg-free pistachio ice cream delivers rich nutty creaminess with a velvety texture that rivals any custard base. I developed this recipe after years of testing to achieve that authentic pistachio flavor without dairy complications.
The secret lies in using real pistachio paste and a precise balance of cream to milk. No eggs means no curdling worries, just smooth chilling and churning. The result is a scoopable, luscious dessert with that signature green hue.
What you get is a sophisticated treat with deep roasted nut flavor and a clean finish. The absence of eggs allows the pistachio’s natural taste to shine through without competition from yolks.
Serve this as an elegant finale to any meal or enjoy it straight from the freezer. The recipe scales perfectly for larger gatherings.
Ingredients for Pistachio Ice Cream Recipe No Egg
Rich nutty flavor starts with just a few quality ingredients. Nothing complicated here.
| Ingredient | Amount | Notes |
|---|---|---|
| Heavy Cream 🥛 | 2 cups | Full-fat for creaminess |
| Whole Milk 🥛 | 1 cup | Cold for best texture |
| Pistachio Paste 🌰 | ½ cup | Real pistachios, not extract |
| Granulated Sugar 🍚 | ¾ cup | Fine grain for smoothness |
| Vanilla Extract 🌿 | 1 tsp | Pure extract preferred |
| Salt 🧂 | ¼ tsp | Fine sea salt works best |
| Roasted Pistachios 🌰 | ½ cup | Chopped, for texture |
| Almond Extract 🌰 | ¼ tsp | Enhances nutty depth |
| Green Food Coloring 🎨 | 2 drops | Optional for vibrancy |
| Vegetable Oil 🫒 | 1 tsp | Neutral flavor for churning |
The pistachio paste is non-negotiable—look for 100% pistachio paste at Middle Eastern markets or online. Trader Joe’s and Whole Foods sometimes carry it too. Heavy cream and whole milk give that ultra-creamy texture without eggs. I always use organic dairy when I can (the flavor difference is noticeable). For the pistachios, get unsalted and roast them yourself if you’re feeling fancy.
No pistachio paste? Blend 1 cup shelled pistachios with 2 tbsp neutral oil until smooth—it won’t be as intense but works. Out of whole milk? Half-and-half thinned with water gets close. Skip the food coloring if you prefer a natural look (the paste gives some green). The almond extract might seem optional, but it really boosts the pistachio flavor.
The base keeps in the fridge for 2 days before churning. Once churned, store in an airtight container for up to 2 weeks. Add a layer of parchment paper directly on the surface to prevent ice crystals. Best served slightly softened after 5 minutes out of the freezer.
Why You’ll Love This Recipe
- No Fuss Mixing: I just whisk the heavy cream, milk, sugar, and pistachio paste together—no eggs to temper or cook.
- Rich Nutty Flavor: The pistachio paste gives it that deep, authentic taste that store-bought can’t touch.
- Dinner Party Hero: I’ve served this at summer barbecues and intimate dinners, and it’s always the first to disappear.
- Freezer Friendly: Honestly, it keeps beautifully for up to a month, so I always make a double batch.
Step-by-Step Instructions for Pistachio Ice Cream
Here’s my no-fail method for ultra-creamy, egg-free pistachio ice cream with intense nutty flavor.
Step 1: Infuse the Cream Base with Pistachio Flavor
In a medium saucepan, combine the 2 cups Heavy Cream, 1 cup Whole Milk, and 0.75 cup Granulated Sugar. Heat over medium heat until the sugar fully dissolves and the mixture just begins to simmer—you’ll see tiny bubbles at the edges.
Whisk in the 0.5 cup Pistachio Paste until completely smooth. This paste contains real pistachios, so it will give your ice cream that authentic, rich nutty taste. Let it simmer for 2-3 minutes, stirring frequently, until the mixture thickens slightly and turns a pale pistachio color.
Step 2: Add Extracts and Color for Depth
Remove the saucepan from heat and stir in the 1 tsp Vanilla Extract, 0.25 tsp Salt, 0.25 tsp Almond Extract, and 2 drops Green Food Coloring. The almond extract enhances the nutty profile, while the food coloring boosts the visual appeal (skip it if you prefer a natural look).
The mixture should now be fragrant with a vibrant pistachio aroma. I always taste at this stage to ensure the sweetness and nuttiness are balanced. If needed, you can add a pinch more salt, but don’t over-sweeten—it’ll taste richer once churned.
Step 3: Chill the Base Completely
Pour the warm mixture into a clean bowl and let it cool to room temperature, stirring occasionally to speed up the process. This usually takes about 30 minutes. Once cool, cover the bowl and refrigerate for at least 4 hours (overnight is even better).
The chilling step is critical—it ensures the base is cold enough to churn properly in your ice cream maker. If you’re in a hurry, you can place the bowl in an ice bath, but don’t skip this step entirely. A warm base will turn into a sad, soupy mess instead of creamy ice cream.
Step 4: Churn to Creamy Perfection
Pour the chilled base into your ice cream maker and add the 1 tsp Vegetable Oil—this helps prevent ice crystals from forming. Churn according to your machine’s instructions, typically for 20-25 minutes, until the mixture thickens to the texture of soft-serve.
About 5 minutes before it’s done, add the 0.5 cup Roasted Pistachios (chopped) through the machine’s spout. This ensures they’re evenly distributed for a satisfying crunch in every bite. The ice cream is ready when it holds its shape but is still slightly soft.
Step 5: Freeze Until Firm and Serve
Transfer the churned ice cream to a freezer-safe container with a tight-fitting lid. Press plastic wrap directly against the surface to minimize ice crystal formation. Freeze for at least 4 hours or until firm.
When ready to serve, let it sit at room temperature for 5-10 minutes to soften slightly for easy scooping. The texture should be smooth and creamy with flecks of pistachio throughout. For the best experience, serve in chilled bowls and enjoy immediately!
Pro Tips For Making Pistachio Ice Cream Recipe No Egg
- Chill the Base: Always refrigerate your cream-milk-sugar mixture for at least 4 hours before churning—I learned this the hard way after ending up with soupy ice cream that took forever to set.
- Toast the Paste: Lightly toast the pistachio paste in a dry pan for 2-3 minutes to deepen its flavor, but watch the heat carefully or it’ll turn bitter.
- Skip the Substitutions: Whole milk and heavy cream aren’t interchangeable here; using half-and-half or light cream will give you icy, less creamy results.
- Add Vanilla Last: Stir in the vanilla extract only after the base has cooled, as high heat can mute its aromatic qualities.
Storing and Reheating Leftovers
Freezer Storage
After churning, transfer to a freezer-safe container with parchment paper pressed directly on the surface to prevent ice crystals. Store at 0°F or below for up to 2 weeks—David swears it tastes even better after 24 hours as flavors meld. ❄️
Refrigerator Base Storage
If you need to pause between making the base and churning, refrigerate the mixture in an airtight container for up to 2 days. This gives you flexibility without sacrificing quality.
Thawing for Serving
Let the ice cream sit at room temperature for 5-10 minutes before scooping. This brief softening makes serving easier and enhances the creamy texture. I always set a timer to avoid over-softening.
Preventing Freezer Burn
Use a container with a tight-fitting lid and add a layer of plastic wrap directly on the ice cream. This double barrier keeps air out and preserves that perfect pistachio flavor and color for the full 2 weeks.
Reviving Slightly Icy Texture
If your ice cream develops minor ice crystals after storage, let it soften for 10-15 minutes, then give it a quick stir. This redistributes the moisture and restores creaminess. 💡
Portioning for Gatherings
For parties, scoop into individual serving cups and refreeze. This prevents repeated thawing of the main container. The single servings will keep their texture for up to 1 week.
Nutrition Facts
Frequently Asked Questions
Can I make this without an ice cream maker?
Yes! Pour the chilled base into a shallow freezer-safe container. Freeze for 1 hour, then whisk vigorously every 30 minutes for 3-4 hours to break up ice crystals.
Why does my ice cream turn icy?
This usually happens if the base wasn’t cold enough before churning or if it wasn’t churned long enough. Ensure your base chills for at least 4 hours and churn until it reaches soft-serve consistency.
Can I use shelled pistachios instead of paste?
Blend 1 cup shelled pistachios with 2 tablespoons neutral oil until smooth. Strain if you prefer a perfectly smooth texture. The flavor will be slightly milder than paste.

- Potato Candy Recipe 1933: Vintage Peanut Butter Roll Delight - October 30, 2026
- Potato Chip Cookie Recipe With Pecans: Buttery Crunch Meets Nutty Richness - October 30, 2026
- Potato Patty Recipe No Egg: Crispy Edges Without the Binder - October 30, 2026