
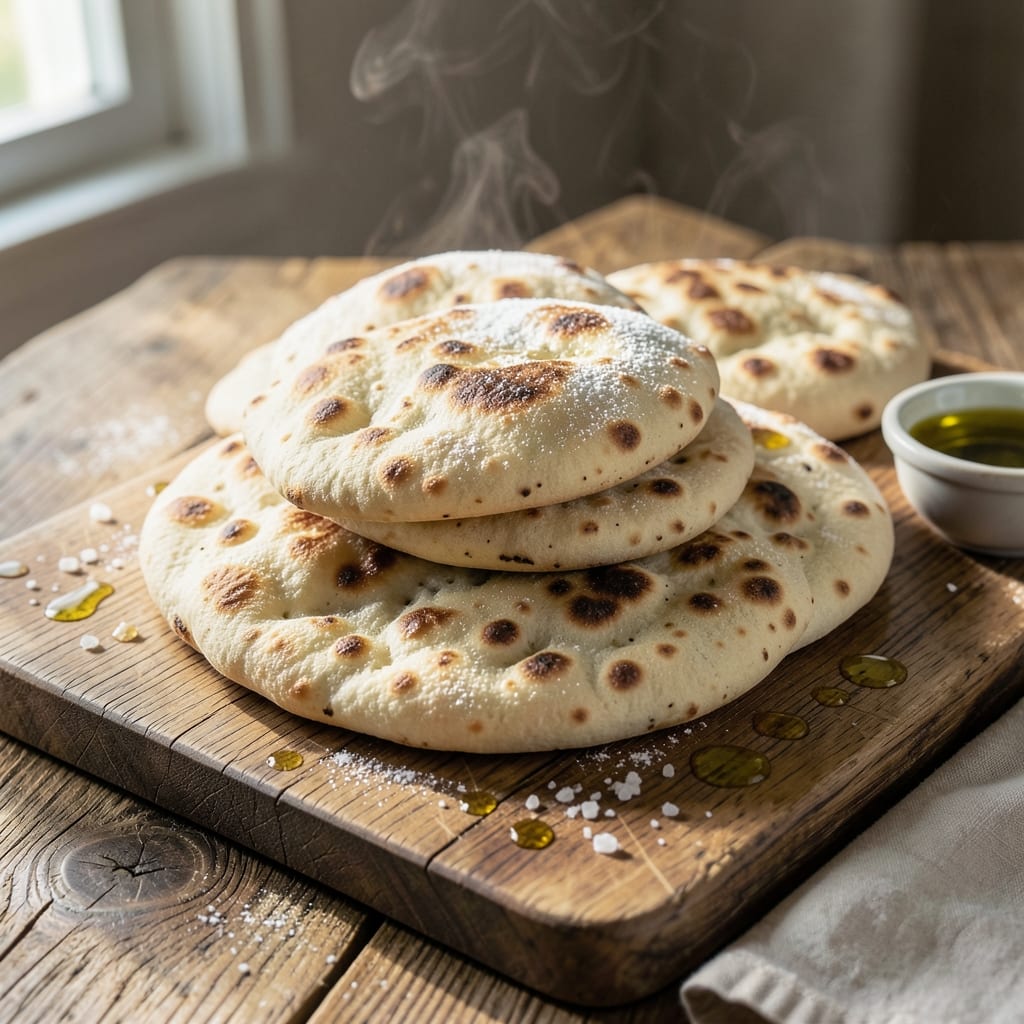
Making pita bread in a bread maker delivers soft, pillowy results with minimal hands-on effort. The machine handles kneading and proofing, leaving you with perfectly risen dough ready for shaping and baking.
This method removes the guesswork from dough preparation, ensuring consistent texture every time. The bread maker’s controlled environment creates ideal conditions for the yeast to work its magic, resulting in light, airy rounds.
Once the cycle completes, you’ll have smooth, elastic dough that rolls out easily. A quick bake in a hot oven transforms them into golden, hands-free pitas that puff beautifully.
Perfect for sandwiches, dipping, or serving alongside your favorite dishes. The process is streamlined without sacrificing quality or flavor.
Ingredients for Pita Bread Recipe Bread Maker
Simple pantry staples create those soft, pillowy rounds you love. Nothing fancy, just quality.
| Ingredient | Amount | Notes |
|---|---|---|
| Bread Flour 🌾 | 3 cups | High-protein for elastic dough |
| Active Dry Yeast 🍞 | 2 ¼ tsp | One packet, check expiration |
| Warm Water 💧 | 1 ¼ cups | 110°F, not hot |
| Olive Oil 🫒 | 2 tbsp | Extra-virgin for richness |
| Sea Salt 🧂 | 1 ½ tsp | Fine grain for even distribution |
| Granulated Sugar 🍚 | 1 tbsp | Feeds the yeast |
| Vital Wheat Gluten 🌾 | 1 tbsp | Optional for extra chew |
| All-Purpose Flour 🌾 | ½ cup | For dusting work surface |
The flour is non-negotiable here—bread flour gives you that elastic, stretchy dough pitas need to puff. King Arthur or Bob’s Red Mill are my go-tos (the good stuff, not the budget bags). Yeast freshness matters too—check that expiration date. If your water’s too hot (over 115°F), you’ll kill the yeast. Use a thermometer if you’re unsure (worth the extra minute).
No bread flour? All-purpose works in a pinch but add an extra 1 tbsp vital wheat gluten per cup. Short on yeast? Don’t risk it—old yeast = flat pitas. The olive oil can be any neutral oil, but extra-virgin adds flavor. Sugar’s just for the yeast, so honey or maple syrup would work too (but keep it vegan).
Dough rests in the machine, so no prep ahead needed. Baked pitas keep 2-3 days in a bag, but they’re best warm. Freeze extras for up to 1 month—reheat in a dry skillet to revive that puff.
Why You’ll Love This Recipe
- Hands-Off Magic: The bread maker does all the kneading and rising—I just measure the flour, yeast, warm water, olive oil, and salt, then walk away.
- Warm, Pillowy Bite: That first tear into a fresh pita, still steaming with a hint of olive oil richness, is pure comfort.
- Meal Prep Hero: I bake a batch on Sunday and they reheat beautifully for wraps, dips, or quick sandwiches all week.
Step-by-Step Instructions for Pita Bread Bread Maker
This hands-off method delivers perfectly soft, pillowy rounds with minimal effort on your part.
Step 1: Activate the Yeast and Prepare Wet Ingredients
In your bread maker pan, add the 1.25 cups Warm Water first—that 110°F temperature is critical, as water that’s too hot will kill the yeast. Sprinkle the 2.25 tsp Active Dry Yeast evenly over the water and let it sit undisturbed for 5 minutes.
You’ll know the yeast is active when it forms a foamy layer on top. Once you see that, add the 2 tbsp Olive Oil and 1 tbsp Granulated Sugar. The sugar feeds the yeast, giving it the energy it needs to create that beautiful rise in your pita bread.
Step 2: Add Dry Ingredients and Start the Dough Cycle
Next, add the 3 cups Bread Flour to the pan, spreading it evenly over the wet ingredients. Sprinkle the 1.5 tsp Sea Salt and 1 tbsp Vital Wheat Gluten on top of the flour. The vital wheat gluten is optional, but I highly recommend it for that extra chewy texture that makes homemade pita so special.
Select the dough cycle on your bread maker and start the machine. The cycle will take about 1 hour 30 minutes to 2 hours, depending on your model. During this time, the machine will knead the dough and let it rise until it’s doubled in size. You’ll end up with a smooth, elastic ball of dough ready for shaping.
Step 3: Divide and Shape the Dough into Balls
Once the dough cycle is complete, transfer the dough to a lightly floured surface. I use the 0.5 cup All-Purpose Flour for dusting—just enough to prevent sticking without incorporating too much extra flour into the dough. Divide the dough into 8 equal portions using a sharp knife or bench scraper.
Roll each portion into a smooth ball, then flatten slightly into a disc. Cover the balls with a clean kitchen towel and let them rest for 10-15 minutes. This rest allows the gluten to relax, making it easier to roll out the pitas later without them shrinking back.
Step 4: Roll Out the Pitas and Let Them Rise
After the rest, roll each disc into a 6-7 inch circle about ¼ inch thick. Use a rolling pin and apply even pressure, starting from the center and working your way out. If the dough resists, let it rest for another 5 minutes before trying again.
Place the rolled pitas on a lightly floured surface, cover with a towel, and let them rise for 20-30 minutes until they’re slightly puffed. You’ll notice they’ll start to look a bit bubbly—that’s the yeast working its magic one last time before baking.
Step 5: Bake the Pitas to Perfection
Preheat your oven to 475°F with a baking stone or inverted baking sheet inside. Once hot, transfer 2-3 pitas at a time to the hot surface. Bake for 3-5 minutes until they’re puffed and just starting to turn golden brown in spots.
Remove them from the oven and immediately place them in a clean kitchen towel to keep them soft. The pitas will deflate slightly as they cool—that’s normal. Repeat with the remaining pitas, then serve warm or store in an airtight container once completely cooled.
Pro Tips For Making Pita Bread Recipe Bread Maker
- Proof the Yeast: Always dissolve the active dry yeast in warm water (around 110°F) with a pinch of sugar first—I learned this the hard way after a few flat pitas that refused to rise.
- Use Bread Flour: Skip the all-purpose; bread flour’s higher protein content gives pita that chewy, elastic texture that’s non-negotiable for a good pocket.
- Don’t Over-Oil: About 1 tablespoon of olive oil is plenty for the dough—any more and it’ll be too slick, making it hard for the bread maker to knead properly.
- Roll Evenly Thin: After the bread maker finishes, roll the dough to ¼-inch thickness for even cooking; thicker spots won’t puff right, and you’ll end up with dense, sad pitas.
Flavor Customization for These Flavors
Herb-Infused Pitas
Mix 1 tbsp dried oregano or rosemary into the dry ingredients for an Italian twist. I love this with olive oil from my local deli—it reminds me of Nonna’s kitchen. The herbs add subtle depth without overpowering the soft texture. 🌿
Garlic Lovers
Add 1 tsp garlic powder or 2 minced fresh garlic cloves to the wet ingredients. This pairs beautifully with olive oil for a savory kick. I often brush baked pitas with garlic butter for extra richness.
Whole Wheat Boost
Replace 1 cup bread flour with whole wheat flour for a nuttier flavor. Add 1 extra tbsp vital wheat gluten to maintain elasticity. The dough may need 1-2 tbsp extra water to compensate for the dryness.
Sweet Variation
For dessert pitas, add 2 tbsp honey and 1 tsp cinnamon to the dough. These are amazing with Nutella or fresh fruit. I learned this trick from a Sicilian baker—simple but unforgettable.
Spiced Middle Eastern
Blend 1 tsp cumin and ½ tsp coriander into the flour. This pairs perfectly with hummus or falafel. I like using King Arthur’s bread flour for the best rise. 🌟
Cheesy Twist
Fold ½ cup crumbled feta into the dough during the final knead cycle. The cheese creates pockets of flavor. Bake as usual—it’s like a surprise in every bite. Honestly, this changed my pita game forever.
Nutrition Facts
Frequently Asked Questions
What bread maker setting should I use?
Use the dough cycle only—this handles kneading and rising in about 1.5-2 hours. Avoid bake cycles as pita needs a hot oven to puff properly.
Why didn’t my pitas puff up?
This usually means the oven wasn’t hot enough or the dough was overworked. Ensure your oven reaches 475°F and roll dough evenly to ¼ inch thickness.
Can I make this without vital wheat gluten?
Yes, but bread flour is essential for structure. If skipping gluten, expect slightly less chewy texture. The dough may need 1-2 tbsp extra water too.

- Potato Candy Recipe 1933: Vintage Peanut Butter Roll Delight - October 30, 2026
- Potato Chip Cookie Recipe With Pecans: Buttery Crunch Meets Nutty Richness - October 30, 2026
- Potato Patty Recipe No Egg: Crispy Edges Without the Binder - October 30, 2026