
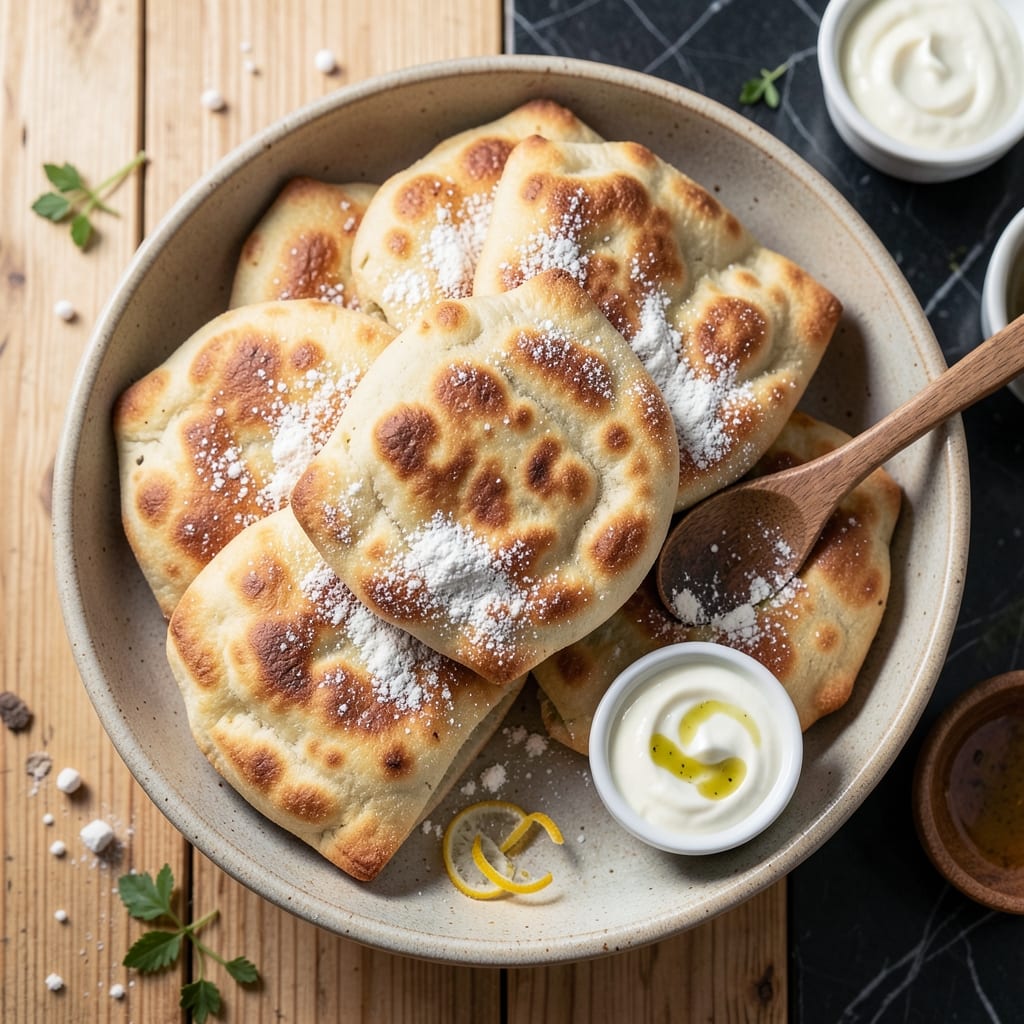
Flat, fluffy pita bread without yeast might sound impossible, but this recipe delivers exactly that. I developed this method after countless trials to create a version anyone can make with pantry staples.
The secret lies in using baking powder and baking soda for lift, combined with yogurt for tenderness. This approach eliminates the need for rising time while still producing soft, pillowy bread with a perfect pocket.
What you get is warm pita ready in under 30 minutes, with the same satisfying chew and versatility as traditional versions. It is perfect for stuffing, dipping, or serving alongside your favorite dishes.
This method proves you don’t need yeast to achieve authentic texture and flavor. Here’s how to make it.
Ingredients for Pita Bread Recipe No Yeast
Nine pantry staples transform into warm, soft pita without the wait.
| Ingredient | Amount | Notes |
|---|---|---|
| All-Purpose Flour 🌾 | 3 cups | Plus extra for dusting |
| Baking Powder 🧂 | 2 tsp | For essential lift |
| Baking Soda 🧂 | ½ tsp | Balances acidity in yogurt |
| Salt 🧂 | 1 tsp | Fine sea salt preferred |
| Plain Vegan Yogurt 🥛 | 1 cup | Unsweetened, thick consistency |
| Olive Oil 🫒 | 2 tbsp | Extra-virgin for richness |
| Water 💧 | ½ cup | Warm, as needed for dough |
| Granulated Sugar 🍚 | 1 tsp | Optional, for slight sweetness |
| Cornstarch 🌾 | 2 tbsp | For dusting while rolling |
The yogurt is non-negotiable here—unsweetened, thick vegan yogurt (I like Silk or Kite Hill) gives that tender crumb. All-purpose flour is key; bread flour makes it too chewy. King Arthur or Gold Medal work perfectly. If your baking powder is older than 6 months, replace it—it loses potency fast. The olive oil? Any extra-virgin you’d drizzle on salad.
No vegan yogurt? Unsweetened applesauce at the same amount works in a pinch (texture’s slightly different). Out of cornstarch? All-purpose flour for dusting is fine. Swap the sugar for maple syrup if you prefer. The water temperature matters—warm, not hot, or it’ll kill the baking powder’s magic. Want extra flavor? Add a pinch of garlic powder to the dry mix.
Dough can rest covered at room temp for up to 2 hours before rolling. Baked pita stays fresh wrapped in a towel for 2 days. Freeze cooled pita in bags for up to 1 month—reheat in a dry skillet to restore that fresh-baked feel.
Why You’ll Love This Recipe
- No Yeast Needed: I love that this skips the waiting—just mix, rest 10 minutes, and cook.
- Tangy Bite: The vegan yogurt gives it a subtle richness that plain pita just can’t match.
- Weeknight Hero: I roll these out while dinner’s cooking and they’re ready by the time we sit down.
- Pantry Staples: Flour, yogurt, and a couple leaveners—no special shopping, ever.
Step-by-Step Instructions for No Yeast Pita Bread
This method delivers soft, pillowy pockets without the traditional yeast rise time.
Step 1: Combine Dry Ingredients for Perfect Structure
In a large mixing bowl, whisk together the 3 cups All-Purpose Flour, 2 tsp Baking Powder, 0.5 tsp Baking Soda, 1 tsp Salt, and 1 tsp Granulated Sugar. I always sift my dry ingredients first to eliminate lumps and ensure even distribution throughout the dough.
The baking powder and baking soda work together to create lift, while the sugar adds just a touch of sweetness that balances the tang of the yogurt. Make sure your bowl is large enough to accommodate the rising dough as it comes together.
Step 2: Incorporate Wet Ingredients for Tender Texture
Add the 1 cup Plain Vegan Yogurt and 2 tbsp Olive Oil to the dry mixture. Using a wooden spoon or silicone spatula, stir until the ingredients begin to come together. The dough will be shaggy at first—this is normal.
Gradually pour in the 0.5 cup Water, starting with ¼ cup and adding more as needed until the dough forms a soft, slightly sticky ball. The exact amount may vary based on your flour’s absorbency. The dough should pull away from the sides of the bowl but still feel tacky to the touch.
I’ve found that using warm water helps the dough come together more smoothly, and the olive oil adds richness that makes the finished pitas extra tender.
Step 3: Knead and Rest the Dough
Turn the dough out onto a lightly floured surface—I use some of the extra all-purpose flour for this. Knead for 5-7 minutes until smooth and elastic. The dough will be softer than traditional yeasted dough but should still spring back when pressed lightly.
Place the kneaded dough in a lightly oiled bowl, cover with a clean kitchen towel, and let it rest at room temperature for 30 minutes. This rest allows the gluten to relax, making the dough easier to roll out and helping the leavening agents activate fully.
Step 4: Shape and Cook the Pitas
Divide the rested dough into 8 equal portions (about 70g each for 4 servings). Roll each portion into a ball, then flatten with your palm. Dust your work surface with the 2 tbsp Cornstarch—this prevents sticking better than flour when rolling.
Roll each ball into a circle about ⅛-inch thick and 6-7 inches in diameter. As you roll, rotate the dough frequently to maintain an even thickness. If the dough springs back, let it rest for 2-3 minutes before continuing.
Heat a non-stick skillet over medium-high heat until hot. Cook each pita for 1-2 minutes per side until puffed in spots and light golden brown with some darker charred spots. Press down gently with a spatula if the pitas aren’t puffing—this helps create that characteristic pocket.
Transfer cooked pitas to a clean kitchen towel and cover to keep warm while you cook the remaining dough. Serve warm for the best texture.
Pro Tips For Making Pita Bread Recipe No Yeast
- Heat the Pan First: I learned this the hard way—crank that skillet to medium-high and let it scream for 2 full minutes before adding dough. Anything less and your pitas won’t puff like they should.
- Use Thick Yogurt: Sounds weird, but it works: strain your vegan yogurt for 10 minutes in a sieve to remove excess water. Too much liquid makes the dough sticky and hard to roll.
- Don’t Overwork Dough: After burning three batches, I finally figured out that kneading more than 2-3 minutes makes these dense. Stop when it’s just smooth—no need for perfect elasticity.
- Roll Evenly Thin: My grandmother swore by this, and she was right: aim for ¼-inch thickness when rolling. Any thicker and they won’t cook through; any thinner and they’ll burn before puffing.
Best Sauces and Condiments for This pita bread recipe no yeast
Garlic Yogurt Sauce
This creamy sauce perfectly complements the tangy notes in your bread. Mix 1 cup vegan yogurt with 2 minced garlic cloves, 1 tbsp lemon juice, and ½ tsp salt. I love how the acidity cuts through the richness. 💫
Spicy Harissa Dip
For heat lovers, blend ¼ cup harissa paste with 2 tbsp olive oil and 1 tbsp honey. The North African flavors pair beautifully with the pillowy texture. Adjust sweetness to balance the spice level.
Classic Hummus
You can’t go wrong with traditional hummus. Blend 1 can chickpeas, ¼ cup tahini, 3 tbsp lemon juice, and 1 garlic clove until smooth. Drizzle with extra-virgin olive oil before serving.
Herb-Infused Olive Oil
Heat ½ cup olive oil with 2 sprigs rosemary and 3 thyme sprigs until fragrant. Strain and use for dipping—it’s simple but transforms the bread into something special. I keep this on hand for Sunday family dinners.
Tzatziki Style
Grate ½ cucumber (squeeze out excess water), mix with 1 cup yogurt, 1 tbsp lemon juice, and 1 tbsp fresh dill. This cooling sauce balances the warmth of freshly baked pita perfectly.
Nutrition Facts
Frequently Asked Questions
Can I use regular yogurt instead of vegan?
Plain regular yogurt works perfectly and will give similar tenderness. Just ensure it’s unsweetened and thick for best results.
Why do my pitas not puff up?
This usually means the heat isn’t high enough. Use medium-high heat and press gently with a spatula to encourage puffing. Also, ensure your baking powder is fresh.
Can I make these ahead of time?
Yes! Cooked pitas stay fresh wrapped in a towel for 2 days. For longer storage, freeze for up to 1 month and reheat in a dry skillet.

- BBQ Sausage Recipe Oven: Smoky Depth Without the Grill - September 28, 2026
- BBQ Chicken Bowl Recipe Rice: Smoky Sweetness Over Fluffy Grains - September 28, 2026
- Beef Cutlet Recipe Ideas: Crispy Breaded Patties With Bold Seasonings - September 28, 2026