
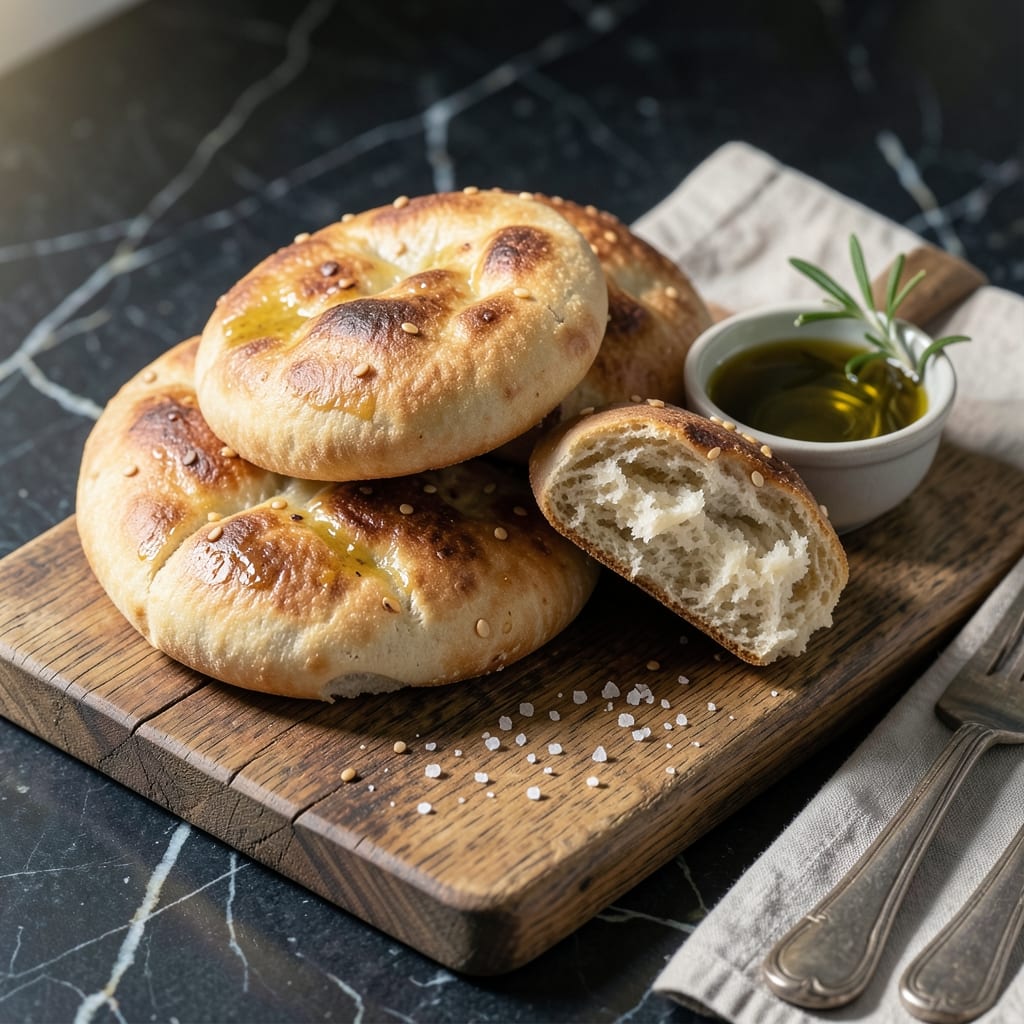
Fresh, warm pitta bread straight from your bread machine is a game-changer for homemade Mediterranean meals. This method takes the guesswork out of achieving that perfect soft yet sturdy texture.
The bread machine handles the mixing and kneading, while you control the final shaping and cooking. With just a few simple ingredients and the right settings, you’ll have pocket-perfect pitta ready for stuffing or serving alongside dips.
I’ve tested this technique extensively to ensure consistent results. The machine’s precision creates a dough that’s easy to work with and bakes into beautifully puffed flatbreads.
Serve warm with hummus, tzatziki, or your favorite fillings. The process is streamlined without sacrificing authenticity.
Ingredients for Pitta Bread Recipe Bread Machine
A handful of pantry staples transforms into warm, pocket-perfect Mediterranean flatbreads.
| Ingredient | Amount | Notes |
|---|---|---|
| Bread Flour 🌾 | 3 ½ cups | High-protein for structure |
| Warm Water 💧 | 1 ¼ cups | 110-115°F for yeast activation |
| Active Dry Yeast 🍞 | 2 ¼ tsp | Or 1 packet, check freshness |
| Granulated Sugar 🍚 | 1 tbsp | Feeds the yeast |
| Olive Oil 🫒 | 2 tbsp | Extra-virgin for flavor |
| Salt 🧂 | 1 ½ tsp | Fine sea salt preferred |
| All-Purpose Flour 🌾 | ½ cup | For dusting work surface |
| Cornmeal 🌽 | ¼ cup | For sprinkling before baking |
The flour is the foundation here. King Arthur Bread Flour gives the best rise and chew—look for 12-14% protein on the label. Yeast freshness is non-negotiable; if your jar’s been open more than 6 months, grab a new packet. I always keep mine in the freezer (unopened) to extend shelf life. Warm water should feel like bathwater—not hot, not cool.
No bread flour? All-purpose plus 1 tbsp vital wheat gluten per cup works in a pinch. Out of yeast? Instant yeast can be used at the same ratio. Olive oil can be swapped for any neutral oil, but you’ll lose that subtle Mediterranean flavor. Salt is flexible—kosher or table both work, just adjust volume slightly.
Dough keeps 24 hours in the fridge if life interrupts. Baked pitta? Best eaten fresh but reheats well wrapped in foil at 350°F for 5 minutes. Freeze extras for up to 1 month (toast from frozen).
Why You’ll Love This Recipe
- Hands-Off Magic: The bread machine does all the kneading and rising while I sip my coffee.
- Warm, Pillowy Bite: That first tear into the soft, olive oil-kissed bread with a hint of sweetness from the sugar? Pure comfort.
- Meal Prep Hero: I make a batch Sunday and they’re ready for lunches, dinners, or even impromptu snacks all week.
- Pennywise Perfection: Five simple pantry staples and I’ve got fresh pitta that costs a fraction of store-bought.
Step-by-Step Instructions for Pitta Bread Bread Machine
Here’s the method. Straightforward, tested, works every time.
Step 1: Activate the Yeast and Prepare Wet Ingredients
In your bread machine pan, start with the 1.25 cups Warm Water—it should feel slightly warm to the touch, around 110-115°F. Add the 2.25 tsp Active Dry Yeast and 1 tbsp Granulated Sugar, then let it sit for 5-7 minutes until the mixture becomes frothy and alive with bubbles.
This step is crucial. The sugar feeds the yeast, and the warm water activates it. If the mixture doesn’t foam, your yeast might be expired—start over with fresh yeast. Once frothy, add the 2 tbsp Olive Oil and give it a quick stir to combine.
Step 2: Incorporate Dry Ingredients and Begin Kneading
Add the 3.5 cups Bread Flour and 1.5 tsp Salt to the pan, ensuring the salt doesn’t directly touch the yeast—this can inhibit its growth. Secure the pan in your bread machine and select the dough setting. The machine will knead the ingredients for 10-15 minutes.
Watch the dough during the first few minutes of kneading. If it looks too dry or crumbly, add water 1 tablespoon at a time. If it’s too sticky, sprinkle in a bit of the 0.5 cup All-Purpose Flour reserved for dusting. The dough should be smooth, elastic, and slightly tacky but not sticking to the sides.
Step 3: Allow the Dough to Rise Undisturbed
Once kneading is complete, the dough will enter its first rise cycle. Leave it be for the next 45-60 minutes or until it has doubled in size. Resist the urge to peek or interfere—the bread machine maintains the perfect environment for rising.
You’ll know it’s ready when the dough is puffy and a finger pressed gently into the top leaves a slight indentation that springs back slowly. If your machine doesn’t have an automatic rise setting, keep an eye on the timer and switch to the next cycle manually when the dough has doubled.
Step 4: Shape and Final Rise
After the first rise, transfer the dough to a lightly floured surface using the 0.5 cup All-Purpose Flour. Divide it into 8 equal portions and roll each into a smooth ball. Flatten each ball into a ¼-inch thick oval or round.
Place the shaped pittas on a baking sheet sprinkled with the 0.25 cup Cornmeal to prevent sticking. Cover loosely with a clean kitchen towel and let them rise again for 20-30 minutes until slightly puffed. The cornmeal adds texture and helps create that signature rustic bottom.
Step 5: Bake to Golden Perfection
Preheat your oven to 475°F. Bake the pittas for 8-10 minutes until they’re puffed and light golden brown with a few darker spots. For an authentic touch, you can also cook them in a dry skillet over medium-high heat for 2-3 minutes per side.
They should puff up dramatically in the oven—this is the steam creating that perfect pocket. If they don’t puff, it might be due to underproofing or an oven that’s not hot enough. Let them cool slightly before serving to allow the structure to set.
Pro Tips For Making Pitta Bread Recipe Bread Machine
- Check Yeast First: I learned this the hard way—always proof your active dry yeast in the warm water with sugar for 5-10 minutes until frothy before adding it to the machine. If it doesn’t bubble, your pitta won’t rise.
- Use Bread Flour: Skip the all-purpose flour; bread flour’s higher protein content gives pitta that chewy, stretchy texture you want. It actually changes the outcome.
- Don’t Over-Oil: Stick to 1-2 tablespoons of olive oil in the dough—any more and your pitta will be greasy instead of light and fluffy.
- Roll Evenly: After the machine finishes, divide and roll the dough to an even ¼-inch thickness. Uneven rolling means some spots won’t puff properly in the pan.
Make-Ahead Tips for This pitta bread recipe bread machine
Prep Dough Ahead
After the bread machine completes the dough cycle, transfer the ball to a lightly oiled bowl, cover with plastic wrap, and refrigerate. The dough stays fresh for 24 hours without losing its rise. I often prep this the night before a big family dinner.
Shape and Freeze
Divide and shape the dough into rounds, then freeze on a parchment-lined tray. Once solid, transfer to a freezer bag. They keep for 1 month. Thaw overnight in the fridge before the final rise and baking.
Pre-Baked Pitta
Bake the pittas as directed, let cool completely, then store in an airtight container at room temperature. They stay soft for 2 days. For longer storage, freeze with parchment between each piece.
Reheating Tips
Wrap in foil and warm at 350°F for 5-8 minutes. For a crispier texture, toast directly on the oven rack for 2-3 minutes. Microwave works in a pinch—15-20 seconds between damp paper towels. 🔥
Day-Of Assembly
If hosting, shape and let pittas do their final rise while guests arrive. Bake just before serving for that warm, fresh-from-the-oven experience. The aroma alone will have everyone gathering in the kitchen.
Doubling Batch
My bread machine handles double the recipe beautifully. Just ensure you don’t overfill the pan—leave 1 inch of space for the dough to expand during kneading and rising. 💪
Nutrition Facts
Frequently Asked Questions
Can I use all-purpose flour instead of bread flour?
Yes, but add 1 tbsp vital wheat gluten per cup to boost protein content. Bread flour’s higher protein creates better structure for that perfect pocket.
Why didn’t my pitta puff up in the oven?
Underproofing or an oven that’s not hot enough are common culprits. Ensure the dough rises until puffy before baking, and preheat to 475°F. Steam is key for the puff!
Can I make the dough ahead and refrigerate it?
After the machine’s dough cycle, transfer to an oiled bowl and refrigerate for up to 24 hours. Let it warm slightly before shaping.
What’s the best way to reheat leftover pitta?
Wrap in foil and warm at 350°F for 5-8 minutes for soft results. For crispiness, toast directly on the oven rack for 2-3 minutes.

- Potato Candy Recipe 1933: Vintage Peanut Butter Roll Delight - October 30, 2026
- Potato Chip Cookie Recipe With Pecans: Buttery Crunch Meets Nutty Richness - October 30, 2026
- Potato Patty Recipe No Egg: Crispy Edges Without the Binder - October 30, 2026