
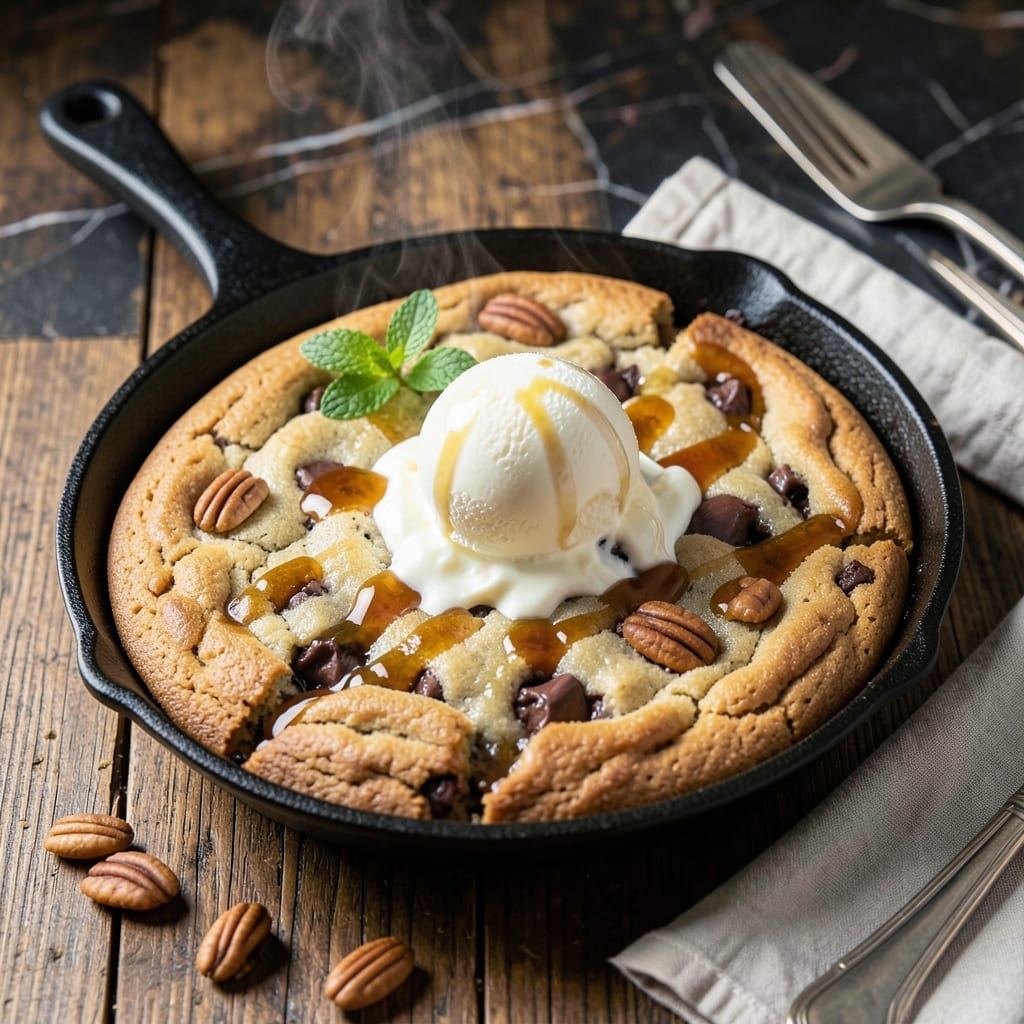
There’s something magical about a warm pizookie fresh from the oven, with a gooey center and melty chocolate chips in every bite. This recipe transforms classic cookie dough into a shareable dessert that’s crisp at the edges and irresistibly soft inside.
The secret lies in the baking time and temperature—just enough heat to set the edges while keeping the middle perfectly underbaked. A cast-iron skillet ensures even cooking and a professional-quality finish every time.
You’ll love how this dessert comes together with minimal effort but delivers maximum impact. The combination of rich, buttery dough and pockets of warm chocolate makes it a crowd-pleaser for any occasion.
Serve straight from the pan with a scoop of vanilla ice cream for the ultimate indulgence. This is comfort food at its finest.
Ingredients for Pizookie Recipe with Cookie Dough
Pantry staples plus chocolate chips. Nothing exotic, just delicious results.
| Ingredient | Amount | Notes |
|---|---|---|
| All-Purpose Flour 🌾 | 2 cups | Spoon and level for accuracy |
| Baking Soda 🧂 | ½ tsp | Ensures proper rise |
| Salt 🧂 | ½ tsp | Fine grain preferred |
| Unsalted Butter 🧈 | 1 cup | Melted and cooled slightly |
| Granulated Sugar 🍚 | ¾ cup | For sweetness and structure |
| Brown Sugar 🟤 | ¾ cup | Packed, for chewiness |
| Large Eggs 🥚 | 2 whole | Room temperature preferred |
| Vanilla Extract 🌿 | 2 tsp | Pure extract recommended |
| Semi-Sweet Chocolate Chips 🍫 | 2 cups | High quality for melty pockets |
| Vanilla Ice Cream 🍦 | 1 pint | For serving alongside |
The butter is key here. Use a good-quality brand like Land O’Lakes or Kerrygold—it melts better and gives that rich, buttery flavor. Most grocery stores carry it in the dairy aisle. The chocolate chips? Ghirardelli or Guittard have the best melt (those flat, wide chips are perfect). If you’re using a cast-iron skillet, make sure it’s well-seasoned for even baking.
No semi-sweet chips? Chop up a chocolate bar—it melts even better. Brown sugar out? All granulated works in a pinch, but the texture won’t be as chewy. Want extra goo? Add 1/4 cup more chocolate chips. The vanilla extract can be swapped for vanilla bean paste if you’re feeling fancy, but the standard stuff is totally fine.
Dough keeps in the fridge for 2-3 days if you want to prep ahead. Baked pizookie? Best eaten fresh but reheats decently for 24 hours. Ice cream goes on last—no sense melting it too early (unless you’re into that, no judgment).
Why You’ll Love This Recipe
- One Bowl Wonder: I love that I can mix everything—flour, butter, sugar—in a single bowl and still get that bakery-style taste.
- Warm Gooey Bliss: That first bite with the melty cookie dough center and crisp edges? Ridiculously good.
- Crowd Pleaser: I’ve served this at movie nights and potlucks—everyone from kids to grandparents asks for the recipe.
- Budget Friendly: A batch costs pennies compared to takeout, and I always have these pantry staples on hand.
Step-by-Step Instructions for Pizookie With Cookie Dough
Here’s the method I use for that perfect gooey center every time.
Step 1: Cream Butter and Sugars for the Base
In a stand mixer, beat the 1 cup Unsalted Butter with the 0.75 cup Granulated Sugar and 0.75 cup Brown Sugar on medium speed for 3-4 minutes. The mixture should become pale and fluffy—this incorporates air for a lighter texture.
I always use room temperature butter for this step (melted and cooled slightly as specified). If it’s too cold, you’ll end up with a grainy texture instead of that smooth, creamy base we’re after. The brown sugar should be packed tightly for maximum chewiness.
Step 2: Incorporate Eggs and Vanilla
Add the 2 whole Large Eggs one at a time, mixing for 30 seconds after each addition. Then add the 2 tsp Vanilla Extract and mix for another 10 seconds. The eggs should be fully emulsified into the butter mixture before adding the next one.
I prefer using room temperature eggs here—they blend more evenly into the fat. The vanilla extract should be pure, not imitation, as the flavor really shines through in this simple recipe. At this point, your mixture should look smooth and slightly glossy.
Step 3: Combine Dry Ingredients and Chocolate Chips
In a separate bowl, whisk together the 2 cups All-Purpose Flour, 0.5 tsp Baking Soda, and 0.5 tsp Salt. Gradually add this to the wet mixture on low speed, mixing just until combined—about 30-45 seconds. Overmixing develops gluten, which would make the pizookie tough.
Fold in the 2 cups Semi-Sweet Chocolate Chips by hand using a spatula. I like to reserve a small handful to sprinkle on top right before baking for that extra melty effect. The dough will be thick and slightly sticky—this is exactly what we want for that perfect pizookie texture.
Step 4: Bake for the Perfect Gooey Center
Press the dough into a greased 10-inch cast iron skillet or oven-safe pan. Bake at 350°F for 20-25 minutes until the edges are golden brown but the center still looks slightly underdone. This is the secret to that coveted gooey center.
Don’t overbake—it’s better to err on the side of slightly underdone. The residual heat will continue cooking the center as it rests. You’ll know it’s perfect when the edges are set but the middle still jiggles slightly when you gently shake the pan.
Step 5: Serve Warm with Vanilla Ice Cream
Let the pizookie cool for 5-10 minutes before serving. This brief rest allows it to set just enough for clean slicing while maintaining that warm, gooey center. The chocolate chips should still be melty and the edges perfectly crisp.
Serve immediately in the skillet with scoops of the 1 pint Vanilla Ice Cream on top. The contrast of warm cookie and cold ice cream is what makes this dish so special. For best results, use a high-quality vanilla ice cream that won’t melt too quickly.
Pro Tips For Making Pizookie Recipe With Cookie Dough
- Preheat the Pan: I learned this the hard way—cold pans make for uneven baking. Crank your oven to 350°F and let the skillet heat up in it for 10 minutes before adding the dough.
- Soften the Butter: Sounds obvious, but room-temperature butter (about 65°F) creams effortlessly with sugar and prevents dense, flat cookies. Leave it out for 30-45 minutes before starting.
- Skip Overmixing: After burning three batches of tough pizookies, I finally figured out that mixing just until the flour disappears keeps them tender. Stop as soon as the dough comes together.
- Underbake Slightly: Pull it out when the edges are golden but the center still looks a little soft—it’ll firm up as it cools, giving that perfect gooey texture. 12-14 minutes usually does it.
Essential Equipment for This Recipe
Cast Iron Skillet
A 10-inch cast iron skillet is non-negotiable for even heat distribution and that crispy edge. I use my Lodge skillet—it’s affordable, durable, and retains heat like a champ. Make sure it’s well-seasoned to prevent sticking. 🔥
Stand Mixer
While you can mix by hand, a stand mixer makes creaming butter and sugars effortless. I recommend the KitchenAid Artisan for its power and capacity. Beat on medium for 3-4 minutes until pale and fluffy.
Mixing Bowls
Have at least 2 mixing bowls—one for wet ingredients and one for dry. I prefer stainless steel for durability and easy cleanup. A 2-quart size works perfectly for this recipe’s quantities.
Spatula
A heat-resistant silicone spatula is essential for folding in chocolate chips and scraping every last bit of dough. I use OXO Good Grips—it’s flexible yet sturdy. The dough will be thick, so a strong spatula is key.
Oven Thermometer
Don’t trust your oven’s built-in thermometer. A $10 oven thermometer from Taylor ensures your 350°F is accurate. Even heat is critical for that perfect gooey center without overbaking the edges.
Cooling Rack
Let your pizookie rest on a wire cooling rack for 5-10 minutes before serving. This prevents the bottom from getting soggy. A basic 12-inch rack from any kitchen store works perfectly.
Nutrition Facts
Frequently Asked Questions
Can I use store-bought cookie dough?
Yes, but fresh dough gives better texture. If using store-bought, let it soften at room temperature for 30 minutes and add 1/2 cup extra chocolate chips for more gooey pockets.
Why is my center too runny?
This usually means it needed 2-3 more minutes in the oven. The center should jiggle slightly but not be liquid. Resist opening the oven door during baking.
Can I make this ahead of time?
Prepare the dough up to 2 days in advance and refrigerate. Press into the skillet just before baking. Do not pre-bake and reheat—it loses the gooey texture.
What if I don’t have a cast iron skillet?
Use any oven-safe 10-inch pan or baking dish. A metal cake pan works well, though the edges may brown faster. Adjust bake time accordingly.

- Potato Candy Recipe 1933: Vintage Peanut Butter Roll Delight - October 30, 2026
- Potato Chip Cookie Recipe With Pecans: Buttery Crunch Meets Nutty Richness - October 30, 2026
- Potato Patty Recipe No Egg: Crispy Edges Without the Binder - October 30, 2026