
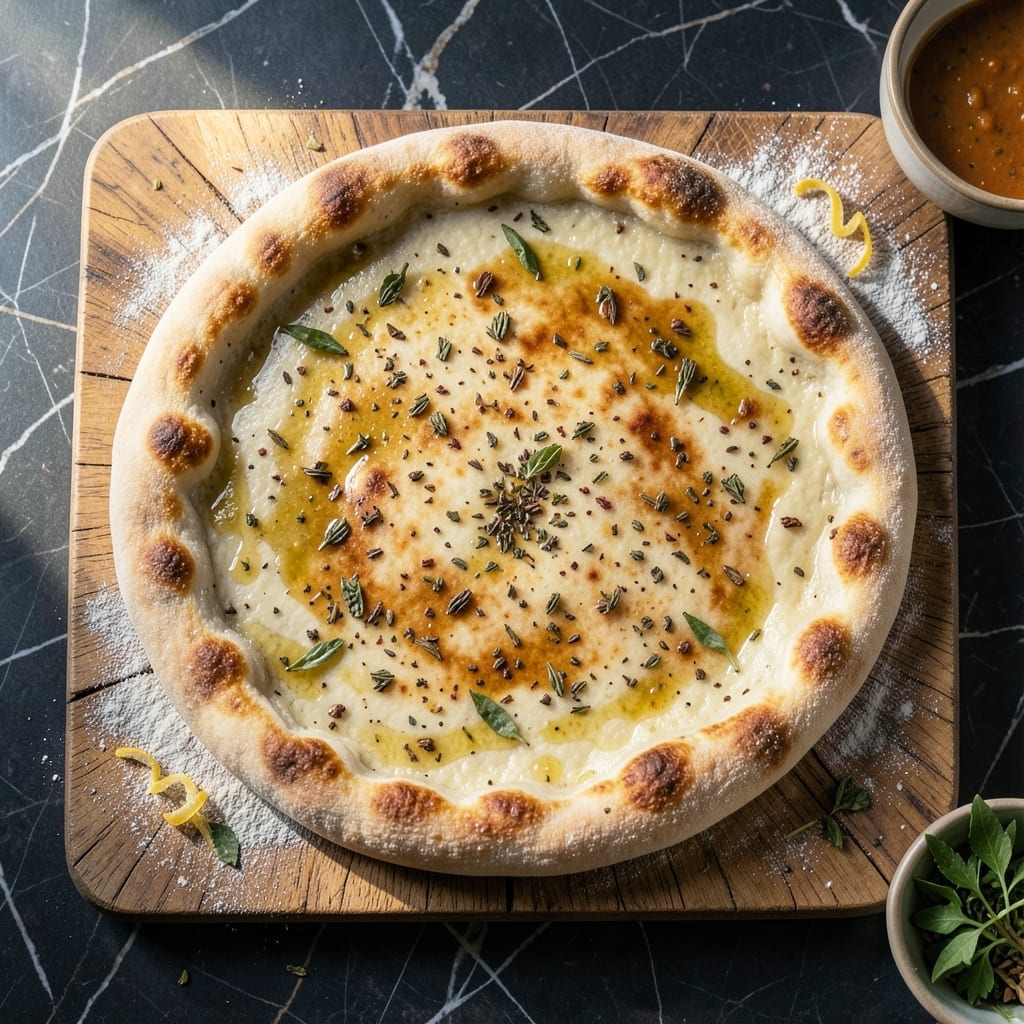
This no-yeast pizza base delivers crispy flatbread results without the wait. Simple ingredients and a straightforward method make it perfect for quick meals.
You’ll achieve a golden, sturdy crust in minutes using just flour, baking powder, and a few pantry staples. Ideal for when you need pizza fast.
Ingredients for Pizza Base Recipe No Yeast
Just flour, baking powder, and pantry staples create this crispy flatbread base.
| Ingredient | Amount | Notes |
|---|---|---|
| All-Purpose Flour 🌾 | 2 cups | Plus extra for dusting |
| Baking Powder 🧂 | 2 tsp | Ensures proper rise |
| Salt 🧂 | ¾ tsp | Fine grain preferred |
| Olive Oil 🫒 | ¼ cup | Extra-virgin for flavor |
| Plain Greek Yogurt 🥛 | ¾ cup | Full-fat for richness |
| Water 💧 | ¼ cup | As needed for consistency |
| Garlic Powder 🧄 | ½ tsp | Optional for flavor boost |
| Dried Oregano 🌿 | ½ tsp | Mediterranean flavor |
| Dried Basil 🍃 | ½ tsp | Complements oregano |
| Red Pepper Flakes 🌶️ | ¼ tsp | Adjust to taste |
The flour forms the foundation of this base. King Arthur or Gold Medal brands deliver consistent results. Baking powder must be fresh—test it by dropping a spoonful in hot water; it should bubble vigorously. The Greek yogurt adds tenderness without yeast. Fage or Chobani full-fat versions work best for structure and flavor.
No Greek yogurt? Plain yogurt strained through cheesecloth for 30 minutes works. For a dairy-free option, use unsweetened almond yogurt of similar thickness. The olive oil can be swapped with melted butter or any neutral oil. Herbs are flexible—fresh rosemary or thyme can replace dried oregano and basil at triple the amount.
The dough keeps 2-3 days wrapped in the fridge, though it’s best used immediately. Baked bases store 5 days in an airtight container or freeze for 1 month. Re-crisp in a dry skillet or oven before serving.
Why You’ll Love This Recipe
- No Yeast Needed: I skip the waiting around for dough to rise—just mix, shape, and bake.
- Rich and Tangy: The Greek yogurt gives it a subtle depth that plain flour can’t match.
- Weeknight Hero: I’ve made this for lazy dinners, last-minute guests, and even quick lunches.
- Pantry Friendly: All-purpose flour and baking powder are staples I always have on hand.
Step-by-Step Instructions for Pizza Base No Yeast
This method delivers a crispy, flavorful flatbread base without waiting for dough to rise.
Step 1: Combine Dry Ingredients for the Base
In a large mixing bowl, whisk together the 2 cups All-Purpose Flour, 2 tsp Baking Powder, 0.75 tsp Salt, 0.5 tsp Garlic Powder, 0.5 tsp Dried Oregano, 0.5 tsp Dried Basil, and 0.25 tsp Red Pepper Flakes until evenly distributed. This ensures the leavening agent and seasonings are well incorporated throughout the dough.
The baking powder reacts with the yogurt to create lift, while the herbs and garlic powder infuse every bite with Mediterranean flavor. Make sure there are no visible clumps of baking powder, as this could create bitter pockets in your finished base.
Step 2: Mix Wet Ingredients into a Shaggy Dough
Create a well in the center of your dry ingredients. Add the 0.25 cup Olive Oil and 0.75 cup Plain Greek Yogurt, then use a fork or your hands to mix until the dough starts to come together. The mixture will look shaggy and slightly sticky at first—this is normal.
Add the 0.25 cup Water gradually, 1 tablespoon at a time, until the dough forms a cohesive ball that pulls away from the sides of the bowl. You may not need all the water; stop as soon as the dough holds together. The yogurt’s acidity tenderizes the flour, creating a soft yet sturdy base.
Step 3: Knead and Rest the Dough
Turn the dough out onto a lightly floured surface (using some of the extra all-purpose flour). Knead gently for 2-3 minutes until smooth and elastic. Unlike yeast dough, this requires minimal kneading—just enough to develop the gluten slightly for structure.
Shape the dough into a ball, cover with a clean kitchen towel, and let it rest at room temperature for 10-15 minutes. This brief rest allows the flour to fully hydrate and the baking powder to begin its reaction, making the dough easier to roll out.
Step 4: Roll and Shape the Pizza Base
Divide the rested dough into 4 equal portions (about 100-110g each). On a floured surface, roll each portion into a thin circle, approximately ⅛-inch thick for a crispy result. Use a rolling pin for even thickness, or press with your hands for a more rustic shape.
If the dough springs back, let it rest for another 2-3 minutes before continuing. For extra crispiness, dust your work surface and rolling pin with a bit more all-purpose flour to prevent sticking. The thinner you roll it, the crispier your base will be.
Step 5: Pre-Cook the Base for Maximum Crispness
Heat a large skillet or griddle over medium-high heat. Once hot, carefully transfer one rolled dough round to the pan. Cook for 2-3 minutes per side until light golden brown with small bubbles forming on the surface.
This pre-cooking step is crucial for achieving that promised crispy texture without a yeast-based rise. The base should be firm enough to hold toppings but not fully cooked through. Remove from the pan and repeat with the remaining dough rounds. Your bases are now ready for toppings and final baking or grilling.
Pro Tips For Making Pizza Base Recipe No Yeast
- Preheat Your Pan: Get your skillet or baking sheet screaming hot before adding the dough—about 5 minutes over medium-high heat. I learned this the hard way after pulling out multiple pale, soggy bases.
- Use Full-Fat Yogurt: Skip the low-fat versions; the extra fat in full-fat Greek yogurt makes a real difference in texture and flavor. Sounds weird, but it works.
- Don’t Overmix: Stir just until the dough comes together—overworking it develops gluten, and you’ll end up with a tough, chewy base instead of a tender one.
- Roll It Thin: Aim for about ¼-inch thickness for an even cook and crispy edges. After burning three batches, I finally figured out thicker dough just doesn’t crisp up right without yeast.
Make-Ahead Tips for This Dish
Dough Prep Ahead
The dough can be mixed and kneaded up to 2 days in advance. Wrap it tightly in plastic wrap or place in an airtight container before refrigerating. Let it sit at room temperature for 30 minutes before rolling to soften. 💡
Pre-Rolled Bases
Roll out your bases and stack them between layers of parchment paper. Store in the fridge for up to 24 hours in a sealed container. This saves time when you’re ready to cook.
Freezing Dough
For longer storage, freeze the dough ball wrapped tightly in plastic wrap and placed in a freezer bag for up to 1 month. Thaw overnight in the fridge before using.
Pre-Cooked Bases
Pre-cook your bases, let them cool completely, then freeze in a single layer before transferring to a freezer bag. They’ll keep for 1 month and can go straight from freezer to oven. ❄️
Re-Crisping Tips
To revive stored bases, warm them in a dry skillet over medium heat for 1-2 minutes per side. Or, bake at 375°F for 5 minutes until crisp.
Make-Ahead Assembly
Assemble your pizzas with toppings and freeze on a tray before transferring to freezer bags. Bake directly from frozen at 400°F for 12-15 minutes.
Nutrition Facts
Frequently Asked Questions
Why use baking powder instead of yeast?
Baking powder creates a quick chemical reaction for immediate rise. It eliminates the need for proofing time, making the process faster. The result is a crispy, thin base perfect for quick meals.
Can I use regular yogurt instead of Greek?
Yes, but strain regular yogurt through cheesecloth for 30 minutes first. This removes excess liquid, creating a thicker consistency similar to Greek yogurt. The dough may be slightly stickier.
How thin should I roll the dough?
Aim for ⅛-inch thickness for maximum crispiness. Use a rolling pin for even results. If it springs back, let it rest for 2-3 minutes before trying again.
Why pre-cook the base before adding toppings?
Pre-cooking ensures a sturdy, crispy texture. It prevents soggy bottoms when toppings are added. Cook each side for 2-3 minutes until light golden brown.

- BBQ Sausage Recipe Oven: Smoky Depth Without the Grill - September 28, 2026
- BBQ Chicken Bowl Recipe Rice: Smoky Sweetness Over Fluffy Grains - September 28, 2026
- Beef Cutlet Recipe Ideas: Crispy Breaded Patties With Bold Seasonings - September 28, 2026