
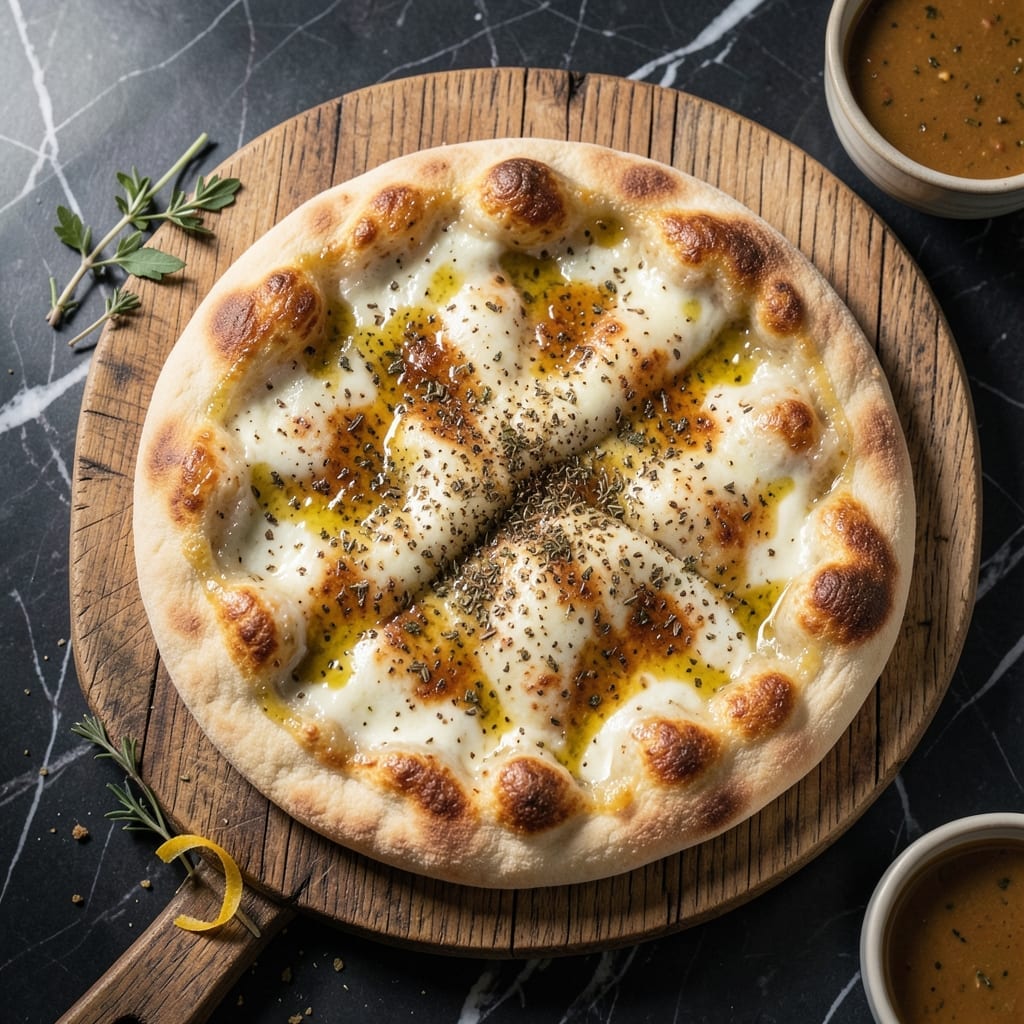
This no-yeast pizza crust delivers flaky layers with minimal effort. I developed this method for busy nights when waiting for dough to rise isn’t an option.
The secret lies in using baking powder and Greek yogurt to create lift without traditional fermentation. This combination produces a tender, layered texture that rivals yeast-based doughs.
In just 20 minutes, you’ll have a golden crust ready for your favorite toppings. The result is crisp at the edges with a soft, flaky interior that holds up beautifully to sauces and cheese.
Perfect for weeknight dinners when you crave homemade pizza without the wait. Here’s how to make it.
Ingredients for Pizza Crust Recipe No Yeast
Nine simple ingredients create that flaky, golden crust you crave. Probably have most already.
| Ingredient | Amount | Notes |
|---|---|---|
| All-Purpose Flour 🌾 | 2 cups | Plus extra for dusting |
| Baking Powder 🧂 | 2 tsp | Aluminum-free preferred |
| Plain Greek Yogurt 🥛 | 1 cup | Full-fat for best texture |
| Olive Oil 🫒 | 2 tbsp | Extra-virgin for flavor |
| Salt 🧂 | ½ tsp | Fine sea salt preferred |
| Sugar 🍚 | 1 tsp | Optional for browning |
| Garlic Powder 🧄 | ½ tsp | Adds subtle depth |
| Dried Oregano 🌿 | ½ tsp | Classic pizza flavor |
| Water 💧 | 2 tbsp | Adjust as needed |
The yogurt is key here—Greek gods or Fage full-fat works best (the thick stuff, not drinkable). Baking powder is your leavening agent, so make sure it’s fresh—test by dropping a teaspoon in hot water. It should bubble vigorously. I grab mine from Whole Foods bulk section to ensure turnover. All-purpose flour is fine, but bread flour adds a touch more chew if you’ve got it.
No Greek yogurt? Regular yogurt strained through cheesecloth for 30 minutes gets you close. Out of oregano? Italian seasoning at the same amount works fine. The olive oil can be any neutral oil in a pinch, but extra-virgin adds that classic pizza flavor. For a crispier crust, brush the top with melted butter (yes, butter is vegetarian) before baking.
Dough keeps wrapped in the fridge for 2 days, but it’s best used fresh. Baked crusts can be par-baked and frozen for 1 month—just thaw before adding toppings. Leftovers? Reheat in a dry skillet to revive the crisp.
Why You’ll Love This Recipe
- I’ll be real: I make a double batch and freeze the extras for lazy nights when pizza cravings hit.
- Ready in Minutes: I mix the flour, yogurt, and baking powder, and it’s ready to shape—no rising time, no yeast fuss.
- Crave-Worthy Crunch: The olive oil gives it that golden, crispy edge while the yogurt keeps the inside tender.
- Freezer Friendly: I’ll be real: I make a double batch and freeze the extras for lazy nights when pizza cravings hit.
Step-by-Step Instructions for Pizza Crust No Yeast
Here’s my no-fail method for achieving that perfect flaky texture without any waiting time.
Step 1: Combine Dry Ingredients for the Base
In a large mixing bowl, whisk together the 2 cups All-Purpose Flour, 2 tsp Baking Powder, 0.5 tsp Salt, 1 tsp Sugar, 0.5 tsp Garlic Powder, and 0.5 tsp Dried Oregano. I like to sift the flour first to remove any lumps and ensure a smooth texture in the final crust.
This dry mix forms the foundation of your no-yeast dough. The baking powder is what gives you lift and flakiness instead of yeast. Make sure it’s fresh—old baking powder loses its potency and won’t create those beautiful layers we’re after.
Step 2: Create the Wet Mixture
In a separate bowl, combine the 1 cup Plain Greek Yogurt, 2 tbsp Olive Oil, and 2 tbsp Water. Whisk until smooth and fully integrated. The full-fat yogurt is key here—it provides the necessary fat and acidity to create a tender, flaky crust without any yeast.
If the mixture seems too thick, you can add a tiny bit more water, but I’ve found the 2 tbsp is usually perfect. The olive oil adds richness and helps with browning, while the yogurt gives that characteristic tang that pairs so well with pizza toppings.
Step 3: Bring the Dough Together
Pour the wet mixture into the dry ingredients. Using a wooden spoon or silicone spatula, stir until the dough just comes together. It will be slightly sticky—that’s normal. Don’t overmix or you’ll develop too much gluten, which can make the crust tough instead of flaky.
If the dough is too sticky to handle, add 1-2 tbsp of additional All-Purpose Flour, but no more. The dough should be soft and slightly tacky but not so sticky that it clings to your hands. This balance ensures the layers will separate beautifully during baking.
Step 4: Shape and Rest the Dough
Turn the dough out onto a lightly floured surface. Pat it into a rough rectangle about ½-inch thick. For extra flakiness, I like to fold the dough over itself a couple of times (like a letter) before the final shaping. This creates layers that will puff up during baking.
Let the dough rest for 10 minutes while you preheat your oven to 400°F. This short rest allows the flour to fully hydrate and makes the dough easier to work with. You’ll notice it becomes more pliable and less likely to spring back when you roll it out.
Step 5: Roll Out and Pre-Bake for Perfect Flakiness
After resting, roll the dough out to your desired thickness on a piece of parchment paper. For a crispy, flaky crust, aim for about ¼-inch thick. Transfer the dough (still on the parchment) to a baking sheet.
Bake in the preheated oven for 12-15 minutes until the edges just start to turn light golden brown. This pre-baking step ensures your crust will be fully cooked and flaky even after adding toppings. Watch closely—it can go from perfectly baked to overdone quickly at this temperature.
Pro Tips For Making Pizza Crust Recipe No Yeast
- Preheat the Pan: Use a hot, heavy skillet—cast iron works best—and let it heat for at least 5 minutes before adding the dough. I learned this the hard way after my first few crusts came out pale and gummy.
- Drain the Yogurt: Strain your Greek yogurt in a fine-mesh sieve for 10 minutes to remove excess liquid, or your dough will be sticky and hard to shape.
- Don’t Overmix: Stir just until the dough comes together—overworking it makes the crust tough. Sounds weird, but it works.
- Add Olive Oil Last: Drizzle the olive oil in after mixing the dry and wet ingredients, then fold it in gently. This keeps the texture tender and prevents a dense, flatbread-like result.
Essential Equipment for pizza crust recipe no yeast
Mixing Bowls
I always use a large stainless steel mixing bowl for the dry ingredients—it’s durable and easy to clean. A medium glass bowl works perfectly for the wet mixture. These are kitchen staples I inherited from my grandmother in Sicily.
Measuring Tools
Precision matters here. I rely on my OXO Good Grips measuring cups and spoons for accurate dry ingredient measurements. For the yogurt and oil, a liquid measuring cup with clear markings ensures you get the right amounts every time. 💡
Rolling Equipment
A wooden rolling pin is my go-to for shaping the dough—it gives me the control I need for an even ¼-inch thickness. If you don’t have one, a wine bottle works in a pinch. Just dust it with flour first.
I also keep a pastry brush handy for brushing on olive oil before baking.
Baking Essentials
A half-sheet baking pan (about 18×13 inches) is ideal for this recipe. I line mine with parchment paper to prevent sticking. The parchment also makes it easy to transfer the crust to a wire rack for cooling.
Optional Tools
For extra flakiness, I sometimes use a dough scraper to help fold the dough during shaping. A pizza stone can also be used instead of a baking sheet for a crispier bottom crust.
Remember, cooking should be as enjoyable as eating—so use what you have and make it fun! 💪
Nutrition Facts
Frequently Asked Questions
Can I use regular yogurt instead of Greek?
Yes, but strain it first. Regular yogurt is thinner, so place it in cheesecloth for 30 minutes to drain excess liquid. This mimics Greek yogurt’s thickness for the right texture.
Why does my crust turn out dense?
Overmixing or old baking powder are common culprits. Stir just until combined and check your baking powder is fresh by testing in hot water—it should bubble vigorously.
How thin should I roll the dough?
Aim for ¼-inch thickness for crispy, flaky results. Use a rolling pin on a floured surface, and don’t worry about perfect circles—rustic shapes add charm!
Can I make this ahead of time?
Yes! Shape the dough and refrigerate for up to 2 days. For longer storage, par-bake the crust and freeze for 1 month. Thaw before adding toppings.

- Potato Candy Recipe 1933: Vintage Peanut Butter Roll Delight - October 30, 2026
- Potato Chip Cookie Recipe With Pecans: Buttery Crunch Meets Nutty Richness - October 30, 2026
- Potato Patty Recipe No Egg: Crispy Edges Without the Binder - October 30, 2026