
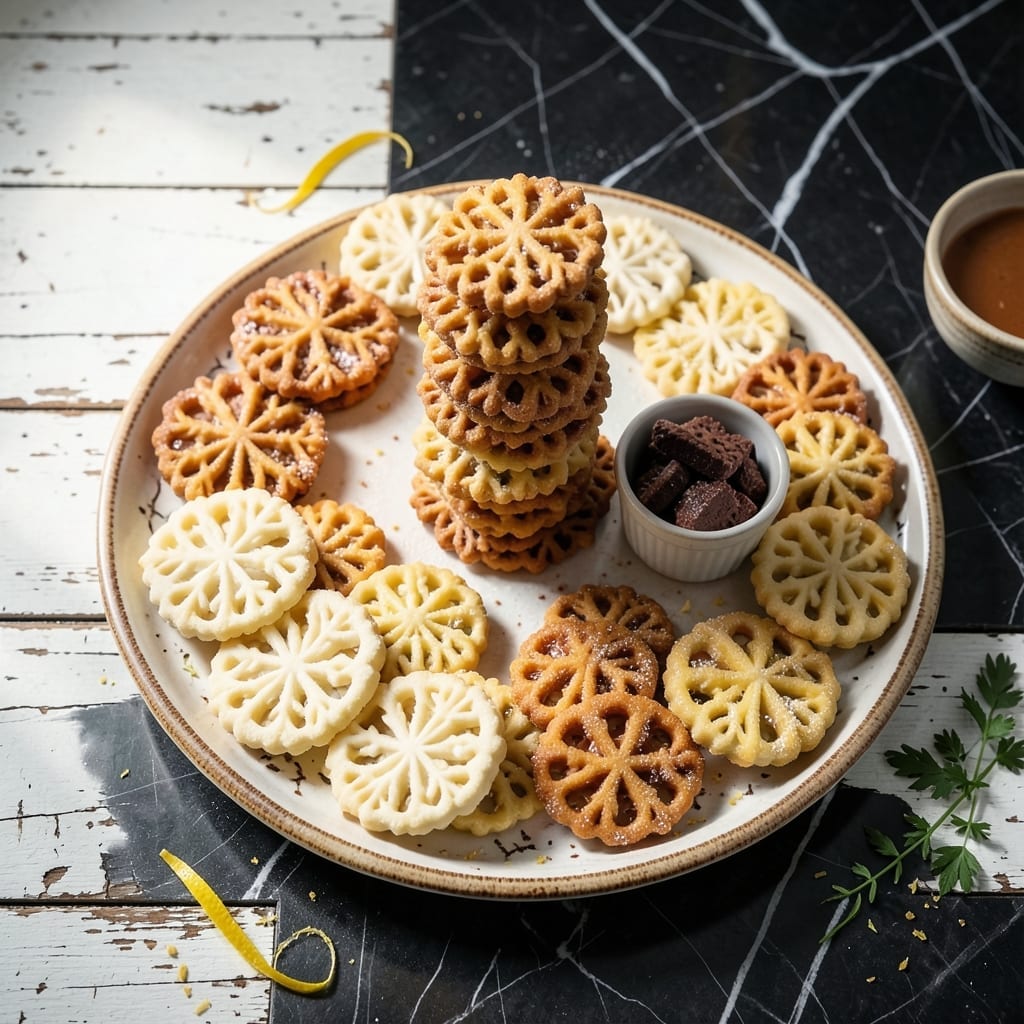
There’s an art to making crispy pizzelle that stay perfectly thin and delicate, yet sturdy enough to hold intricate designs. This traditional Italian cookie requires precision in both batter consistency and iron temperature to achieve that signature lacy texture.
I’ve tested countless variations to develop a foolproof method that works with classic anise flavor or modern twists like vanilla, lemon, or chocolate. The key is using the right iron and mastering the timing for each design.
What emerges from the iron are golden, fragrant wafers with intricate patterns that make every bite special. The contrast between the crispy edges and tender centers is what sets authentic pizzelle apart from ordinary cookies.
Perfect for holidays, weddings, or everyday treats with a touch of elegance. Here’s how to create these beautiful cookies at home.
Ingredients for Pizzelle Recipe Variations
Precision meets tradition with these carefully selected ingredients for perfect pizzelle every time.
| Ingredient | Amount | Notes |
|---|---|---|
| All-Purpose Flour 🌾 | 2 cups | Sifted for smooth batter |
| Granulated Sugar 🍚 | ¾ cup | Fine grain for even texture |
| Unsalted Butter 🧈 | ½ cup | Melted and cooled slightly |
| Large Eggs 🥚 | 3 whole | Room temperature for best volume |
| Pure Vanilla Extract 🌿 | 1 tsp | For classic vanilla flavor |
| Anise Extract 🌿 | 1 tsp | Traditional Italian flavor |
| Baking Powder 🧂 | 1 tsp | Ensures light texture |
| Salt 🧂 | ¼ tsp | Fine sea salt preferred |
| Lemon Zest 🍋 | 1 tbsp | Freshly grated for brightness |
| Cocoa Powder 🍫 | 2 tbsp | Dutch-process for chocolate variation |
| Vegetable Oil 🫒 | ¼ cup | For greasing iron |
The flour and eggs form the foundation here. King Arthur Flour is my go-to for consistent results, and large eggs (about 50g each) ensure proper batter consistency. The butter must be unsalted—salt content varies by brand and can affect texture. For authentic anise flavor, seek out pure anise extract (not imitation) from specialty stores or Italian markets.
Want to switch up flavors? Swap vanilla for almond extract or add a teaspoon of orange zest. For chocolate pizzelle, replace 2 tablespoons of flour with cocoa powder. No anise extract? 1 tablespoon crushed anise seeds steeped in 2 tablespoons warm milk works in a pinch. The batter should be thick but pourable—adjust with a splash of milk if needed.
Store cooled pizzelle in an airtight container at room temperature for up to 2 weeks. They’ll soften slightly over time but regain crispness if briefly reheated in a 300°F oven. For longer storage, freeze between layers of parchment for up to 3 months.
Why You’ll Love This Recipe
- One-Bowl Wonder: I mix the flour, sugar, melted butter, eggs, and vanilla in a single bowl—no extra dishes, no fuss.
- Buttery Vanilla Magic: The combo of real butter and vanilla gives these pizzelle that rich, warm flavor that’s impossible to resist.
- Endless Flavor Twists: I’ve swapped in lemon zest, almond extract, or even cocoa powder to keep things fresh for holidays or just because.
- Freezer Friends: Honestly, I double the batch and freeze half—they crisp up like new straight from the freezer, so I always have a sweet treat ready.
Step-by-Step Instructions for Pizzelle Recipe Variations
Master the technique for perfectly crisp wafers with these professional steps.
Step 1: Prepare the Batter Base
In a large mixing bowl, whisk together the 2 cups All-Purpose Flour, 0.75 cup Granulated Sugar, 1 tsp Baking Powder, and 0.25 tsp Salt. Sifted flour ensures a smooth, lump-free batter essential for even cooking and crisp texture.
Create a well in the center of the dry ingredients. This preparation method guarantees even distribution of leavening agents, which is critical for achieving the characteristic light, crisp structure of traditional pizzelle.
Step 2: Incorporate Wet Ingredients
In a separate bowl, beat the 3 whole Large Eggs until frothy. Add the 0.5 cup Unsalted Butter (melted and cooled slightly), 1 tsp Pure Vanilla Extract, and 1 tsp Anise Extract. Room temperature eggs incorporate more air, creating a lighter batter.
Gradually pour the egg mixture into the dry ingredients while whisking continuously. The batter should be thick but pourable. For chocolate variation, whisk in the 2 tbsp Cocoa Powder at this stage until fully integrated. For lemon variation, fold in the 1 tbsp Lemon Zest.
Step 3: Heat and Prepare the Pizzelle Iron
Preheat your pizzelle iron according to manufacturer instructions, typically to medium-high heat. Lightly brush both sides of the iron with 0.25 cup Vegetable Oil using a pastry brush. This thin, even coating prevents sticking and ensures easy release.
Test the iron temperature by dropping a small amount of batter onto the center. If it sizzles immediately and begins to spread, the iron is ready. Proper temperature is crucial—too cool and the wafers won’t crisp; too hot and they’ll burn before cooking through.
Step 4: Cook to Crisp Perfection
Spoon about 1 tablespoon of batter onto each pattern of the preheated iron. Close the lid firmly and cook for 30-45 seconds until the edges turn golden brown and steam stops rising from the iron.
Carefully remove the wafers using a fork and transfer to a wire rack to cool completely. They will crisp as they cool. Avoid stacking while warm, as this traps steam and creates soggy spots. The ideal pizzelle should be delicate, crisp, and hold its pattern when fully cooled.
Step 5: Store for Maximum Freshness
Once completely cooled, store the pizzelle in an airtight container at room temperature. Layer between sheets of parchment paper to prevent sticking. Properly stored, they will maintain their crisp texture for up to 2 weeks.
For gift-giving, package in decorative tins or cellophane bags tied with ribbon. The subtle anise or chocolate aroma will intensify slightly over time, enhancing the flavor experience with each bite.
Pro Tips For Making Pizzelle Recipe Variations
- Preheat the Iron: I learned this the hard way—always heat your pizzelle iron for at least 5 minutes before adding batter, or you’ll get pale, doughy cookies instead of crisp, golden ones.
- Soften the Butter: Use room-temperature butter, not melted—about 65°F, so it creams smoothly with the sugar without turning the dough greasy.
- Skip Cold Eggs: Crack your eggs into warm water for 5 minutes first; cold eggs can seize the butter, leaving your batter lumpy and hard to work with.
- Add Flavor Early: Fold citrus zest or a pinch of cinnamon into the dry ingredients with the flour—it distributes better than stirring in at the end.
Troubleshooting This Dish
Batter Issues
If your batter is too thick, add 1-2 tbsp milk until it reaches a pourable consistency. Too thin? Stir in 1 tbsp flour at a time. I’ve found that room temperature eggs help achieve the perfect texture every time.
Sticking Problems
A well-seasoned iron is key. Before each use, brush with vegetable oil using a pastry brush. If wafers stick, try increasing the heat slightly—medium-high works best for most irons. Never use nonstick sprays, as they can create a gummy residue. 🔥
For stubborn residue, clean the iron while still warm with a dry brush or paper towel. Avoid water, which can cause rust.
Uneven Cooking
If some wafers are pale while others burn, your iron may have hot spots. Rotate the iron 180 degrees halfway through cooking. Also, ensure you’re using the same amount of batter—1 tbsp per pattern—for consistent results.
Soft Pizzelle
These should crisp as they cool. If they stay soft, they likely didn’t cook long enough. Extend cooking time by 5-10 seconds and ensure they cool completely on a wire rack. Stacking warm wafers traps steam, so keep them single-layer until cooled.
Design Clarity
For sharp, defined patterns, avoid overfilling the iron. Use just enough batter to cover the design without spreading to the edges. I like to practice with water first to gauge the right amount. ✨
Nutrition Facts
Frequently Asked Questions
Can I make these without anise extract?
Swap it for 1 tsp almond or lemon extract. You can also use 1 tbsp orange zest for a citrus twist. Each variation brings a unique flavor while keeping the texture perfect.
How do I get extra crispy results?
Cook for the full 45 seconds until deep golden, then cool on a wire rack in a single layer. Stacking warm wafers traps steam, which softens them. Store in an airtight container once completely cooled.
Why do my designs look blurry?
Overfilling the iron causes batter to spread and blur the pattern. Use exactly 1 tbsp batter per pattern and ensure the iron is fully preheated to medium-high heat before adding batter.

- BBQ Sausage Recipe Oven: Smoky Depth Without the Grill - September 28, 2026
- BBQ Chicken Bowl Recipe Rice: Smoky Sweetness Over Fluffy Grains - September 28, 2026
- Beef Cutlet Recipe Ideas: Crispy Breaded Patties With Bold Seasonings - September 28, 2026