
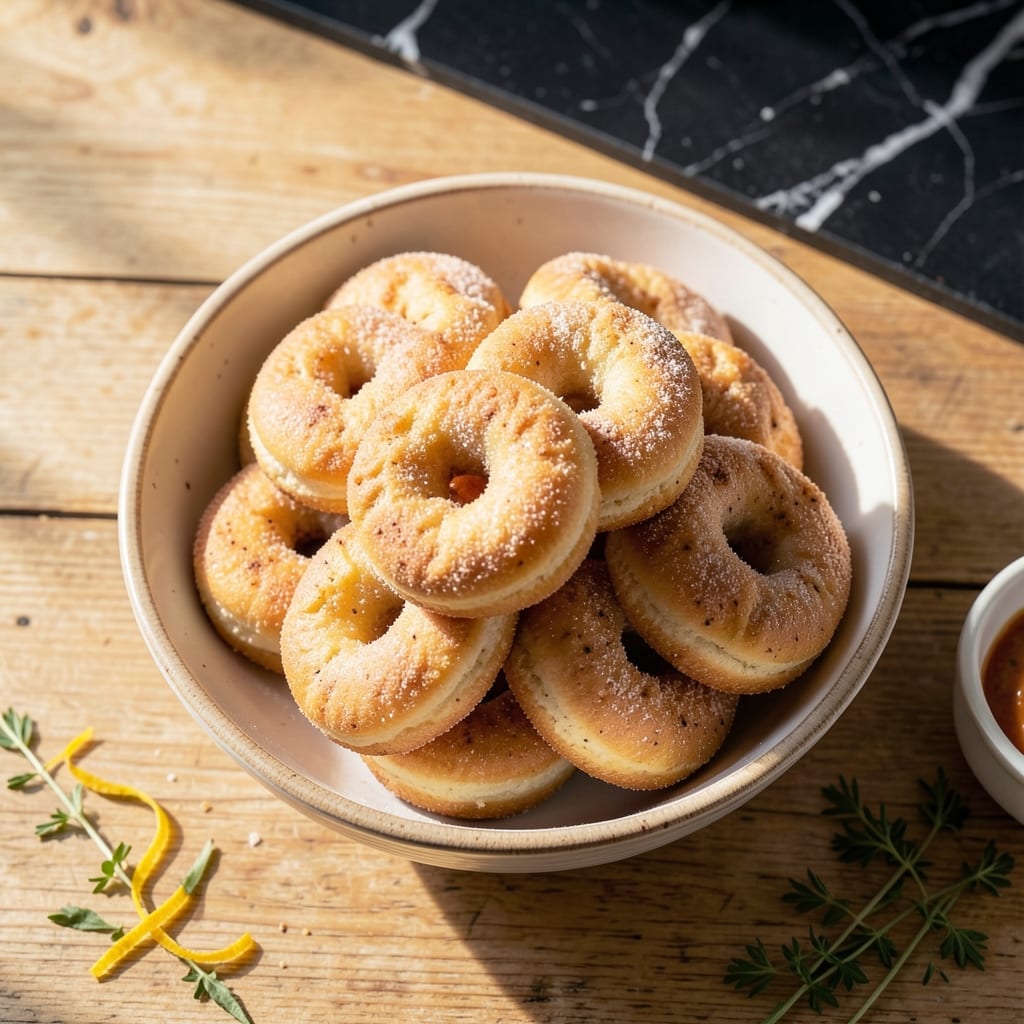
There’s something satisfying about homemade baked donuts—warm, soft, and perfectly golden without the mess of frying. This method delivers a lighter texture while keeping that classic pillowy feel.
The secret lies in a simple batter that comes together in minutes, then bakes into tender, cake-like donuts. No special equipment needed, just a donut pan and a few pantry staples.
You’ll get evenly baked donuts with a delicate crumb and subtle sweetness, ready to enjoy plain or dusted with sugar. The process is straightforward and foolproof.
Perfect for breakfast, brunch, or a sweet snack, these donuts prove that simplicity doesn’t mean sacrificing flavor or texture.
Ingredients for Plain Donut Recipe Baked
Pantry staples plus a few basics. Simple enough for a lazy Sunday morning.
| Ingredient | Amount | Notes |
|---|---|---|
| All-Purpose Flour 🌾 | 2 cups | Sifted for lighter texture |
| Granulated Sugar 🍚 | ½ cup | Fine grain preferred |
| Baking Powder 🧂 | 2 tsp | Fresh for best rise |
| Salt 🧂 | ½ tsp | Fine sea salt works |
| Ground Nutmeg 🌰 | ¼ tsp | Freshly ground preferred |
| Large Egg 🥚 | 1 whole | Room temperature preferred |
| Whole Milk 🥛 | ½ cup | Warm to room temperature |
| Unsalted Butter 🧈 | 2 tbsp | Melted and cooled slightly |
| Vanilla Extract 🌿 | 1 tsp | Pure vanilla preferred |
| Granulated Sugar 🍚 | ¼ cup | For dusting finished donuts |
The flour is doing most of the work here—King Arthur or Gold Medal give you that tender crumb. Baking powder loses potency over time, so check the expiration date before you start. I grab mine from Target or the bulk bins at Whole Foods. The milk and butter should be at room temp (leave them out for 30 minutes) so they blend smoothly into the batter without seizing.
No whole milk? 2% works fine, or oat milk in a pinch (though the flavor will be slightly different). Out of nutmeg? Cinnamon at the same amount gives a different but still delicious warmth. The vanilla can be skipped if you’re desperate, but it adds that classic bakery flavor. Unsalted butter is key—salted can make your donuts taste unevenly seasoned.
Baked donuts are best eaten the same day, but they’ll keep in an airtight container for 2 days. Freeze for up to 1 month (reheat in microwave for 20 seconds to revive). Dust with sugar just before serving so it doesn’t melt into the donut.
Why You’ll Love This Recipe
- No-Fuss Baking: I just mix, shape, and bake—no deep fryer mess or hot oil to deal with.
- Warm Spice Magic: The nutmeg adds this cozy, old-fashioned sweetness that’s subtly addictive.
- Breakfast or Snack: Honestly, I make a double batch on Sunday and we grab them all week.
- Pantry Staples Only: Between us, I already had all the ingredients—flour, sugar, baking powder—no extra shopping.
Step-by-Step Instructions for Baked Plain Donuts
This method delivers soft, pillowy results without the mess of frying.
Step 1: Combine Dry Ingredients
In a large bowl, whisk together the 2 cups All-Purpose Flour, 0.5 cup Granulated Sugar, 2 tsp Baking Powder, 0.5 tsp Salt, and 0.25 tsp Ground Nutmeg. I sift the flour first—this breaks up any lumps and incorporates air for a lighter texture.
The nutmeg adds a subtle warmth that enhances the sweetness without overpowering it. Make sure your baking powder is fresh; old baking powder loses its leavening power and results in dense donuts. The mixture should look uniformly combined with no streaks of flour.
Step 2: Mix Wet Ingredients
In a separate bowl, beat the 1 whole Large Egg lightly, then whisk in the 0.5 cup Whole Milk, 2 tbsp Unsalted Butter, and 1 tsp Vanilla Extract. The butter should be melted and cooled slightly so it doesn’t cook the egg.
I warm the milk to room temperature first—cold milk can cause the melted butter to clump. The vanilla extract should be pure, not imitation, for the best flavor. The wet mixture will look smooth and slightly pale from the egg.
Step 3: Form the Dough
Pour the wet ingredients into the dry ingredients and stir gently with a wooden spoon until just combined. The dough will be thick and slightly sticky. Don’t overmix—this develops gluten, which makes the donuts tough instead of tender.
If the dough seems too wet, add a tablespoon of flour, but I find the ratio is usually perfect. Let the dough rest for 5 minutes—this allows the flour to fully hydrate and makes the dough easier to handle when shaping.
Step 4: Shape and Bake
Preheat your oven to 375°F and lightly grease a donut pan. Transfer the dough to a piping bag or a plastic bag with a corner snipped off. Pipe the dough into the pan, filling each cavity about ⅔ full.
Bake for 10-12 minutes until the donuts are light golden brown and spring back when touched lightly. A toothpick inserted into the center should come out clean. Don’t overbake, or they’ll lose their soft, pillowy texture.
Step 5: Finish with Sugar
Let the donuts cool in the pan for 5 minutes, then transfer them to a wire rack. While they’re still warm, roll the donuts in the remaining 0.25 cup Granulated Sugar to coat evenly. The residual heat helps the sugar adhere.
Let them cool completely before serving. The sugar should form a thin, slightly crisp layer on the outside, while the inside stays soft and moist. These are best enjoyed the same day, though they’ll keep for a day or two in an airtight container.
Pro Tips For Making Plain Donut Recipe Baked
- Preheat the Oven: I learned this the hard way—baking powder starts reacting the second it hits liquid, so your oven needs to be at 375°F before the batter goes in, or you’ll lose the rise.
- Measure Flour Right: Scooping flour straight from the bag packs it down—spoon it into your measuring cup and level it off, or your donuts will turn out dense and dry.
- Skip Overmixing: Stir just until the flour disappears; after burning three batches, I finally figured out that overmixing develops gluten and makes baked donuts tough instead of tender.
- Add Nutmeg Last: Sounds weird, but it works: fold the ground nutmeg in at the very end to keep its warm flavor bright—it’s the thing that matters most for that classic donut taste.
Flavor Customization for This Recipe
Sweet Glaze Option
For a sweeter finish, dip warm donuts in a simple glaze made with 1 cup powdered sugar and 2-3 tbsp milk. Whisk until smooth, then add ½ tsp vanilla extract for extra flavor. Dip each donut, let excess drip off, then place on a wire rack. 💛
Spiced Sugar Coating
Mix ¼ cup granulated sugar with ½ tsp cinnamon and a pinch of ground cardamom for a warm, aromatic twist. Roll warm donuts in this mixture for a cozy, bakery-style finish.
Chocolate Drizzle
Melt ½ cup semi-sweet chocolate chips with 1 tsp coconut oil for a smooth drizzle. Use a fork to drizzle over cooled donuts. Let it set for 5 minutes before serving.
Citrus Zest Boost
Add 1 tbsp lemon or orange zest to the sugar coating for a bright, fresh flavor. The citrus oils elevate the sweetness without overpowering it. I love this for a springtime treat.
Pair with a warm chai latte for a cozy combination. ✨
Savory Herb Twist
For an unexpected flavor, mix ¼ cup sugar with ½ tsp dried rosemary or thyme. The herbal notes complement the sweetness beautifully. Serve with a sprinkle of flaky sea salt.
Nutrition Facts
Frequently Asked Questions
Can I make these without a donut pan?
Yes! Use a muffin tin and fill greased cups halfway. They’ll bake into donut-like shapes. Bake at 375°F for 12-14 minutes until golden.
Why are my donuts dense instead of fluffy?
Overmixing the batter or using expired baking powder are common culprits. Stir just until combined and check your baking powder’s freshness. The dough should be thick but not tough.
Can I use a different milk?
2%, oat, or almond milk work well. For best results, warm it to room temperature first. Avoid coconut milk as it can add unwanted flavor.
How do I store leftovers?
Keep in an airtight container at room temperature for 2 days. For longer storage, freeze for up to 1 month. Reheat briefly in the microwave before serving.

- Potato Candy Recipe 1933: Vintage Peanut Butter Roll Delight - October 30, 2026
- Potato Chip Cookie Recipe With Pecans: Buttery Crunch Meets Nutty Richness - October 30, 2026
- Potato Patty Recipe No Egg: Crispy Edges Without the Binder - October 30, 2026