
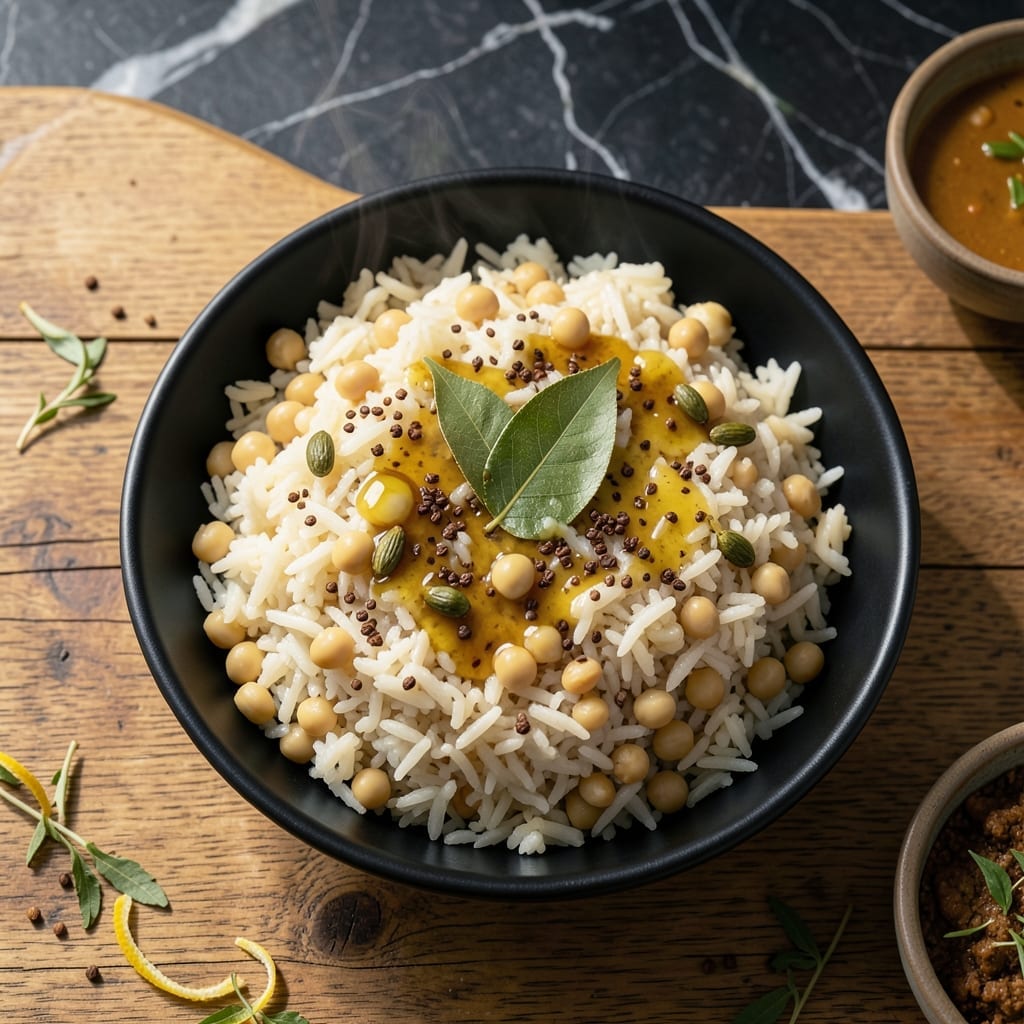
There’s a reason khichdi is called India’s ultimate comfort food—it’s simple, nourishing, and effortlessly satisfying. This one-pot creation transforms humble rice and lentils into a meal that feels like a warm embrace.
The pressure cooker makes it nearly foolproof, cutting cooking time while preserving every bit of flavor. Mild spices and ghee come together to create a dish that’s gentle on the stomach yet deeply comforting.
What you get is perfectly soft rice and lentils with a light, porridge-like texture that’s endlessly customizable. It’s the kind of meal that tastes like home, no matter where you are.
Serve it plain or with a side of yogurt and papad for the full experience. Here’s how to make it right every time.
Ingredients for Plain Khichdi Recipe Pressure Cooker
Simple ingredients for a dish that feels like home. Nothing fancy, just pure comfort.
| Ingredient | Amount | Notes |
|---|---|---|
| Basmati Rice 🌾 | 1 cup | Rinsed until water runs clear |
| Yellow Moong Lentils 🥣 | ½ cup | Split and washed thoroughly |
| Ghee 🧈 | 2 tbsp | Clarified butter, or sub oil |
| Cumin Seeds 🌿 | 1 tsp | Whole, not ground |
| Green Cardamom Pods 🌿 | 2 whole | Lightly crushed |
| Bay Leaf 🍃 | 1 whole | Dried or fresh |
| Fresh Ginger 🌿 | 1 tbsp | Minced or grated |
| Turmeric Powder 🌶️ | ½ tsp | Ground, for color and warmth |
| Salt 🧂 | 1 tsp | Adjust to taste |
| Water 💧 | 4 cups | For pressure cooking |
| Plain Yogurt 🥛 | ½ cup | For serving (optional) |
| Fresh Cilantro 🌿 | 2 tbsp | Chopped, for garnish |
The rice and lentils are the heart of this dish. Basmati rice gives the perfect texture, and yellow moong lentils cook fast and soft. Grab them from any Indian grocery store or the international aisle at Whole Foods. Ghee is traditional (and worth it for that rich flavor), but vegetable oil works in a pinch. Look for organic ghee if you want the good stuff.
No moong lentils? Split red lentils or masoor dal work too—just adjust the water slightly. Out of cumin seeds? Ground cumin at half the amount gets you close. The ginger can be swapped for 1 tsp ginger paste (from those little jars). If you’re skipping the ghee, any neutral oil is fine, but don’t use olive oil—the flavor’s too strong here.
This keeps beautifully for 3-4 days in the fridge. Reheat with a splash of water to loosen it up. Freezes for 2 months too (portion before freezing). The yogurt topping? Add it fresh each time—don’t mix it in ahead.
Why You’ll Love This Recipe
- One Pot Wonder: I just dump rice, moong dal, and spices in the pressure cooker and walk away.
- Aromatic Comfort: The ghee-toasted cumin and cardamom make the whole kitchen smell like home.
- Feeds All Ages: Even my picky nephew cleans his plate—mild flavors work for everyone.
- Leftovers Gold: Tastes even better the next day, and it freezes like a dream.
Step-by-Step Instructions for Plain Khichdi
This one-pot wonder comes together effortlessly with just a few simple steps.
Step 1: Rinse and Prepare the Base Ingredients
Start by thoroughly rinsing the 1 cup Basmati Rice until the water runs clear. This removes excess starch and prevents the khichdi from becoming gummy. In a separate bowl, wash the 0.5 cup Yellow Moong Lentils until the water is no longer cloudy.
Drain both the rice and lentils well, then set aside. Properly rinsed grains are the foundation of a perfectly textured khichdi—this step ensures each grain remains distinct while cooking together harmoniously.
Step 2: Temper the Spices in Ghee
Heat the 2 tbsp Ghee in your pressure cooker over medium heat. Once melted, add the 1 tsp Cumin Seeds, 2 whole Green Cardamom Pods, and 1 whole Bay Leaf. Sauté for 30-45 seconds until the cumin seeds begin to sizzle and release their aroma.
Quickly stir in the 1 tbsp Fresh Ginger and cook for another 15-20 seconds until fragrant. Be careful not to burn the spices—this would make them bitter. The ghee should be hot enough to bloom the spices but not so hot that they darken too quickly.
Step 3: Combine and Pressure Cook
Add the drained rice and lentils to the pressure cooker, stirring to coat them in the spiced ghee. Sprinkle in the 0.5 tsp Turmeric Powder and 1 tsp Salt, then pour in the 4 cups Water. Stir everything together gently.
Secure the lid on your pressure cooker and cook on high heat until you reach full pressure. Once pressurized, reduce the heat to medium-low and cook for 15 minutes. The khichdi is done when the rice and lentils are soft and fully tender with no resistance when tested.
Step 4: Release Pressure and Finish
Allow the pressure to release naturally for 5 minutes, then carefully open the lid. The khichdi should have a porridge-like consistency—thick but not dry. If it appears too thick, stir in a splash of hot water to reach your desired texture.
Let the khichdi sit covered for 5 minutes off the heat. This resting time allows the flavors to meld and the grains to absorb any remaining liquid, creating that comforting, cohesive texture khichdi is known for.
Step 5: Serve Warm with Garnishes
Ladle the khichdi into bowls while it’s still warm. Top each serving with a dollop of 0.5 cup Plain Yogurt if desired, and sprinkle with 2 tbsp Fresh Cilantro for a bright, fresh finish.
The yogurt adds a creamy tang that balances the earthy spices, while the cilantro brings a pop of color and freshness. Serve immediately for the ultimate one-pot comfort experience.
Pro Tips For Making Plain Khichdi Recipe Pressure Cooker
- Rinse the Lentils: Soak yellow moong lentils for 10 minutes before cooking—this cuts pressure cooker time in half and prevents them from turning mushy.
- Toast the Cumin: Heat cumin seeds in ghee until fragrant before adding rice and lentils; I learned this the hard way—raw cumin tastes bitter and ruins the dish.
- Stick to 1:2 Ratio: Use a 1:2 ratio of rice to moong dal, and never exceed 3 whistles in the pressure cooker, or you’ll end up with a sticky, overcooked mess.
- Add Cardamom Last: Crush green cardamom pods lightly and add them just before sealing the pressure cooker—this keeps their aroma bright instead of letting it cook off.
Creative Variations of This plain khichdi recipe pressure cooker
Vegetable Khichdi
Add 1 cup diced carrots, ½ cup green peas, and ½ cup cauliflower florets when tempering the spices. This version boosts nutrition and texture while keeping the dish light and comforting. The vegetables soften beautifully in the pressure cooker. 💛
Masala Khichdi
For extra flavor, add 1 chopped tomato, 1 green chili, and ½ tsp garam masala with the ginger. This spiced-up version is perfect when you want a little more warmth and depth. It’s still gentle but more aromatic.
Moong Dal Only
Skip the rice and use 1 cup Yellow Moong Lentils with 4 cups water. Cook for 12 minutes under pressure for a lighter, protein-packed porridge. This variation is easier to digest and great for fasting days.
Creamy Khichdi
Stir in ¼ cup heavy cream or coconut milk after cooking for a richer texture. A pinch of sugar balances the flavors beautifully. This feels indulgent while staying simple and comforting.
Herbed Khichdi
Add 5-6 fresh curry leaves and 1 sprig fresh mint with the spices. The curry leaves add a nutty aroma, while mint brings freshness. Remove the leaves before serving for a clean, fragrant finish.
Protein-Packed Khichdi
Mix in ½ cup cooked chickpeas or diced paneer after pressure cooking. This adds heartiness and makes the dish more filling. Perfect for a complete, balanced meal in one pot. ✨
Nutrition Facts
Frequently Asked Questions
What’s the ideal rice-to-lentil ratio?
Use a 2:1 ratio of rice to lentils for classic texture. For this recipe, that’s 1 cup rice to 0.5 cup moong dal. This balance ensures soft, distinct grains.
Can I use a different type of lentil?
Yes! Split red lentils or masoor dal work well. Adjust water slightly as they cook faster. Avoid whole lentils—they won’t soften properly.
Why did my khichdi turn mushy?
Overcooking or excess water causes this. Stick to 15 minutes under pressure and 4 cups water for the given ratio. Rinse grains thoroughly to remove excess starch.
How long can I store leftovers?
It keeps for 3-4 days in the fridge. Reheat with a splash of water to restore texture. For longer storage, freeze for up to 2 months.

- Potato Candy Recipe 1933: Vintage Peanut Butter Roll Delight - October 30, 2026
- Potato Chip Cookie Recipe With Pecans: Buttery Crunch Meets Nutty Richness - October 30, 2026
- Potato Patty Recipe No Egg: Crispy Edges Without the Binder - October 30, 2026