
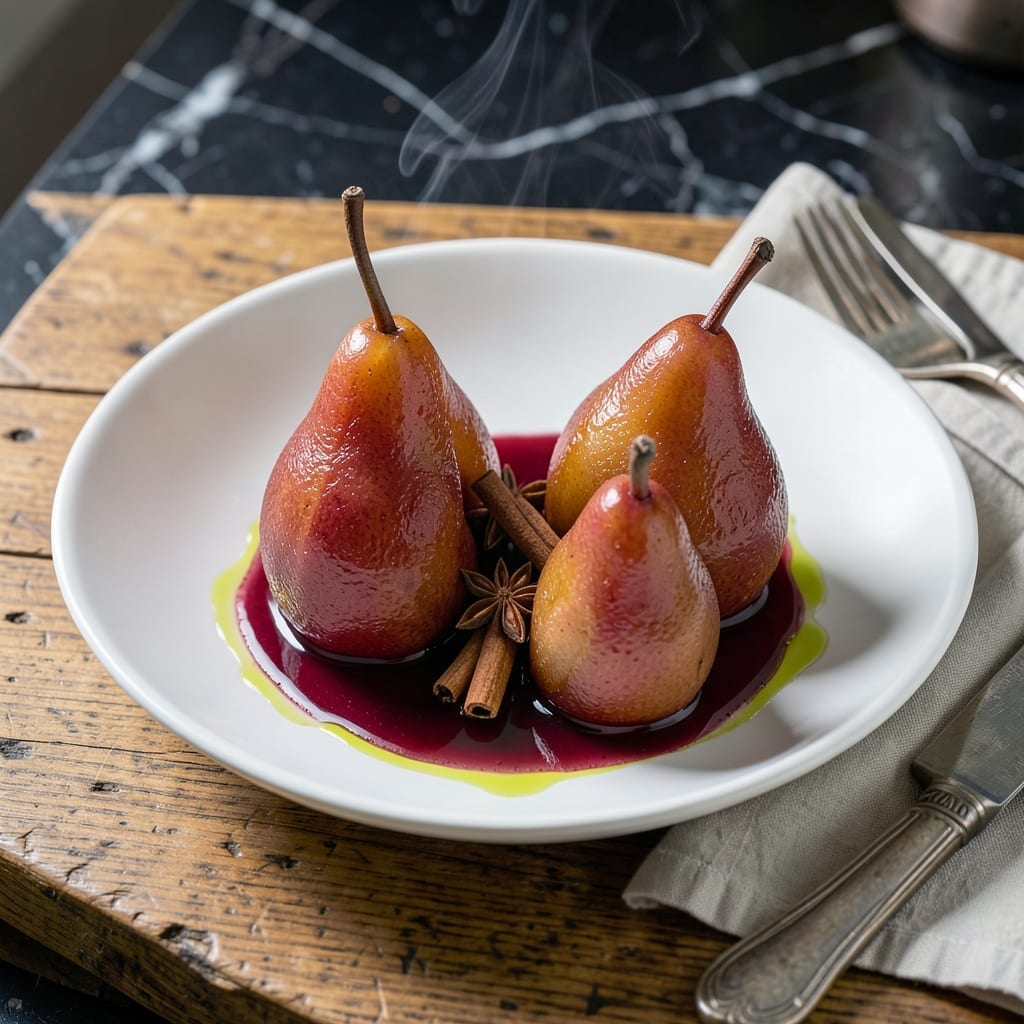
This dessert transforms simple pears into a sophisticated finale that deserves a place at any dinner party. The poaching liquid infuses the fruit with deep, wine-soaked flavors and a delicate spice warmth.
I developed this method after testing multiple variations to achieve the ideal balance between tender fruit and rich, aromatic syrup. The key is maintaining a gentle simmer that cooks the pears evenly without breaking them apart.
The result is perfectly tender pears with a subtle crimson blush, served in a reduced wine syrup that’s ideal for drizzling. This dish proves that elegant desserts don’t require complicated techniques.
Serve with whipped cream or vanilla ice cream for a touch of indulgence. The poaching liquid keeps well and can be reused for another batch.
Ingredients for Poached Pears in Red Wine Recipe Uk
A few quality ingredients and a bottle of red wine create this elegant dessert.
| Ingredient | Amount | Notes |
|---|---|---|
| Bosc Pears 🍐 | 4 whole | Firm, not overripe |
| Red Wine 🍷 | 2 cups | Dry variety like Cabernet Sauvignon |
| Granulated Sugar 🍚 | ½ cup | For poaching liquid |
| Water 💧 | 2 cups | To balance wine intensity |
| Cinnamon Stick 🌿 | 1 whole | For aromatic depth |
| Star Anise Pods ⭐ | 2 whole | Optional but recommended |
| Orange Zest 🍊 | 1 tbsp | Freshly grated for brightness |
| Vanilla Bean 🌿 | 1 whole | Split and scraped |
| Cloves 🌰 | 4 whole | For spice warmth |
| Fresh Ginger 🌿 | 1 tbsp | Peeled and sliced |
| Whipped Cream 🥛 | 1 cup | For serving, optional |
| Vanilla Ice Cream 🍦 | 1 cup | For serving, optional |
The pears are the star here. Bosc or Anjou varieties hold their shape best during poaching. Look for fruit that’s firm but just starting to yield when pressed—avoid anything mushy. For the wine, any dry red works, but Cabernet Sauvignon or Merlot add the deepest color and flavor. I always grab mine from Waitrose or Tesco (their mid-range bottles are perfect).
No red wine? Cranberry juice mixed with a splash of red wine vinegar can stand in. Star anise not in your spice drawer? Substitute with a pinch of ground anise or skip it entirely. The cinnamon and cloves are non-negotiable though—they build that signature warmth. For the sugar, brown sugar adds molasses notes, but granulated keeps things clean and bright.
The poached pears keep beautifully in their liquid for 3-4 days in the fridge. The syrup thickens as it cools, making it perfect for drizzling. You can even reuse the poaching liquid for another batch—just bring it back to a simmer first. Serve at room temperature for the best flavor.
Why You’ll Love This Recipe
- One Pot Wonder: I just toss the pears, wine, sugar and cinnamon in a saucepan and let it work its magic.
- Rich Winter Spice: The red wine soaks into the pears while the cinnamon adds that warm, cozy depth.
- Dinner Party Star: Honestly, it feels fancy but takes almost no effort—my guests always ask for the recipe.
- Keeps Beautifully: I make a big batch and the pears stay tender in their syrup for days, ready for desserts or breakfast.
Step-by-Step Instructions for Poached Pears in Red Wine
This elegant dessert comes together with precise timing and careful attention to the poaching process.
Step 1: Prepare the Bosc Pears
Peel the 4 whole Bosc Pears, leaving the stems intact for presentation. Cut a thin slice from the bottom of each pear so they stand upright. This step ensures even cooking and a polished appearance when served.
As you work, place the peeled pears in a bowl of cold water with a splash of lemon juice or vinegar to prevent browning. The pears should be firm but ripe—overripe fruit will fall apart during poaching.
Step 2: Simmer the Poaching Liquid
In a large saucepan, combine the 2 cups Red Wine, 2 cups Water, and 0.5 cup Granulated Sugar. Stir until the sugar dissolves completely over medium heat.
Add the 1 whole Cinnamon Stick, 2 whole Star Anise Pods, 1 tbsp Orange Zest, split and scraped 1 whole Vanilla Bean, 4 whole Cloves, and 1 tbsp Fresh Ginger. Bring to a gentle simmer, then reduce heat to low to maintain a steady, subtle bubble.
Step 3: Poach the Pears to Perfection
Carefully place the prepared pears upright in the simmering liquid. The liquid should cover about three-quarters of each pear. If needed, add a bit more water to ensure proper coverage.
Poach uncovered for 20-25 minutes, turning the pears halfway through for even color. Test doneness by piercing with a knife—the tip should slide in easily but the pear should still hold its shape. The pears will deepen to a rich, translucent ruby hue when ready.
Step 4: Cool and Reduce the Syrup
Using a slotted spoon, transfer the pears to a serving dish. Increase the heat to medium-high and boil the poaching liquid for 10-12 minutes until it reduces by half and thickens into a syrup.
Strain the syrup through a fine-mesh sieve to remove the spices, then pour it over the pears. Let the pears cool to room temperature, basting occasionally with the syrup to enhance flavor and shine.
Step 5: Serve with Optional Garnishes
Serve the pears at room temperature or slightly chilled. For an indulgent finish, top each pear with a dollop of 1 cup Whipped Cream or a scoop of 1 cup Vanilla Ice Cream.
The contrast of warm spiced pears with cold cream creates a sophisticated dessert experience. Drizzle any remaining syrup over the plate for an elegant presentation.
Pro Tips For Making Poached Pears In Red Wine Recipe Uk
- Peel Gently: Use a vegetable peeler and keep the stems intact—Bosc pears are delicate when ripe, and the stem helps them hold shape during poaching.
- Simmer, Don’t Boil: Keep the wine mixture at a gentle simmer, not a rolling boil, or the pears will turn mushy instead of tender and infused.
- Use Full-Bodied Wine: Skip the cheap stuff; a bold UK red like a Cabernet Sauvignon or Malbec adds depth to the syrup that lighter wines just can’t.
- Test with a Knife: Slide a thin knife into the thickest part after 15 minutes—if it goes in smoothly, they’re done, even if they still feel firm.
Essential Equipment for Perfect Results
Quality Saucepan
I recommend a 3-4 quart stainless steel saucepan with a heavy base for even heat distribution. A Cuisinart MultiClad Pro works beautifully for this. The wide surface allows pears to stand upright while the heavy bottom prevents hot spots that could overcook sections of the fruit.
Fine-Mesh Sieve
A fine-mesh strainer is essential for removing whole spices from your syrup. I use an OXO Good Grips sieve—it catches every clove and star anise pod while letting the liquid flow through easily. This ensures a silky-smooth final syrup with no unwanted bits.
Sharp Peeler
Since you need to peel the pears without damaging their shape, invest in a high-quality swivel peeler. The OXO Y-Peeler gives me precise control and removes thin strips of skin effortlessly. A dull peeler can tear the fruit and ruin your presentation. 💡
Slotted Spoon
Transferring delicate poached pears requires a wide, shallow slotted spoon to support their shape. I prefer a stainless steel version with large slots that lets the liquid drain while keeping the fruit intact. Avoid deep ladles that can crush the pears.
Instant-Read Thermometer
While not strictly necessary, a ThermoWorks ThermaPen helps monitor your liquid temperature. Maintaining 160-180°F ensures gentle cooking without boiling. This small tool prevents the common mistake of overheating that turns pears mushy.
Serving Dishes
Choose shallow bowls or rimmed plates that showcase the pears and catch the syrup. I love white stoneware from Waitrose—it makes the ruby-red pears pop visually. Clear glass dishes also work beautifully for a more elegant presentation. ✨
Nutrition Facts
Frequently Asked Questions
Can I use a different type of pear?
Bosc or Anjou work best, but Conference pears are a great UK substitute. Avoid very ripe pears as they’ll fall apart. The key is choosing firm fruit that holds its shape during cooking.
How do I know when they’re done?
Test with a knife tip—it should slide in easily after 20-25 minutes. The pears will darken to a deep ruby color and feel tender but not mushy when pierced.
What if my syrup is too thin?
Simmer it longer on medium-high heat until reduced by half. If it thickens too much, stir in a splash of water. The syrup should coat the back of a spoon.
Can I make this ahead?
Yes! The pears keep beautifully in their syrup for 3-4 days in the fridge. In fact, the flavors deepen over time. Serve chilled or at room temperature.

- Potato Chip Cookie Recipe With Pecans: Buttery Crunch Meets Nutty Richness - October 30, 2026
- Potato Patty Recipe No Egg: Crispy Edges Without the Binder - October 30, 2026
- Paula Deen’s Potato Chip Cookies Recipe: Salty-Sweet Crunch in Every Bite - October 30, 2026