
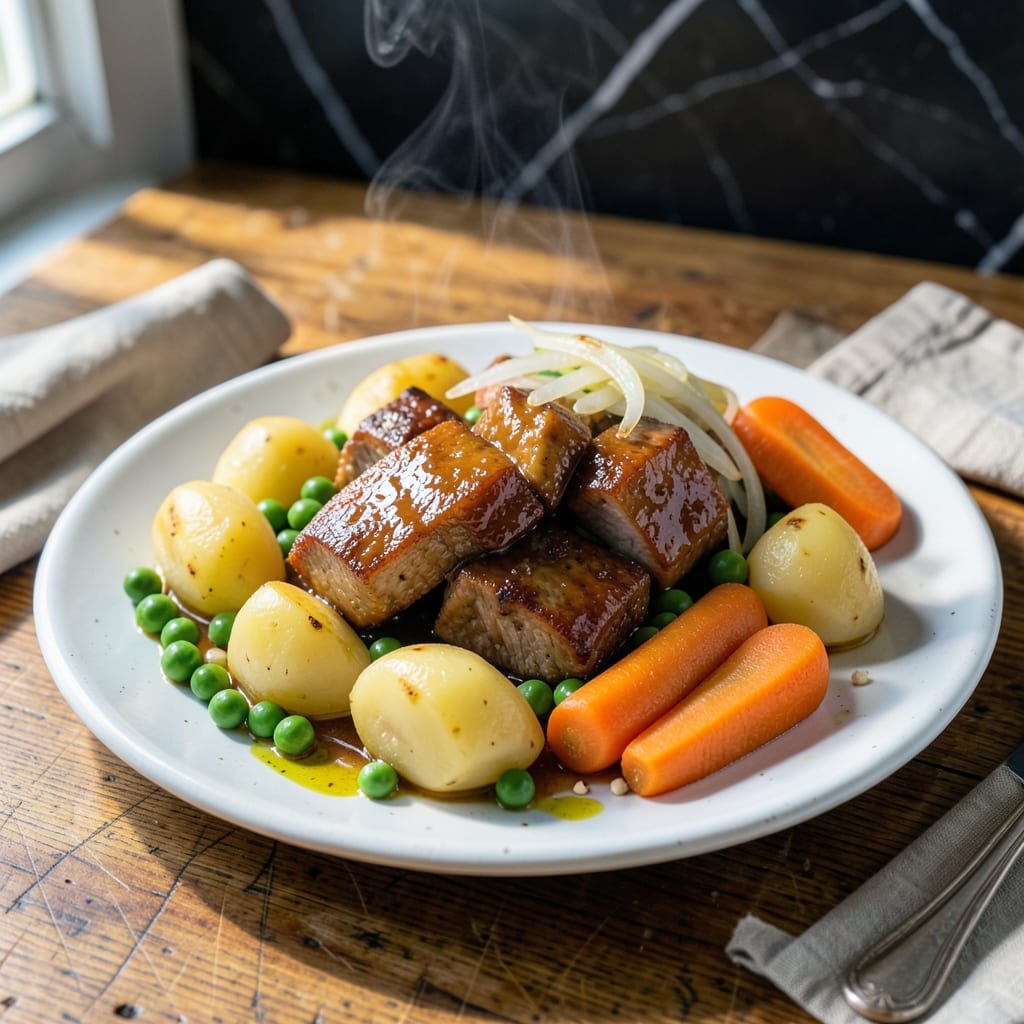
This dish brings the warmth of Filipino home cooking to your kitchen with minimal effort. The one-pot method captures all the savory depth of traditional pork and peas while keeping cleanup simple.
I learned this technique from my grandmother’s handwritten notes, where she relied on instinct more than measurements. The secret lies in slow-cooking the pork until tender, allowing the flavors to meld perfectly with the peas.
What you’ll get is a comforting meal with tender pork, sweet peas, and a rich, slightly sweet sauce that’s impossible to resist. It’s the kind of dish that feels like a hug on a plate.
Perfect for weeknight dinners when you want something hearty without the fuss. Here’s how to make it.
Ingredients for Pork and Peas Filipino Recipe Panlasang Pinoy
Pantry staples meet fresh veggies for a hearty one-pot wonder you’ll crave.
| Ingredient | Amount | Notes |
|---|---|---|
| Pork Shoulder 🥩 | 1 ½ lb | Cut into 1-inch cubes |
| Green Peas 🌱 | 1 ½ cups | Fresh or frozen |
| Carrots 🥕 | 2 whole | Peeled and diced |
| Potatoes 🥔 | 2 whole | Peeled and cubed |
| Onion 🧅 | 1 whole | Medium, finely chopped |
| Garlic Cloves 🧄 | 4 cloves | Minced |
| Tomato Sauce 🍅 | 1 cup | Plain variety |
| Soy Sauce 🫒 | ¼ cup | Low-sodium preferred |
| Water 💧 | 1 ½ cups | For simmering |
| Bay Leaf 🌿 | 1 whole | Dried |
| Salt 🧂 | 1 tsp | Adjust to taste |
| Black Pepper 🌶️ | ½ tsp | Freshly ground |
| Sugar 🍚 | 1 tbsp | For balance |
| Vegetable Oil 🫒 | 2 tbsp | For sautéing |
The pork shoulder is key here—look for well-marbled pieces at your local Asian market or butcher. It’s forgiving and gets incredibly tender. I grab mine from H-Mart when I can; their cuts are perfect for slow cooking. Carrots and potatoes add sweetness, so pick firm, fresh ones (the good stuff, not the pre-cut kind).
No pork shoulder? Pork butt works just as well. Frozen peas are fine (no need to thaw), but fresh adds a nice pop of color. Out of tomato sauce? Tomato paste thinned with water gets you close. Fish sauce (yes, really) can replace soy sauce for a deeper umami kick—just use half the amount.
This tastes even better the next day. Store in an airtight container for up to 4 days in the fridge or freeze for 3 months. Reheat gently to keep the pork tender (don’t skip this part).
Why You’ll Love This Recipe
- One Pot Meal: I love that everything—pork shoulder, peas, carrots, and potatoes—simmers together in one pot.
- Savory Comfort: The pork soaks up the sauce while the peas add a subtle sweetness that balances the dish perfectly.
- Feeds the Family: It’s hearty enough for a weeknight dinner and still tastes great as leftovers the next day.
- Budget Stretcher: Pork shoulder is affordable, and the veggies bulk it up without breaking the bank.
Step-by-Step Instructions for Pork and Peas Filipino Stew
This one-pot method delivers tender pork and vegetables in a rich, savory sauce with minimal cleanup.
Step 1: Sauté Aromatics Until Fragrant
Heat the 2 tbsp vegetable oil in a large pot over medium heat. Add the finely chopped onion and cook for 2-3 minutes until it becomes translucent and just starts to turn golden at the edges. Stir occasionally to prevent burning.
Add the minced 4 cloves garlic cloves and sauté for 30 seconds until fragrant. Here’s the thing—don’t let the garlic brown, or it’ll turn bitter. You want it just golden and aromatic, which builds the flavor foundation for the entire dish.
Step 2: Brown the Pork and Build the Base
Add the 1.5 lb pork shoulder (cut into 1-inch cubes) to the pot and cook for 5-6 minutes, stirring occasionally, until the meat is lightly browned on all sides. The pork should release its juices and then start to develop a golden crust.
Pour in the 1 cup tomato sauce, 0.25 cup soy sauce, 1 tbsp sugar, 1 tsp salt, and 0.5 tsp black pepper. Stir well to coat the pork evenly. I always add the 1 whole bay leaf at this stage—it infuses the sauce as it simmers.
Step 3: Simmer Until Pork Is Tender
Add the 2 whole carrots (peeled and diced), 2 whole potatoes (peeled and cubed), and 1.5 cups water to the pot. Bring the mixture to a boil, then reduce the heat to low. Cover and let it simmer for 40-45 minutes.
The pork is done when it’s fork-tender and the carrots and potatoes are soft. If the sauce looks too thin, let it simmer uncovered for an additional 5 minutes to thicken slightly. This ensures every bite is packed with flavor.
Step 4: Add Peas and Finish Cooking
Stir in the 1.5 cups green peas and cook for another 5 minutes. This is just enough time for the peas to heat through without turning mushy. Fresh or frozen peas both work perfectly here.
Taste and adjust the seasoning if needed. I often find that the soy sauce and tomato sauce provide enough saltiness, but a final tweak with salt or black pepper can elevate the flavors. Remove the bay leaf before serving.
Pro Tips For Making Pork And Peas Filipino Recipe Panlasang Pinoy
- Brown the Pork: Sear the pork shoulder pieces in batches over medium-high heat until deeply browned—about 3-4 minutes per side. I learned this the hard way: skipping this step leaves the meat bland and the sauce pale.
- Cut Evenly: Chop the pork, potatoes, and carrots into uniform 1-inch chunks so everything cooks through at the same time. Sounds obvious, but I used to end up with mushy potatoes and undercooked pork.
- Add Peas Last: Stir in the green peas only during the last 5 minutes of cooking. After burning three batches, I finally figured out they turn to mush if simmered too long.
- Use Pork Shoulder: Resist the urge to swap in lean cuts like tenderloin—pork shoulder’s fat keeps the dish rich and tender, even after long simmering. My grandmother swore by this, and she was right.
Serving Suggestions for pork and peas filipino recipe panlasang pinoy
Family-Style Serving
This dish is perfect for serving family-style in a large, shallow bowl. The vibrant colors of the green peas, carrots, and potatoes against the rich sauce make it as beautiful as it is delicious. I love watching everyone dig in together. 💛
Rice Pairing
Serve over steamed jasmine rice—about ½ cup per person—to soak up that incredible sauce. The rice balances the savory flavors and makes it a complete meal. My grandmother always said the rice was just as important as the stew itself.
Garnish Ideas
Sprinkle with chopped green onions or cilantro for freshness right before serving. A squeeze of calamansi or lime adds a bright citrus note that cuts through the richness. These little touches elevate the dish beautifully.
Bread Option
For a heartier meal, offer warm pandesal or crusty bread on the side. It’s perfect for mopping up every last bit of sauce. I often do this when serving a crowd—everyone always asks for seconds.
Side Dish
A simple cucumber and tomato salad with a light vinegar dressing provides a refreshing contrast. The cool, crisp veggies balance the warm, rich stew. It’s an easy addition that rounds out the meal.
Leftovers Tip
This tastes even better the next day. Store in an airtight container and reheat gently on the stove with a splash of water. The flavors deepen overnight, making leftovers a treat rather than an afterthought. ✨
Nutrition Facts
Frequently Asked Questions
Can I use a different cut of pork?
Yes! Pork butt works just as well as shoulder. Avoid lean cuts like tenderloin, as they dry out during the 40-45 minute simmer. The fat in shoulder or butt keeps the meat tender and flavorful.
What if my sauce is too thin?
Simmer uncovered for an extra 5 minutes to reduce. For thicker results, mix 1 tbsp cornstarch with 2 tbsp water, then stir into the pot until it reaches your desired consistency.
Can I make this ahead of time?
The flavors deepen overnight. Store in an airtight container for up to 4 days in the fridge. Reheat gently with a splash of water to maintain tenderness.
Do I need to thaw frozen peas first?
No need—add them directly to the pot during the final 5 minutes of cooking. They’ll heat through perfectly without turning mushy. This saves time and keeps the prep simple.

- Potato Chip Cookie Recipe With Pecans: Buttery Crunch Meets Nutty Richness - October 30, 2026
- Potato Patty Recipe No Egg: Crispy Edges Without the Binder - October 30, 2026
- Paula Deen’s Potato Chip Cookies Recipe: Salty-Sweet Crunch in Every Bite - October 30, 2026