
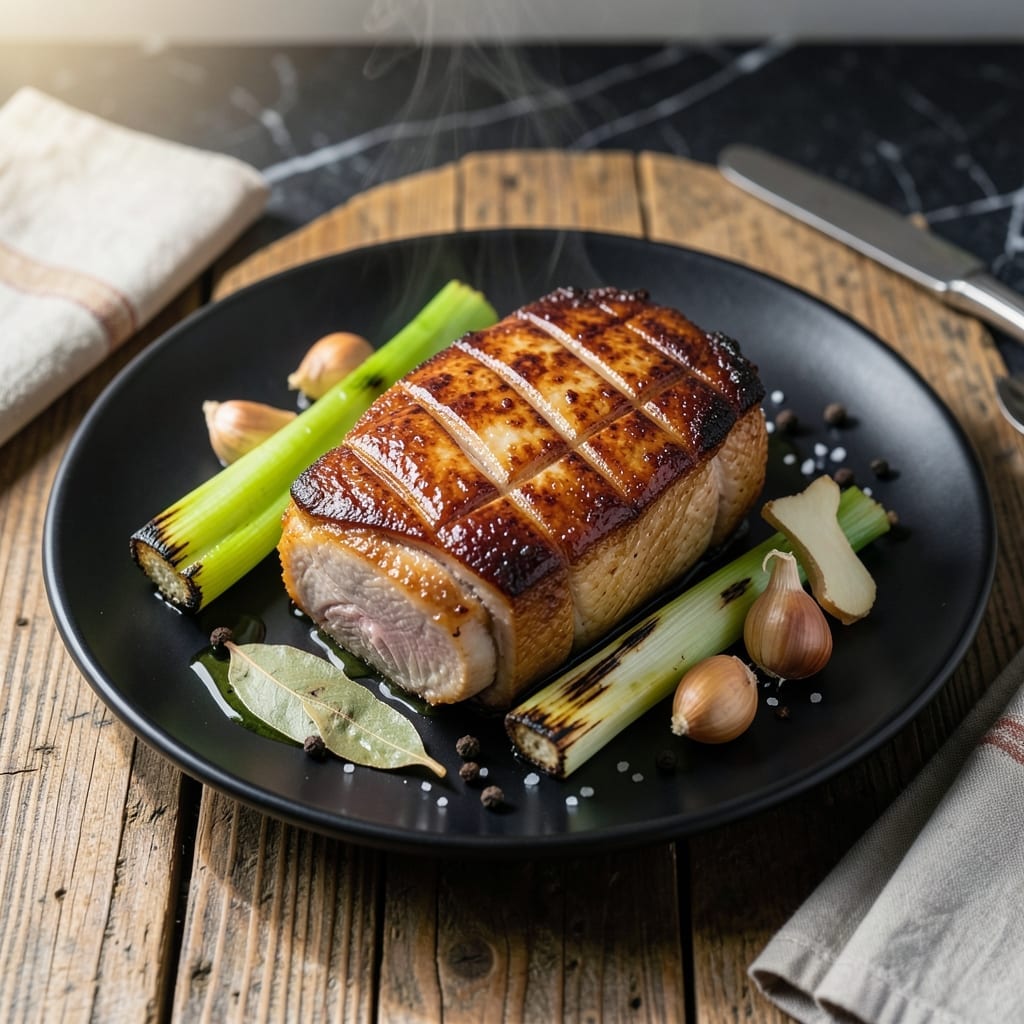
I learned this method from my grandmother’s vague notes—boiling pork belly first transforms the texture completely. The pre-boiling step renders excess fat while keeping the meat succulent, setting the stage for perfect crispiness later.
This approach may seem unconventional, but it creates a safety net against dryness. The meat stays juicy through the final roasting phase, while the skin achieves that coveted crispy finish without burning.
After boiling, a hot oven blast works magic on the skin. The result is layers of tender meat beneath a shatteringly crispy surface that cracks with each bite.
No fancy equipment needed—just time and attention to temperature. The boiling step ensures consistent results every time, even for beginners.
Ingredients for Pork Belly Recipe Boil First
Pantry staples plus pork belly. That’s the whole list for perfect texture every time.
| Ingredient | Amount | Notes |
|---|---|---|
| Pork Belly 🥓 | 2 lb | Skin-on, even thickness preferred |
| Kosher Salt 🧂 | 2 tbsp | Diamond Crystal preferred for texture |
| Black Peppercorns 🌶️ | 1 tbsp | Lightly crushed for boiling water |
| Bay Leaves 🍃 | 3 whole | Dried, for aromatic boiling |
| Garlic Cloves 🧄 | 6 cloves | Smashed, peeled for infusion |
| Fresh Ginger 🌿 | 2 whole | Sliced, skin-on for boiling |
| Green Onions 🧅 | 4 whole | Cut into 2-inch pieces |
| Soy Sauce 🫒 | ½ cup | Low-sodium preferred for control |
| Rice Vinegar 🍶 | ¼ cup | For acidity balance in boil |
| Brown Sugar 🍚 | 1 tbsp | Light or dark for caramelization |
| Five-Spice Powder 🌶️ | 1 tsp | Optional but recommended for depth |
| Sesame Oil 🫒 | 1 tbsp | Toasted, for finishing drizzle |
The pork belly is non-negotiable here. Look for skin-on cuts with even fat marbling—ask your butcher to score the skin if it’s not already done. Asian markets often have better prices than Whole Foods or Costco. The skin should be dry and taut, not flabby. For the aromatics, fresh ginger and garlic make a huge difference in the boiling liquid (don’t skip peeling the garlic, though).
No pork belly? This technique works with pork shoulder too, though the texture will be different. Swap soy sauce for coconut aminos if avoiding gluten. The rice vinegar can be apple cider vinegar in a pinch, but its milder flavor is ideal. Five-spice is traditional but a mix of cinnamon and star anise works if that’s what you’ve got in the spice drawer.
The boiled pork keeps in its liquid for 2 days in the fridge if you want to split the process. Once roasted, it’s best eaten fresh but reheats decently in a 350°F oven for 10 minutes. Leftovers? Chop and crisp in a pan for tacos or ramen.
Why You’ll Love This Recipe
- Minimal Effort: I just boil the pork belly first with salt and aromatics—no fancy prep, just set and forget.
- Deep, Rich Taste: The garlic and bay leaves infuse the meat with layers of flavor that stay put even after roasting.
- Meal Prep Hero: I make a big batch on Sunday and it reheats beautifully for tacos, ramen, or rice bowls all week.
- Budget Stretch: A single slab of pork belly feeds my family twice, and the leftovers taste even better the next day.
Step-by-Step Instructions for Pork Belly Boil First
Here’s my tested method for achieving that perfect balance of crisp and tender.
Step 1: Prep and Parboil the Pork Belly
Rinse the 2 lb Pork Belly under cold water and pat it dry. In a large pot, combine the 2 tbsp Kosher Salt, 1 tbsp Black Peppercorns, 3 whole Bay Leaves, 6 cloves Garlic Cloves, 2 whole Fresh Ginger, and 4 whole Green Onions.
Add enough water to fully submerge the pork belly, then bring to a rolling boil. Carefully lower the pork belly into the water and boil for 20-25 minutes until the skin softens slightly. This step removes impurities and preps the meat for maximum crispiness later.
Step 2: Dry and Season the Pork Belly
Remove the pork belly from the water and pat it completely dry with paper towels. This drying step is crucial—any moisture left on the skin will prevent it from crisping up properly.
Score the skin in a crosshatch pattern, being careful not to cut into the fat. Rub the scored skin with the 1 tbsp Brown Sugar and 1 tsp Five-Spice Powder, pressing gently so the seasoning adheres to the surface. Let it sit at room temperature for 10-15 minutes to dry further.
Step 3: Oven-Roast for Crispy Skin
Preheat your oven to 375°F. Place the pork belly skin-side up on a wire rack set over a baking sheet. Roast for 40-45 minutes until the skin starts to puff and turn golden brown.
Increase the oven temperature to 425°F and roast for an additional 10-15 minutes to achieve maximum crispiness. Watch closely during this time to prevent burning—the skin should be deep golden and crackling when done.
Step 4: Glaze and Rest
In a small bowl, mix the 0.5 cup Soy Sauce and 0.25 cup Rice Vinegar. Brush this mixture generously over the pork belly, ensuring the skin is well-coated. Return it to the oven for 5 minutes to set the glaze.
Remove from the oven and let the pork belly rest for 10 minutes before slicing. This resting period allows the juices to redistribute, ensuring each bite is succulent. Drizzle with the 1 tbsp Sesame Oil just before serving for an extra layer of aroma.
Pro Tips For Making Pork Belly Recipe Boil First
- Parboil First: Simmer the pork belly in water with bay leaves and peppercorns for 30-45 minutes to render out excess fat and tighten the meat before seasoning—this keeps it from shrinking too much when roasted later.
- Score the Skin: After boiling, pat the belly dry and score the skin in a diamond pattern with a sharp knife, about 1/4-inch deep, so the fat renders evenly and the skin crisps up properly.
- Skip the Salt Early: I learned this the hard way—don’t salt the pork belly before boiling, or it’ll draw out too much moisture and leave the meat tough; wait until after the boil to season with kosher salt.
- Use Fresh Garlic: Sounds obvious, but old garlic cloves turn bitter during the long boil—smash 4-5 fresh ones and toss them in the water for a cleaner, sweeter aroma in the finished dish.
Serving Suggestions for This Dish
Asian-Inspired Plating
Slice the pork belly into ½-inch thick rectangles and fan them across a platter. I love arranging them over a bed of steamed bok choy for color contrast—the deep brown of the skin pops against the bright green. Drizzle the reserved glaze in a zigzag pattern.
Bao Bun Style
For a hands-on meal, serve in steamed bao buns with quick-pickled cucumbers and hoisin sauce. I pick up these buns from my local Asian market. The soft buns balance the crispy pork belly perfectly. Add a sprinkle of sliced scallions for freshness. 🥢
Rice Bowl Creation
Layer over steamed jasmine rice with stir-fried vegetables. The rice soaks up the cooking juices beautifully. I often add a fried egg on top—the runny yolk creates an extra layer of richness that pairs wonderfully with the crispy pork.
Family-Style Feast
Place the whole piece on a wooden board with small bowls of dipping sauces. I set out sriracha mayo and black vinegar with chili oil. Let guests carve their own portions. This works great for gatherings. 💫
Salad Topping
Thinly slice and arrange over a crisp Asian slaw with sesame dressing. The crunch of the vegetables and the crispy pork belly create amazing texture. I toss napa cabbage with carrots and a light rice vinegar dressing.
Leftovers Reinvented
Chop and crisp in a pan for ramen topping or tacos. The pre-boiled pork belly reheats wonderfully. I love adding it to pho broth with rice noodles—the flavor infuses the liquid beautifully.
Nutrition Facts
Frequently Asked Questions
Why do you boil pork belly before cooking?
Boiling first removes impurities and renders some fat, creating a cleaner base. It ensures the meat stays juicy during later high-heat cooking. My grandmother swore by this method for consistent results.
How long should I boil it?
Boil the 2 lb piece for 20-25 minutes until the skin softens slightly. Any longer can start cooking the meat too much—you want just enough to prep the skin for crisping.
What if my skin doesn’t crisp?
Pat it completely dry after boiling and ensure your oven is fully preheated to 375°F. Moisture is the enemy of crispiness. A wire rack helps air circulate underneath.
Can I skip the boiling step?
Technically yes, but you risk uneven cooking and less crispy skin. The boiling step creates a buffer against dryness and helps achieve that perfect texture contrast.

- Potato Chip Cookie Recipe With Pecans: Buttery Crunch Meets Nutty Richness - October 30, 2026
- Potato Patty Recipe No Egg: Crispy Edges Without the Binder - October 30, 2026
- Paula Deen’s Potato Chip Cookies Recipe: Salty-Sweet Crunch in Every Bite - October 30, 2026