
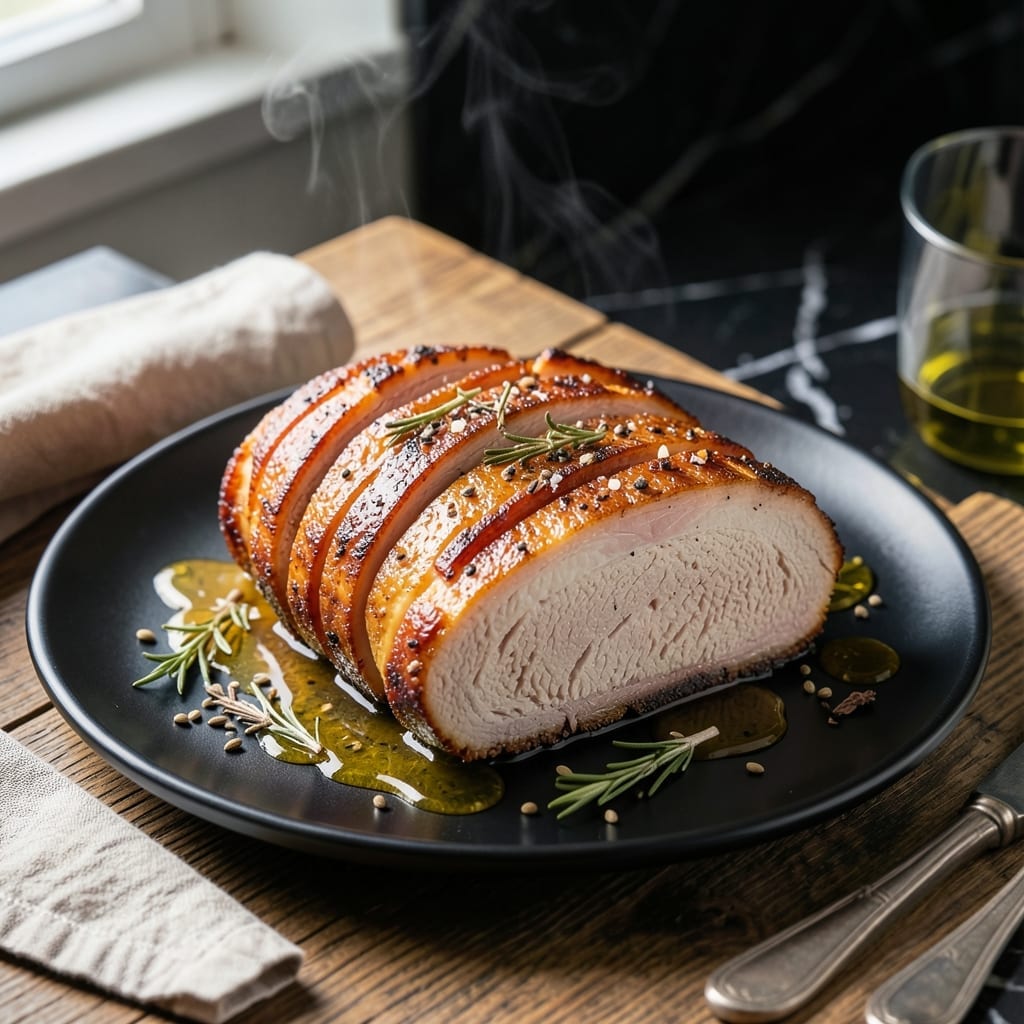
This pork belly recipe delivers crispy crackling and a sticky glaze that’s hard to resist. I’ve refined the method to ensure the skin puffs up perfectly while keeping the meat tender underneath.
The secret lies in scoring the skin deeply, drying it thoroughly, and roasting at high heat initially. This creates that signature crispy texture Jamie Oliver fans love.
Once the crackling is set, a final baste with a sweet glaze takes it over the top. The result is a dish that’s rich, flavorful, and visually stunning.
Serve with roasted vegetables or a fresh salad for balance. This method guarantees a showstopper every time.
Ingredients for Pork Belly Recipe Jamie Oliver
Crispy skin meets tender meat with these carefully selected ingredients for a showstopping dish.
| Ingredient | Amount | Notes |
|---|---|---|
| Pork Belly 🥓 | 2 lb | Skin-on, evenly scored |
| Kosher Salt 🧂 | 2 tbsp | Diamond Crystal preferred |
| Black Pepper 🌶️ | 1 tsp | Freshly ground preferred |
| Fennel Seeds 🌿 | 1 tsp | Lightly crushed for aroma |
| Dried Rosemary 🍃 | 1 tbsp | Finely chopped for even distribution |
| Honey 🍯 | ⅓ cup | For sticky glaze base |
| Rice Vinegar 💧 | 2 tbsp | Balances sweetness in glaze |
| Soy Sauce 🫒 | 2 tbsp | Low-sodium for control |
| Garlic Cloves 🧄 | 4 cloves | Minced for glaze depth |
| Fresh Ginger 🌿 | 1 tbsp | Grated, skin removed |
| Olive Oil 🫒 | 1 tbsp | For initial searing |
| Apple Cider Vinegar 🍏 | 1 tbsp | For extra tang in glaze |
| Brown Sugar 🍚 | ¼ cup | Light or dark variety |
The pork belly quality is paramount. Source skin-on pork belly from a trusted butcher—look for even fat marbling and a thick skin layer. Most Whole Foods or specialty grocers carry excellent options. The skin must be scored deeply (about 1/4-inch cuts) for optimal crackling. Pat it completely dry before seasoning—any moisture prevents crispiness.
For the glaze, local honey adds depth, but maple syrup works at a 1:1 ratio. No rice vinegar? White wine vinegar or cider vinegar are acceptable substitutes. Fresh ginger is preferred, but ground ginger at half the amount will suffice. Use tamari instead of soy sauce for a gluten-free version (same quantity).
Pork belly keeps in the fridge for 3-4 days post-cooking. The glaze can be made 2 days ahead and reheated gently. Leftovers freeze beautifully for up to 3 months—reheat in the oven to maintain crispiness.
Why You’ll Love This Recipe
- Set and Forget: Honestly, it’s just salt, rub, and roast—no babysitting required.
- Crispy & Aromatic: That crackling skin with the fennel and rosemary? I’ll be real: it’s the reason I make this every weekend.
- Feeds a Crowd: One slab of pork belly stretches for Sunday lunch and leftovers taste even better the next day.
- Budget Friendly: Pork belly’s cheap compared to other cuts, but here’s what sold me—it feels like a fancy meal without the price tag.
Step-by-Step Instructions for Jamie Oliver’s Pork Belly
This method ensures perfectly crispy crackling and a glossy, flavorful glaze every time.
Step 1: Score and Dry-Brine the Pork Belly
Pat the 2 lb Pork Belly completely dry with paper towels. If not pre-scored, use a sharp knife to make even, shallow cuts across the skin, about ¼ inch apart. This scoring allows the fat to render out while creating maximum surface area for crispy crackling.
Rub the scored pork belly all over with the 2 tbsp Kosher Salt and 1 tsp Black Pepper, pressing the seasoning into the meat and skin. Add the 1 tsp Fennel Seeds and 1 tbsp Dried Rosemary, ensuring even distribution. Place the pork belly skin-side up on a wire rack set over a tray and refrigerate uncovered for 12-24 hours to dry the skin thoroughly.
Step 2: Sear and Begin Roasting
Preheat your oven to 300°F. Remove the pork belly from the refrigerator and let it sit at room temperature for 30 minutes. Heat the 1 tbsp Olive Oil in a large oven-safe skillet over medium-high heat. Sear the pork belly skin-side down for 4-5 minutes until the skin begins to crisp and turn golden brown.
Flip the pork belly and sear the meat side for 2-3 minutes until lightly browned. Transfer the skillet to the preheated oven and roast for 1 hour. This initial low-and-slow phase renders the fat while keeping the meat tender.
Step 3: Prepare and Apply the Glaze
In a bowl, combine the 0.33 cup Honey, 2 tbsp Rice Vinegar, 2 tbsp Soy Sauce, 4 cloves minced Garlic Cloves, 1 tbsp Fresh Ginger, and 1 tbsp Apple Cider Vinegar. Stir in the 0.25 cup Brown Sugar until fully dissolved. This glaze should be thick but pourable.
After the initial roasting, remove the pork belly from the oven and brush it generously with the glaze, ensuring it coats the skin and seeps into the scores. Increase the oven temperature to 425°F and return the pork belly to the oven, skin-side up.
Step 4: Finish with High Heat for Crackling
Roast the pork belly for an additional 20-25 minutes, basting with the remaining glaze every 5-7 minutes. Watch for the skin to puff up and turn deep golden brown with crispy edges. The glaze should caramelize into a sticky, glossy coating.
Remove the pork belly from the oven and let it rest for 15 minutes before slicing. This resting period allows the juices to redistribute, ensuring the meat remains moist and tender beneath the crispy crackling.
Slice the pork belly into 1-inch thick pieces and serve immediately, drizzling any remaining glaze from the pan over the top.
Pro Tips For Making Pork Belly Recipe Jamie Oliver
- Score the Skin: Cut 1/4-inch deep crosshatches into the fat cap before seasoning—this lets the salt and spices penetrate while helping the skin crisp up evenly.
- Salt Overnight: Dry-brine the pork belly with kosher salt and rub it into the scores, then refrigerate uncovered for at least 12 hours; I learned this the hard way after my first attempt came out bland.
- Low Then High: Start at 300°F for 2 hours to render the fat slowly, then finish at 425°F for 30 minutes to get that crackling skin.
- Toast the Seeds: Lightly toast the fennel seeds in a dry pan for 30 seconds before crushing—they release way more aroma and actually change the outcome.
Dietary Considerations for These Flavors
Gluten-Free Adaptations
This creation is naturally gluten-free if you use tamari instead of soy sauce in the glaze. I always check labels, as some brands add wheat. The rest of the ingredients—pork belly, honey, vinegars—are inherently gluten-free, making this a safe choice for sensitive diets.
Keto-Friendly Version
With just a few tweaks, this fits a keto lifestyle. Replace the 0.25 cup Brown Sugar with ¼ cup monk fruit sweetener. The pork belly itself is perfect for keto, with its high fat content and zero carbs. 💪
Lower-Sodium Option
To reduce sodium without sacrificing flavor, cut the 2 tbsp Kosher Salt in half and use low-sodium soy sauce. I boost the herbs—add an extra 1 tsp Dried Rosemary—to compensate. The glaze’s sweetness still balances beautifully.
Pescatarian Alternative
For a seafood twist, swap the pork belly for salmon fillets with skin on. Score the skin similarly and use the same glaze. Roast at 400°F for 12-15 minutes for crispy skin. The flavors translate surprisingly well.
Dairy-Free Note
This dish is already dairy-free, so no substitutions are needed. The glaze relies on honey, vinegars, and spices, while the pork belly contains no dairy. Always verify your soy sauce or tamari is dairy-free, as some brands may process in shared facilities.
Allergen Awareness
The primary allergens here are soy (in the sauce) and possibly sulfites in vinegars. For soy allergies, use coconut aminos as a substitute. If vinegar is a concern, omit it entirely—the honey and brown sugar still create a delicious glaze.
Nutrition Facts
Frequently Asked Questions
What’s the best way to get crispy crackling?
Dry the skin thoroughly and score it deeply before seasoning. Refrigerate uncovered for 12-24 hours to dry the surface completely.
Can I skip the overnight drying step?
Not recommended. Skipping this step often results in chewy, not crispy, skin. The drying process is key for that perfect texture.
Can I use a different sweetener for the glaze?
Yes! Maple syrup or ¼ cup monk fruit sweetener work well. Adjust to taste, as sweetness levels vary.
How do I prevent the meat from drying out?
Roast low and slow at 300°F first, then finish at 425°F. Always let it rest for 15 minutes before slicing.

- BBQ Sausage Recipe Oven: Smoky Depth Without the Grill - September 28, 2026
- BBQ Chicken Bowl Recipe Rice: Smoky Sweetness Over Fluffy Grains - September 28, 2026
- Beef Cutlet Recipe Ideas: Crispy Breaded Patties With Bold Seasonings - September 28, 2026