
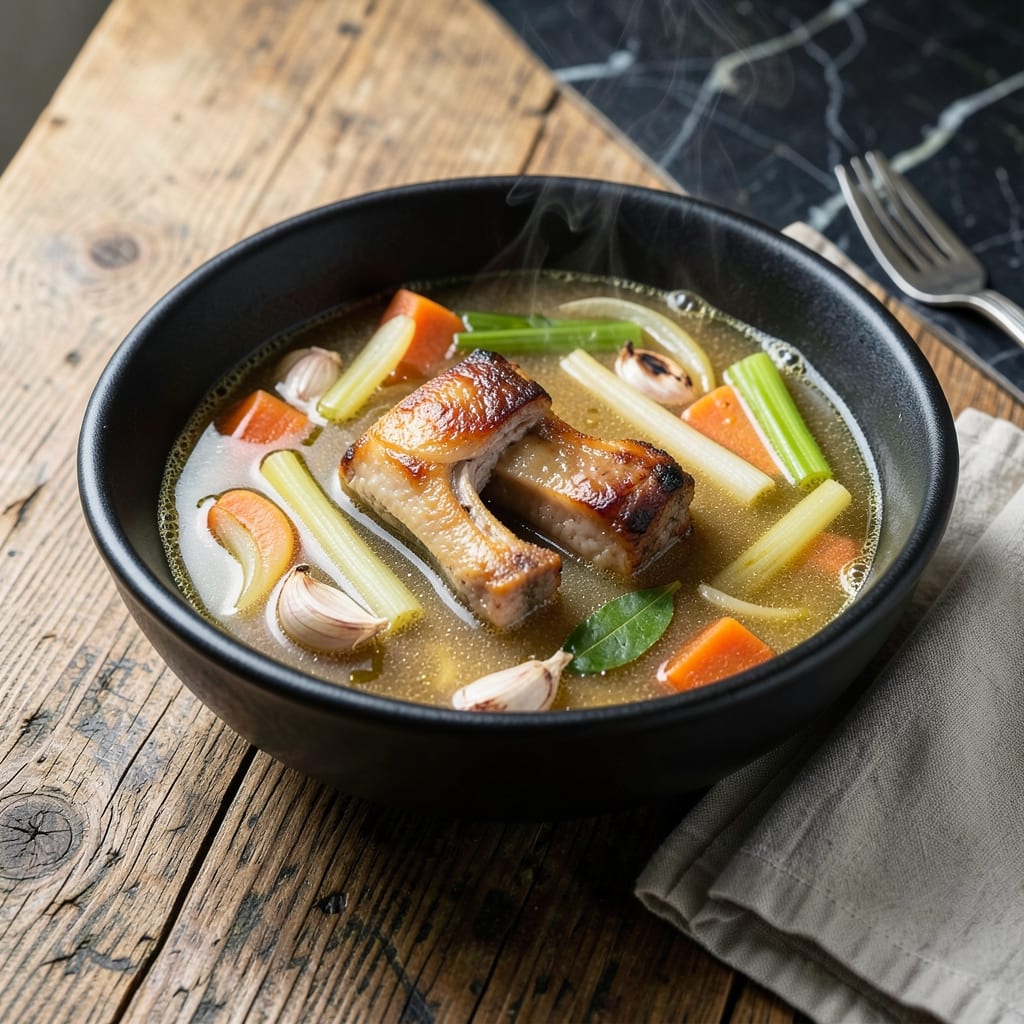
A rich pork broth is the foundation of countless dishes, and this method delivers depth of flavor with minimal effort. I learned the importance of a well-made stock during my apprenticeship in Charleston, where every pot of beans or bowl of soup started with a proper base.
This recipe transforms humble pork bones and aromatics into a golden, savory liquid that elevates any meal. The key is a long, gentle simmer that extracts maximum flavor while keeping the broth clear and clean.
Use this as a base for soups, stews, or braising liquids. The result is a versatile ingredient that brings restaurant-quality depth to your home cooking.
With just a few hours and basic ingredients, you’ll have a stock that’s far superior to anything from a store shelf.
Ingredients for Pork Broth Recipe Ideas
Pantry staples and pork bones create a golden, savory liquid with minimal effort.
| Ingredient | Amount | Notes |
|---|---|---|
| Pork Bones 🍖 | 2 lb | Neck or shoulder bones preferred |
| Yellow Onion 🧅 | 1 whole | Quartered, skin on for color |
| Carrots 🥕 | 2 whole | Cut into large chunks |
| Celery Stalks 🌿 | 2 pieces | Cut into large chunks |
| Garlic Cloves 🧄 | 4 cloves | Smashed, skin on |
| Bay Leaves 🍃 | 2 pieces | Dried, for depth |
| Black Peppercorns 🌶️ | 1 tsp | Whole, not ground |
| Fresh Thyme Sprigs 🌿 | 4 pieces | Optional for extra aroma |
| Cold Water 💧 | 4 cups | Enough to cover all ingredients |
| Apple Cider Vinegar 🍏 | 2 tbsp | For brightness and clarity |
| Salt 🧂 | 1 tsp | Adjust to taste at end |
The pork bones are everything here. Ask your butcher for neck or shoulder bones—they’ve got the most collagen for that rich, gelatinous finish. I grab mine from Whole Foods or a local farm stand when I can (the flavor difference is noticeable). Don’t bother with pre-cut soup bones—they’re often stripped of flavor. A quick rinse under cold water removes any bone fragments.
No pork bones? Beef or chicken bones work in a pinch, but the flavor profile changes. Skipping the vinegar? The broth might turn cloudy—lemon juice does the same trick. Fresh thyme can be swapped for dried at one-third the amount. If you’re missing an onion, an extra carrot or two won’t hurt. The key is keeping everything in large pieces so it’s easy to strain out later.
Broth keeps in the fridge for 4-5 days or freezes like a dream for 6 months. I like to freeze it in ice cube trays first (perfect for deglazing pans), then transfer to bags. Skim off any fat after chilling—it’s great for cooking, but not for broth. Strain through cheesecloth for extra clarity (worth the extra minute).
Why You’ll Love This Recipe
- Set It and Forget: I toss everything in the pot, simmer for hours, and the pork bones do all the work.
- Rich in Every Sip: The carrots and garlic melt into this deep, savory broth that’s way better than store-bought.
- Endless Meal Base: I use it for ramen, soups, or cooking grains—honestly, it rescues any boring dish.
- Pennywise Pot: A bag of pork bones and veggies I already have? Feeds me for a week on barely any budget.
Step-by-Step Instructions for Pork Broth
This simple method delivers a rich, flavorful base that works for countless dishes.
Step 1: Roast the Bones and Vegetables
Preheat your oven to 400°F. Arrange the 2 lb Pork Bones on a baking sheet and roast for 20-25 minutes until they develop a deep golden brown color. This caramelization step is crucial for building the deep, meaty flavor in your broth.
While the bones roast, quarter the 1 whole Yellow Onion (leave the skin on for color), cut the 2 whole Carrots into large chunks, and chop the 2 pieces Celery Stalks into similar sizes. Add these to the baking sheet with the bones for the last 10 minutes of roasting to char slightly.
Step 2: Prepare the Aromatics and Combine
Smash the 4 cloves Garlic Cloves (no need to peel) and add them to your largest pot along with the 2 pieces Bay Leaves, 1 tsp Black Peppercorns, and 4 pieces Fresh Thyme Sprigs. These aromatics will infuse the broth with complex, savory notes.
Transfer the roasted bones and vegetables to the pot. The dark, caramelized bits on the baking sheet are pure flavor—deglaze with a splash of the 4 cups Cold Water and pour that into the pot too. Don’t let any of that good stuff go to waste.
Step 3: Add Liquids and Simmer
Pour the remaining 4 cups Cold Water into the pot, ensuring it covers all the ingredients by at least an inch. Add the 2 tbsp Apple Cider Vinegar—this helps extract minerals from the bones and keeps the broth clear. Stir in the 1 tsp Salt, but remember you can adjust this at the end.
Bring the mixture to a boil over medium-high heat, then reduce to a gentle simmer. Skim off any foam that rises to the surface during the first 30 minutes—this keeps your broth clean and flavorful. Partially cover the pot and let it simmer for 3-4 hours.
Step 4: Strain and Finish
After simmering, the broth should have a rich amber color and a deep, savory aroma. Remove the pot from the heat and let it cool slightly. Strain the broth through a fine-mesh sieve into a large bowl, pressing gently on the solids to extract all the liquid.
Discard the solids and let the broth cool completely. Taste and adjust the seasoning with additional salt if needed. The broth should be rich and flavorful but not overly salty, as it will often be reduced in other recipes.
Store the broth in airtight containers in the refrigerator for up to 5 days or freeze for up to 3 months. This base is now ready to elevate any dish you add it to.
Pro Tips For Making Pork Broth Recipe Ideas
- Roast the Bones: Toss pork bones with a little oil and roast at 400°F for 20-30 minutes until deeply browned—I learned this the hard way after making bland broth for years.
- Char the Veggies: Throw halved onions, carrots, and celery on the same tray as the bones for the last 10 minutes; the caramelization adds depth you just can’t get from raw veg.
- Skim the Foam: During the first 30 minutes of simmering, skim off the gray foam that rises to the top—skip this and your broth will taste murky instead of clean.
- Use Cold Water: Start bones in cold water and bring to a gentle simmer; dumping them into boiling water makes the impurities seize up and cloud your broth.
Common Mistakes When Making This Dish
Skipping the Roast
I see home cooks skip roasting the 2 lb Pork Bones to save time, but this is where the deep, caramelized flavor develops. Those browned bits are pure umami gold for your broth. Even 10 minutes under the broiler makes a difference. 🔥
Overcrowding the Pot
Using a pot that’s too small means your ingredients won’t be properly submerged. The 4 cups Cold Water needs to cover everything by at least an inch. I learned this the hard way during my first year at The Smoky Pig—under-submerged bones lead to weak, watery broth.
Boiling Too Hard
A rolling boil makes broth cloudy and can break down the collagen too quickly. After bringing to a boil, reduce to a gentle simmer where you see just occasional bubbles. This slow extraction is what gives you that rich, gelatinous finish.
Ignoring the Skim
Not skimming the foam during the first 30 minutes results in a bitter, impure broth. Use a fine-mesh skimmer and remove all the scum that rises to the surface. I keep a small bowl next to the stove for this exact purpose.
Short Simmer Time
Anything less than 3 hours won’t extract all the flavor and collagen from the bones. I often go for 4 hours when I have the time. The longer simmer is what transforms good broth into great broth. This is non-negotiable for that restaurant-quality depth.
Wrong Bone Choice
Using lean pork bones like loin or tenderloin won’t give you the gelatinous body you want. Stick with neck or shoulder bones as specified. These cuts have the collagen and connective tissue needed for that rich mouthfeel. My butcher at the Charleston market always saves these for me.
Nutrition Facts
Frequently Asked Questions
Can I use leftover pork instead of bones?
Use 1 lb of meaty leftover pork like ribs or shoulder. The flavor will be milder but still delicious. Simmer for 2-3 hours instead of 3-4 hours to prevent overcooking.
How can I make this in a slow cooker?
Combine all ingredients in your slow cooker. Cook on low for 8-10 hours or high for 4-5 hours. Strain and store as usual. This hands-off method works perfectly for busy days.
What’s the best way to use this broth?
Use it as a base for ramen, pho, or any soup. It also adds depth to risotto, braised greens, or gravy. The rich, savory flavor enhances any dish that needs a liquid component.
Why did my broth turn cloudy?
Cloudiness often comes from boiling too hard or not skimming the foam during the first 30 minutes. Keep the heat at a gentle simmer and skim regularly for a clear, clean finish.

- Potato Chip Cookie Recipe With Pecans: Buttery Crunch Meets Nutty Richness - October 30, 2026
- Potato Patty Recipe No Egg: Crispy Edges Without the Binder - October 30, 2026
- Paula Deen’s Potato Chip Cookies Recipe: Salty-Sweet Crunch in Every Bite - October 30, 2026