
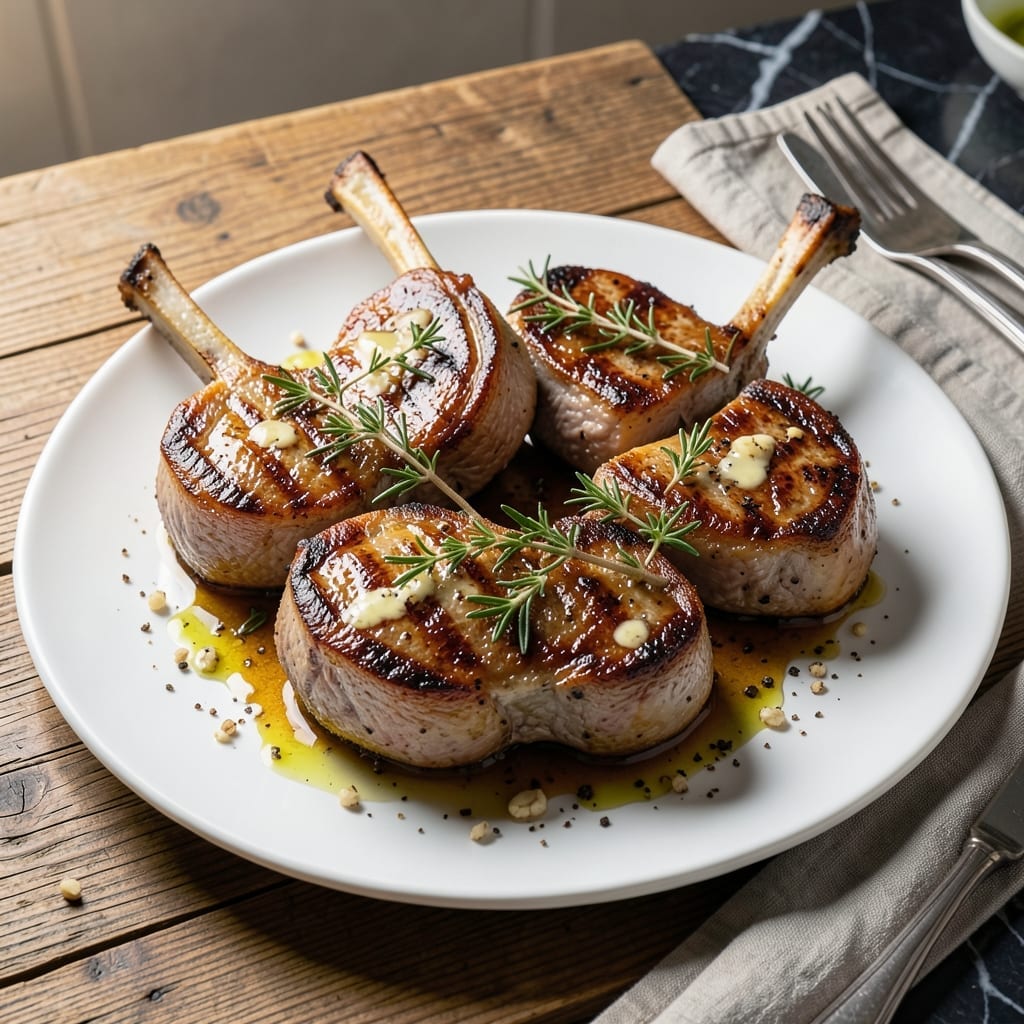
This pan-seared pork chop recipe delivers restaurant-quality results with a simple yet elegant approach. The secret lies in achieving a perfect golden crust while keeping the meat juicy and tender inside.
I developed this method after testing multiple techniques in my small Boston kitchen, focusing on precise timing and temperature control. A quick sear in a hot pan followed by basting with garlic butter creates an irresistible glaze.
The result is a dish with savory depth and a glossy finish that elevates any weeknight dinner. The garlic butter infuses every bite with rich, aromatic flavor without overpowering the natural taste of the pork.
Serve with roasted vegetables or mashed potatoes for a complete meal. Here’s how to make these pork chops perfectly every time.
Ingredients for Pork Chop Recipe Natasha’s Kitchen
Just a few high-quality ingredients create this restaurant-worthy pan-seared dish with its signature garlic butter glaze.
| Ingredient | Amount | Notes |
|---|---|---|
| Bone-In Pork Chops 🥩 | 4 whole | 1 to 1.5 inches thick, rib or loin |
| Kosher Salt 🧂 | 2 tsp | Diamond Crystal preferred for even seasoning |
| Black Pepper 🌶️ | 1 tsp | Freshly ground for best flavor |
| Unsalted Butter 🧈 | 4 tbsp | Divided for searing and basting |
| Garlic Cloves 🧄 | 4 cloves | Smashed and peeled for butter |
| Fresh Thyme Sprigs 🌿 | 4 sprigs | Optional, for aromatic basting |
| Fresh Rosemary Sprigs 🍃 | 2 sprigs | Optional, for aromatic basting |
| Olive Oil 🫒 | 2 tbsp | High smoke point, for initial sear |
| Vegetable Oil 💧 | 1 tbsp | Neutral flavor, prevents butter from burning |
| Lemon 🍋 | ½ whole | For bright finishing acidity (optional) |
The pork chops are everything here. Bone-in cuts (rib or loin) stay juicier than boneless—look for 1 to 1.5-inch thickness at Whole Foods or your butcher. Avoid pre-brined chops; you want control over the seasoning. Diamond Crystal kosher salt is my go-to for even distribution. For the butter, European-style unsalted has that rich, creamy depth you need for the basting glaze.
No fresh herbs? Dried thyme or rosemary at one-third the amount works in a pinch. Short on garlic? Garlic powder (1/4 tsp per clove) is fine, but fresh delivers that aromatic punch. The olive oil can be swapped for avocado oil if you prefer. Skip the lemon if you must, but that little hit of acidity (worth the extra minute) really brightens the dish.
Pork chops keep in the fridge for 2-3 days or freeze for 3 months. Let them sit at room temp for 30 minutes before cooking for even doneness. The garlic butter can be made ahead and reheated gently (don’t skip this part)—it separates if boiled.
Why You’ll Love This Recipe
- One Pan Wonder: So easy. Just season, sear, and baste with that garlic butter—no fancy techniques required.
- Crave-Worthy Crust: The combo of crispy pork chop edges and that rich garlic butter? I make extra just to drizzle over everything.
- Weeknight Hero: I’ve served this for quick family dinners and last-minute dinner parties—always disappears fast.
Step-by-Step Instructions for Pan-Seared Pork Chops With Garlic Butter Glaze
Here’s the method. Straightforward, tested, works every time.
Step 1: Season and Prep the Bone-In Pork Chops
Pat the 4 whole bone-in pork chops dry with paper towels. This is critical—moisture prevents proper browning. Season both sides generously with the 2 tsp kosher salt and 1 tsp black pepper, pressing gently so the seasoning adheres to the meat.
Let the seasoned chops sit at room temperature for 15-20 minutes. This takes the chill off so they cook evenly without developing a tough exterior before the inside is done.
Step 2: Sear the Chops to Golden Perfection
Heat the 2 tbsp olive oil and 1 tbsp vegetable oil in a large skillet over medium-high heat until shimmering. The olive oil has a high smoke point for the initial sear, while the vegetable oil prevents butter from burning later.
Add the chops and sear for 4-5 minutes per side until a deep golden-brown crust forms. Don’t move them until they release easily from the pan—that’s your sign the crust is ready. Transfer chops to a plate and tent with foil to keep warm.
Step 3: Create the Garlic Butter Glaze
Reduce heat to medium-low and add 2 tbsp of the unsalted butter, the 4 smashed garlic cloves, 4 sprigs fresh thyme, and 2 sprigs fresh rosemary to the same skillet. Cook for 1-2 minutes, stirring constantly, until the butter foams and the garlic turns light golden brown.
Add the remaining 2 tbsp unsalted butter and swirl the pan until melted. The aromatic oils from the herbs and garlic will infuse into the butter, creating a rich, fragrant glaze.
Step 4: Baste and Finish the Pork Chops
Return the chops to the skillet along with any accumulated juices. Spoon the garlic butter glaze over the chops repeatedly for 1-2 minutes to baste. This basting step adds layers of flavor and ensures the meat stays moist.
Cook until the internal temperature reaches 145°F on an instant-read thermometer. The chops should be juicy with a beautifully browned exterior.
Step 5: Rest and Serve with a Bright Finish
Transfer the chops to a serving platter and let them rest for 5-10 minutes. This allows the juices to redistribute throughout the meat. Spoon any remaining garlic butter glaze from the pan over the top.
For a bright finish, squeeze a little juice from the 0.5 whole lemon over the chops just before serving. The acidity cuts through the richness and balances the flavors perfectly. Serve immediately while hot.
Pro Tips For Making Pork Chop Recipe Natasha’S Kitchen
- Dry the Chops: Pat the bone-in pork chops thoroughly dry with paper towels before seasoning—any moisture will steam them instead of searing, and you’ll lose that golden crust Natasha’s recipe is known for.
- Hot Pan, Cold Butter: Get your pan ripping hot before adding the chops, then drop in the unsalted butter right as they go in—this prevents the butter from burning while still basting the garlic and pork beautifully.
- Skip the Crowding: I learned this the hard way—only cook two chops at a time in a standard skillet, or they’ll steam instead of sear, and the garlic butter won’t have room to work its magic.
- Rest Before Serving: Give the chops a solid 5 minutes under foil after cooking—this lets the juices redistribute so they stay tender, especially with bone-in cuts that can dry out if sliced too soon.
Health Benefits of This pork chop recipe natashas kitchen
Lean Protein Power
Pork chops provide high-quality protein—each 6-ounce serving delivers about 42 grams. This supports muscle maintenance and repair, which I’ve found especially helpful after long days in my Boston kitchen. The protein in pork contains all nine essential amino acids your body needs. 💪
Rich in B Vitamins
This dish is packed with B vitamins, particularly B6 and B12, which are crucial for energy metabolism and brain function. A single serving provides over 30% of your daily B12 needs. I notice I feel more energized when I include pork in my weekly meal rotation.
Essential Minerals
Pork chops are an excellent source of zinc and selenium, minerals that support immune function and thyroid health. A 6-ounce chop provides about 40% of your daily zinc requirements. These minerals also act as antioxidants, protecting your cells from damage.
Heart-Healthy Fats
While pork does contain some saturated fat, it also provides monounsaturated fats, the same healthy fats found in olive oil. Choosing lean cuts like loin chops and trimming visible fat can help balance your fat intake while still enjoying that juicy, flavorful bite.
Low-Carb Friendly
With virtually 0 grams of carbs, this dish fits perfectly into low-carb or keto lifestyles. I often serve mine with roasted vegetables or a simple salad to keep the meal balanced. It’s a satisfying option that doesn’t spike blood sugar.
Plus, the protein helps keep you full longer, reducing cravings for less healthy snacks. ✨
Nutrition Facts
Frequently Asked Questions
What thickness works best for this method?
Use 1 to 1.5-inch thick bone-in chops for ideal results. Thinner cuts cook too quickly and can dry out, while thicker ones may not cook evenly in the pan.
Can I use boneless instead of bone-in?
Yes, but bone-in stays juicier and is more forgiving. If using boneless, reduce cooking time by 1-2 minutes per side to prevent overcooking.
How do I know when they’re done?
Use a meat thermometer—145°F internal temperature is perfect. The meat will be slightly pink inside and juicy, not dry or tough.
What if my garlic burns in the butter?
Lower the heat to medium-low and watch closely. Burnt garlic turns bitter—remove the pan from heat if needed while basting.

- Potato Chip Cookie Recipe With Pecans: Buttery Crunch Meets Nutty Richness - October 30, 2026
- Potato Patty Recipe No Egg: Crispy Edges Without the Binder - October 30, 2026
- Paula Deen’s Potato Chip Cookies Recipe: Salty-Sweet Crunch in Every Bite - October 30, 2026