
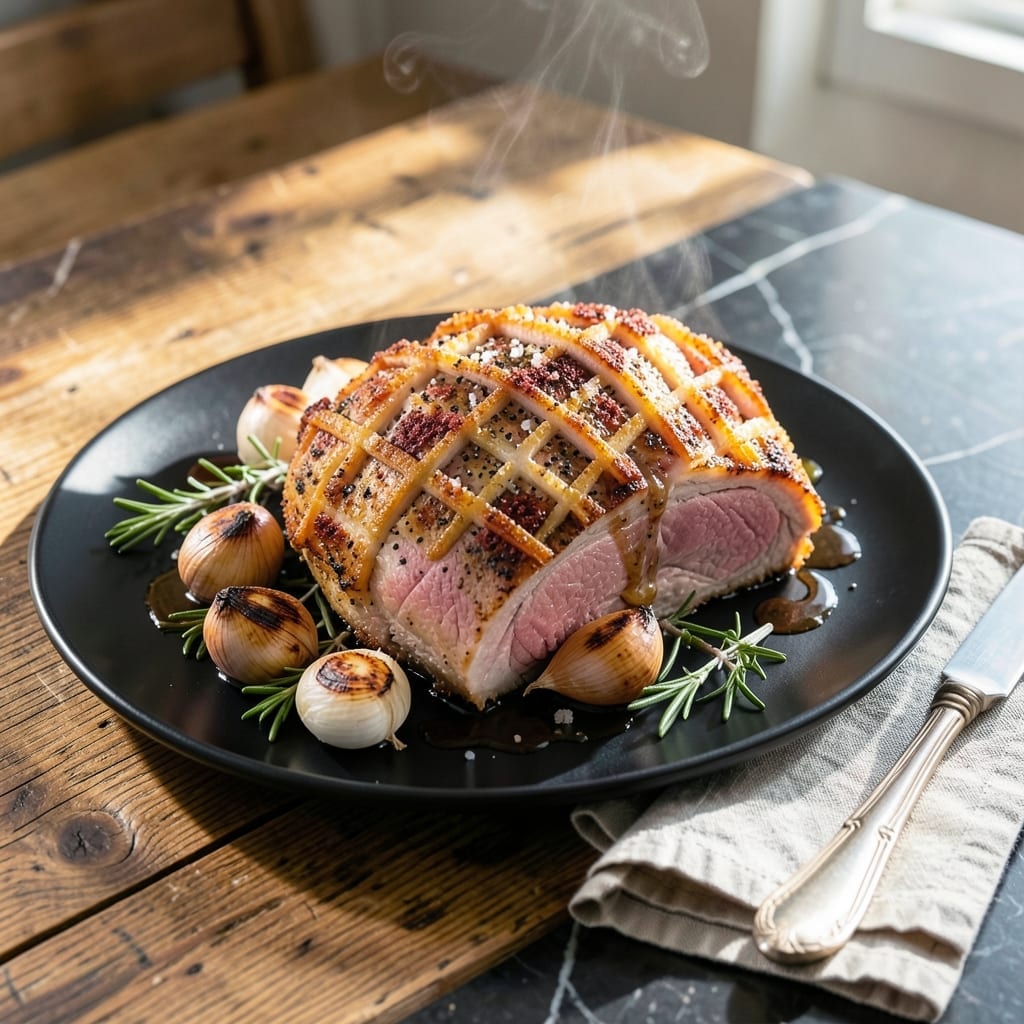
Forget the deep fryer—I’ve perfected golden pork crackling in a standard oven using a technique honed over years of whole-hog cooking. The secret lies in patience and precision, transforming tough skin into shatteringly crisp perfection.
This method starts with scoring the pork skin just right, then drying it thoroughly to ensure maximum crunch. A generous salt rub and slow roasting at 325°F render the fat while crisping the skin to an irresistible texture.
What emerges is a crackling so light and airy it practically melts in your mouth, with a deep golden hue that signals perfect doneness. The contrast between the crisp exterior and tender meat underneath is what makes this dish unforgettable.
No special equipment required—just time, attention to detail, and a willingness to let the oven work its magic.
Ingredients for Pork Crackling Recipe Oven
Pork shoulder with skin and a handful of pantry staples produce this oven-baked masterpiece.
| Ingredient | Amount | Notes |
|---|---|---|
| Pork Shoulder with Skin 🐖 | 4 lb | Skin-on, bone-in preferred |
| Kosher Salt 🧂 | 2 tbsp | Diamond Crystal preferred |
| Coarse Black Pepper 🌶️ | 1 tbsp | Freshly ground |
| Garlic Powder 🧄 | 1 tsp | Not garlic salt |
| Onion Powder 🧅 | 1 tsp | Fine grind preferred |
| Smoked Paprika 🌶️ | 1 tsp | Optional for depth |
| Olive Oil 🫒 | 1 tbsp | For skin conditioning |
| White Vinegar 💧 | 1 tbsp | For skin drying |
| Fresh Rosemary 🌿 | 2 sprigs | Optional for aroma |
| Fresh Thyme 🍃 | 2 sprigs | Optional for aroma |
| Bay Leaf 🌿 | 1 whole | Optional for meat seasoning |
The pork shoulder must have intact skin for proper crackling formation. Whole Foods or local butchers typically carry skin-on cuts, though you may need to request it. Look for thick, even skin (at least 1/4-inch) without excessive fat between skin and meat. The salt is critical—Diamond Crystal kosher salt adheres best to the skin surface, creating that signature crisp texture.
No pork shoulder? Pork belly with skin works equally well, though the texture differs slightly. Substitute sea salt flakes at a 1:1 ratio if kosher salt isn’t available. Fresh herbs can be replaced with dried at one-third the amount. The vinegar helps dry the skin—apple cider vinegar offers a milder alternative. For extra flavor, some chefs add fennel seeds to the salt rub.
Store the raw pork in the coldest part of your refrigerator for up to 3 days. Once cooked, crackling keeps at room temperature for 2 hours or refrigerated for 4 days. Re-crisp in a 350°F oven for 5-10 minutes if needed. Never microwave—it ruins the texture.
Why You’ll Love This Recipe
- Set and Forget: I rub the skin with salt and spices, pop it in the oven, and let the heat do all the work.
- Crunch & Flavor: That first bite—crackling so crisp it shatters, with garlic and onion powder punching through every layer.
- Party Starter: I make a big batch for game nights; everyone fights over the last piece.
- Budget Winner: Pork shoulder is cheap, and the leftovers turn into the best sandwiches the next day.
Step-by-Step Instructions for Pork Crackling
Achieve perfectly crispy results every time with this precise oven method.
Step 1: Prepare and Score the Skin
Pat the 4 lb Pork Shoulder with Skin dry with paper towels to remove all moisture. This step is non-negotiable—excess water prevents crisping. Place the pork skin-side up on a clean cutting board.
Using a sharp knife, score the skin in a crosshatch pattern, cutting through the fat but not into the meat beneath. These cuts allow the fat to render out while the skin crisps. For best results, make the incisions about ¼ inch apart. This creates the maximum surface area for that coveted crunch.
Step 2: Dry and Season the Skin
Rub the scored skin with the 1 tbsp White Vinegar, which helps draw out remaining moisture and tenderizes the surface. Follow immediately with the 1 tbsp Olive Oil, massaging it into every scored line to condition the skin.
Combine the 2 tbsp Kosher Salt, 1 tbsp Coarse Black Pepper, 1 tsp Garlic Powder, 1 tsp Onion Powder, and 1 tsp Smoked Paprika. Press this mixture aggressively into the scored skin, ensuring it penetrates every crevice. For aroma, tuck the 2 sprigs Fresh Rosemary, 2 sprigs Fresh Thyme, and 1 whole Bay Leaf between the skin and meat.
Step 3: Rest and Preheat for Optimal Crisping
Place the seasoned pork uncovered in the refrigerator for 12-24 hours. This drying period is critical—it allows the skin to dehydrate fully, which guarantees maximum crispness. The longer you can wait, the better your results will be.
When ready to cook, remove the pork from the refrigerator and let it sit at room temperature for 1 hour. Preheat your oven to 375°F. Position the rack in the center of the oven to ensure even heat distribution. This temperature provides the perfect balance between rendering fat and crisping skin without burning.
Step 4: Roast to Golden Perfection
Place the pork shoulder skin-side up on a wire rack set in a roasting pan. This elevation allows air to circulate underneath, preventing the skin from steaming. Roast for 2 hours, then increase the oven temperature to 425°F for the final 30-45 minutes.
Watch for the skin to transform into a deep golden brown with visible bubbles forming in the scored lines. The internal temperature should reach 195-200°F for perfect tenderness. If the skin isn’t crisping enough, broil for 2-3 minutes at the end, but monitor closely to avoid burning.
Step 5: Rest and Serve Immediately
Transfer the pork to a cutting board and let it rest for 15-20 minutes. This allows the juices to redistribute while the skin maintains its crispness. Don’t cover it—trapped steam will soften your hard-earned crackling.
To serve, use a cleaver to separate the crispy skin from the meat, then chop it into bite-sized pieces. The skin should shatter with a satisfying crunch, while the meat beneath remains moist and flavorful. Serve the crackling immediately for the best texture.
Pro Tips For Making Pork Crackling Recipe Oven
- Dry the Skin: Pat the pork shoulder skin completely dry with paper towels before seasoning—I learned this the hard way after ending up with soggy crackling twice.
- Start Hot, Finish Low: Blast the oven at 450°F for the first 30 minutes, then drop to 325°F to render the fat without burning the spices.
- Score Deep Enough: Cut through the skin and fat down to the meat in 1/4-inch intervals, or the seasoning won’t penetrate and the crackling won’t puff properly.
- Salt the Night Before: Rub kosher salt into the scored skin 12-24 hours ahead—sounds like overkill, but it draws out moisture for that perfect crunch.
Make-Ahead Tips for This Dish
Overnight Drying
After scoring and seasoning, I always let my pork rest uncovered in the fridge for 12-24 hours. This step is non-negotiable for that perfect shatter—it draws out moisture so the skin crisps evenly. I use a wire rack over a tray to allow airflow on all sides. 💪
Pre-Roast Prep
Take the pork out 1 hour before roasting to bring it to room temperature. This ensures even cooking throughout. Meanwhile, I preheat my oven to 375°F with the rack centered for consistent heat distribution.
Partial Cooking Option
If short on time, you can par-cook the pork at 325°F for 2 hours, then finish the next day. Just cool it completely, refrigerate, and resume roasting with an extra 15-20 minutes to restore crispness.
Storage Before Cooking
Keep your seasoned pork uncovered in the coldest part of your fridge. I place mine on the bottom shelf where it’s 34-36°F. This prevents any accidental moisture from other foods affecting the drying process.
Herb Preparation
If using fresh herbs like rosemary or thyme, I prep them right before the drying period. Lightly bruise the sprigs to release their oils, then tuck them under the skin. This infuses the meat with aroma as it rests. ❄️
Equipment Ready
Before starting, I set out my roasting pan with wire rack, meat thermometer, and a small bowl of extra kosher salt for touch-ups. Being organized means I can focus on the cooking, not the prep.
Nutrition Facts
Frequently Asked Questions
Why score the skin before roasting?
Scoring creates surface area for fat to render out while allowing the skin to crisp evenly. It also helps the seasoning penetrate deeply for maximum flavor in every bite.
Can I skip the overnight drying step?
Not recommended. The 12-24 hour drying period is crucial for removing moisture, which is the key to achieving that perfect shatter. Skipping this may result in chewy rather than crisp crackling.
How do I know when it’s perfectly crisp?
The skin should be deep golden brown with visible bubbles, and it will make a hollow sound when tapped. If unsure, broil for 2-3 minutes while watching closely.
Can I use a different cut of pork?
Yes, pork belly with skin works well, though the texture may differ slightly. The key is choosing a cut with thick, even skin for the best crackling results.

- Potato Chip Cookie Recipe With Pecans: Buttery Crunch Meets Nutty Richness - October 30, 2026
- Potato Patty Recipe No Egg: Crispy Edges Without the Binder - October 30, 2026
- Paula Deen’s Potato Chip Cookies Recipe: Salty-Sweet Crunch in Every Bite - October 30, 2026