
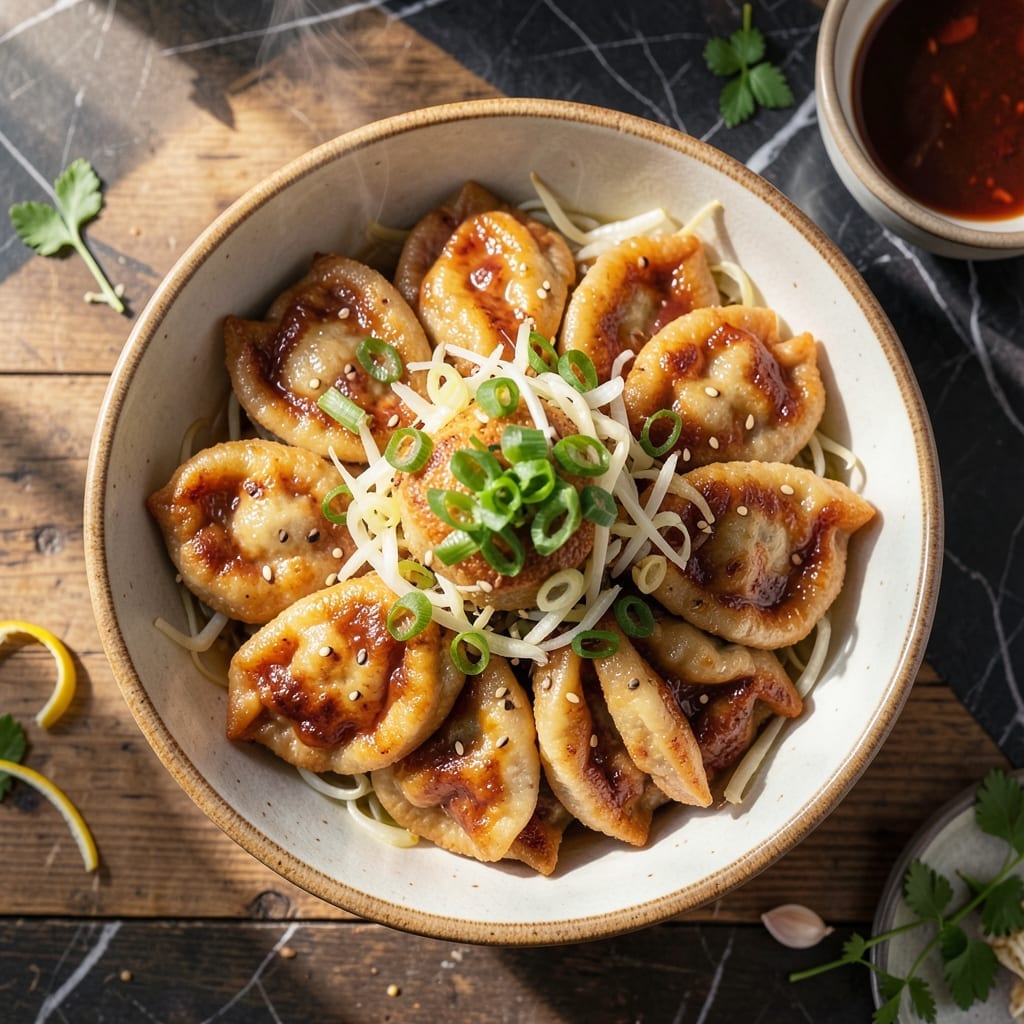
Growing up in Georgia, I learned that the perfect pork dumpling delivers both crispy bottoms and juicy fillings in every bite. This method transforms simple ingredients into restaurant-quality results at home.
The key is a two-step cooking process: first pan-frying to create that golden-brown crust, then steaming to ensure the filling stays tender. I’ve prepared thousands of dumplings at The Smoky Pig, and this technique never fails.
What you’ll achieve is dumplings with shatteringly crispy undersides giving way to juicy, flavorful pork centers. The contrast in textures is what makes these irresistible.
Serve with a simple dipping sauce of soy, vinegar, and chili oil. The process takes practice, but the results are worth every effort.
Ingredients for Pork Dumpling Recipe Fried
Transform simple pantry staples into restaurant-quality dumplings with crispy bottoms and juicy centers right at home.
| Ingredient | Amount | Notes |
|---|---|---|
| Ground Pork 🐷 | 1 lb | 70% lean, 30% fat ratio |
| Napa Cabbage 🥬 | 2 cups | Finely shredded, salted and drained |
| Green Onions 🧅 | 4 whole | Thinly sliced, white and green parts separated |
| Fresh Ginger 🌿 | 1 tbsp | Peeled and minced |
| Garlic Cloves 🧄 | 3 cloves | Minced finely |
| Soy Sauce 🫒 | 2 tbsp | Low-sodium preferred |
| Sesame Oil 🫒 | 1 tbsp | Toasted for depth of flavor |
| Shaoxing Wine 🍶 | 1 tbsp | Dry sherry as substitute |
| Dumpling Wrappers 🥟 | 48 pieces | Round, store-bought or homemade |
| Neutral Oil 🫒 | ½ cup | For pan-frying, high smoke point |
| Salt 🧂 | 1 tsp | Divided for filling and seasoning |
| White Pepper 🌶️ | ½ tsp | Freshly ground for brightness |
| Sugar 🧂 | 1 tsp | Balances savory flavors |
| Cornstarch 🌾 | 1 tbsp | Thickens filling mixture |
| Water 💧 | ½ cup | For steaming dumplings |
The pork is non-negotiable for flavor and juiciness. Source 70% lean ground pork from a trusted butcher or well-stocked supermarket like Whole Foods—higher fat ratios ensure moisture retention during cooking. Napa cabbage adds the perfect crunch; substitute with regular cabbage (salted and drained well) if unavailable. Asian markets often carry the best dumpling wrappers, fresh or frozen.
No Shaoxing wine? Dry sherry at one-to-one ratio works perfectly. Out of green onions? Chives provide a similar mild bite. For gluten-free needs, swap soy sauce for tamari and use gluten-free wrappers. The sesame oil can be omitted in a pinch, but toasted variety is essential for authentic flavor. Fresh ginger and garlic are mandatory—powdered versions won’t deliver the same punch.
Filling can be prepped 1 day ahead and refrigerated. Uncooked dumplings freeze beautifully on a tray before bagging—store for up to 3 months. Cooked dumplings keep in the fridge for 3-4 days (reheat in a skillet to recapture crispiness).
Why You’ll Love This Recipe
- One Pan Magic: I can mix, fold, and fry these all in one skillet—no extra bowls piling up in the sink.
- Ginger-Garlic Punch: That fresh ginger and garlic hit with the pork? It’s the kind of flavor that lingers in the best way.
- Weekend or Weeknight: I’ve served these at parties and scarfed them down solo for lunch—they work for both.
- Leftovers? Yes Please: They crisp up just as good the next day, straight from the fridge to the pan. Honestly, sometimes better.
Step-by-Step Instructions for Pork Dumplings Fried
Master the technique for achieving golden-brown crusts while locking in moist, flavorful centers.
Step 1: Prepare the Filling Mixture
In a large mixing bowl, combine the 1 lb Ground Pork with 2 cups Napa Cabbage, white parts of the 4 whole Green Onions (finely sliced), 1 tbsp Fresh Ginger, and 3 cloves Garlic Cloves. The cabbage should be well-drained to prevent a soggy filling.
Add 2 tbsp Soy Sauce, 1 tbsp Sesame Oil, 1 tbsp Shaoxing Wine, ½ tsp White Pepper, 1 tsp Sugar, and 1 tbsp Cornstarch. Mix thoroughly in one direction until the mixture becomes sticky and cohesive. The cornstarch helps bind the filling and keeps it juicy during cooking.
Step 2: Fill and Shape the Dumplings
Place 1 tbsp of the filling in the center of each Dumpling Wrapper. I use about 48 pieces Dumpling Wrappers for this batch, but adjust based on your preferred size. Moisten the edge of the wrapper with water, then fold and pleat to create a crescent shape, pressing firmly to seal.
Ensure the edges are tightly sealed to prevent the filling from leaking during frying. Arrange the finished dumplings on a floured surface, covering them with a damp towel to keep them from drying out while you work.
Step 3: Pan-Fry for Crispy Bottoms
Heat 2 tbsp Neutral Oil in a large non-stick skillet over medium-high heat. Arrange the dumplings in a single layer, flat-side down, ensuring they don’t touch. Fry undisturbed for 3-4 minutes until the bottoms turn golden brown and crisp.
Watch for the edges to develop a deep golden color—this visual cue means the crust is forming properly. Resist the urge to move them too soon; letting them sear undisturbed creates that coveted crispy texture.
Step 4: Steam for Juicy Centers
Carefully add ½ cup Water to the skillet, then immediately cover with a tight-fitting lid. The water should sizzle and steam the dumplings. Reduce heat to medium and let them cook for 6-8 minutes until the water evaporates completely.
You’ll hear the sizzling subside as the water cooks off. Once the pan is dry, remove the lid and let the dumplings cook for another 1-2 minutes to re-crisp the bottoms. The wrappers should appear translucent where they’ve steamed, with the tops still slightly firm.
Step 5: Serve with Crispy Side Up
Transfer the dumplings to a serving plate, crispy side facing up. Garnish with the remaining green parts of the Green Onions, sliced thinly. The contrast between the golden crust and tender filling should be immediate.
The bottoms should crackle slightly when bitten into, while the filling remains succulent and flavorful. Serve immediately while hot to preserve the texture contrast that makes this dish exceptional.
Pro Tips For Making Pork Dumpling Recipe Fried
- Salt the Cabbage: Drain your shredded napa cabbage with a teaspoon of salt for 10 minutes, then squeeze out every drop—this keeps your dumplings from turning into sad, soggy pockets. —
- Chill the Filling: After mixing the pork with ginger, garlic, and green onions, let it rest in the fridge for 20 minutes. I learned this the hard way—cold filling is way easier to fold and stays put in the pan. —
- Skip the Cold Pan: Get your oil shimmering hot before adding the dumplings, or they’ll stick like glue and tear when you try to flip them. A proper sizzle means you’re doing it right. —
- Steam Then Crisp: After frying the bottoms golden, add a splash of water and cover for 3-4 minutes. Sounds weird, but it works: the tops cook through while the bases turn lacy and crisp.
Troubleshooting This Recipe
Sticking to Pan
If dumplings stick, your pan isn’t hot enough or you moved them too soon. Heat 2 tbsp Neutral Oil until shimmering, then wait 30 seconds before adding dumplings. Use a non-stick skillet—I swear by my vintage Wagner cast iron. 🔥
Soggy Bottoms
This happens when steaming too long. After adding ½ cup Water, cook covered for exactly 6-8 minutes, then uncover and crisp for 1-2 minutes. The pan should be completely dry before removing lid.
Filling Leaks
Your pleats aren’t sealed tightly enough. Press edges firmly together as you pleat, using a bit of water to help them stick. For extra security, do a second pleat fold. I learned this trick during my apprenticeship in Charleston.
Dumplings Break
Overcrowding is the culprit. Leave ½ inch between each dumpling so they have room to expand. Cook in batches if needed—this gives you that perfect golden crust without tearing the delicate wrappers.
Uneven Cooking
Your heat is inconsistent. Use medium-high heat for frying, then reduce to medium for steaming. Rotate the pan occasionally for even heat distribution. My 47 cast iron pieces all have their quirks.
Dry Filling
This means your cabbage wasn’t drained well. After salting 2 cups Napa Cabbage, let it sit 10 minutes, then squeeze out every drop of water. The cornstarch also helps retain moisture—don’t skip it. 💡
Nutrition Facts
Frequently Asked Questions
How do I prevent my dumplings from sticking?
Use a non-stick skillet and ensure the oil is hot before adding dumplings. Heat 2 tbsp of oil until shimmering, then wait 30 seconds before placing them in the pan.
Can I use a different type of cabbage?
Yes, regular cabbage works as a substitute. Salt and drain it well for 10 minutes, then squeeze out all moisture to avoid a soggy filling. Napa cabbage is preferred for its mild flavor.
How do I know when they’re done cooking?
The bottoms should be golden brown and crisp, while the wrappers appear translucent. Steam for 6-8 minutes, then crisp for 1-2 minutes before serving.
Can I make these ahead of time?
Yes! Uncooked dumplings freeze well for up to 3 months. Cook from frozen by adding 1-2 minutes extra steaming time. Reheat cooked ones in a skillet to restore crispiness.

- Potato Chip Cookie Recipe With Pecans: Buttery Crunch Meets Nutty Richness - October 30, 2026
- Potato Patty Recipe No Egg: Crispy Edges Without the Binder - October 30, 2026
- Paula Deen’s Potato Chip Cookies Recipe: Salty-Sweet Crunch in Every Bite - October 30, 2026