
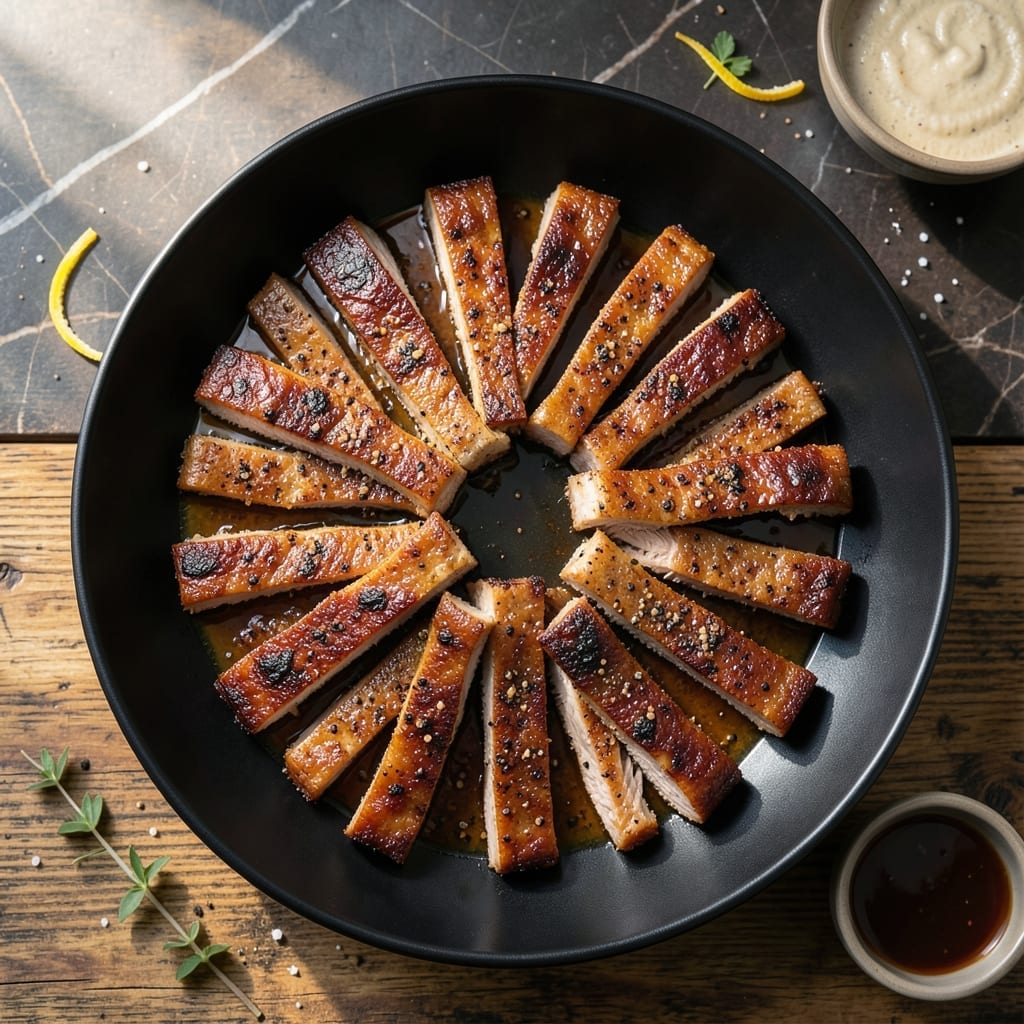
I developed this oven method after years of inconsistent grill results in my small Boston kitchen. The key is a two-step cooking process that ensures tender meat with crispy edges every time.
Starting with a low-temperature bake allows the connective tissue to break down slowly. This creates that coveted fall-off-the-bone texture without drying out the pork.
Finishing under the broiler transforms the exterior into a caramelized, slightly charred crust. The result is finger ribs that deliver perfect contrast in every bite.
This technique works in any standard home oven. No special equipment required, just patience and attention to detail.
Ingredients for Pork Finger Ribs Recipe Oven
Standard grocery list yields extraordinary results with this oven method.
| Ingredient | Amount | Notes |
|---|---|---|
| Pork Finger Ribs 🥩 | 2 ½ lb | Trimmed of excess fat |
| Kosher Salt 🧂 | 1 ½ tbsp | Diamond Crystal preferred |
| Black Pepper 🌶️ | 1 tbsp | Freshly ground coarse |
| Garlic Powder 🧄 | 1 tbsp | Not garlic salt |
| Onion Powder 🧅 | 1 tbsp | Fine grind preferred |
| Smoked Paprika 🌶️ | 1 tsp | Hungarian or Spanish |
| Brown Sugar 🍚 | ½ cup | Light or dark variety |
| Apple Cider Vinegar 🍏 | ¼ cup | For acidity balance |
| Worcestershire Sauce 🍶 | 2 tbsp | Anchovy-free if preferred |
| Olive Oil 🫒 | 2 tbsp | For moisture and browning |
| Yellow Mustard 🟡 | 2 tbsp | For binding rub |
| BBQ Sauce 🍯 | 1 cup | For finishing glaze |
The ribs are everything here. Look for well-marbled pork finger ribs—avoid pre-cut racks with excessive fat. Whole Foods or Costco typically carry quality options. Ask your butcher for St. Louis-style if available; they’re meatier and more uniform. The connective tissue should be visible but not overwhelming. Avoid enhanced or pre-brined products, as they can interfere with the dry rub penetration.
No smoked paprika? Regular paprika plus a pinch of liquid smoke works in a pinch. Brown sugar can be swapped for honey (though it may caramelize faster). If avoiding Worcestershire, use coconut aminos plus a dash of vinegar. The mustard is purely for adhesion—Dijon works equally well. For the BBQ sauce, Stubb’s Original or Sweet Baby Ray’s are reliable store-bought options.
Uncooked ribs keep in the fridge for 3-4 days or freeze for up to 6 months. Once cooked, they reheat beautifully—wrap in foil with a splash of apple juice and warm at 300°F for 20 minutes. The rub can be mixed ahead and stored in an airtight container for 2 weeks.
Why You’ll Love This Recipe
- One Pan Wonder: I just toss the ribs with salt, pepper, and those powders, then let the oven do the work—no flipping, no fuss.
- Crave-Worthy Crust: The garlic and onion powder bake into this stick-to-your-fingers crust that’s honestly hard to resist.
- Feeds a Crowd: I made these for a Sunday dinner and watched my picky nephew go back for thirds.
- Budget Friendly: Pork finger ribs are cheap, and that dry rub costs pennies—here’s what sold me: it tastes like a million bucks.
Step-by-Step Instructions for Pork Finger Ribs Oven
Achieve tender meat with crispy edges using this oven-baking method that delivers consistent results.
Step 1: Prepare and Season the Pork Finger Ribs
Pat the 2.5 lb pork finger ribs completely dry with paper towels to ensure the rub adheres properly. In a small bowl, combine 1.5 tbsp kosher salt, 1 tbsp black pepper, 1 tbsp garlic powder, 1 tbsp onion powder, 1 tsp smoked paprika, and 0.5 cup brown sugar.
Rub the 2 tbsp yellow mustard evenly over all surfaces of the ribs—this acts as a binder for the dry rub. Then generously coat the ribs with the spice mixture, pressing firmly so it forms a crust. Let them sit at room temperature for 30 minutes while the oven preheats.
Step 2: Create the Braising Liquid and Preheat Oven
Preheat your oven to 300°F. In a separate bowl, whisk together 0.25 cup apple cider vinegar, 2 tbsp Worcestershire sauce, and 2 tbsp olive oil. This liquid will keep the ribs moist during the long cook while adding depth of flavor.
Place the seasoned ribs in a large baking dish or roasting pan, bone-side down. Pour the braising liquid around (not over) the ribs to avoid washing off the rub. Cover the dish tightly with aluminum foil to trap steam and begin the tenderizing process.
Step 3: Slow-Bake Until Tender
Bake the covered ribs in the preheated oven for 2.5 hours. This low-and-slow approach breaks down the connective tissue, yielding fall-off-the-bone tenderness. Resist the urge to check on them—maintaining consistent heat and moisture is crucial.
After 2.5 hours, carefully remove the foil. The ribs should be tender but not yet caramelized. Increase the oven temperature to 400°F to prepare for the final crisping phase.
Step 4: Glaze and Crisp the Edges
Brush the ribs liberally with 1 cup BBQ sauce, coating all surfaces evenly. Return them to the oven, uncovered, and bake for an additional 15-20 minutes at 400°F.
Watch closely during this phase—the edges should turn deep brown and slightly charred while the sauce thickens into a glossy glaze. The ribs are done when the sauce has caramelized and the edges are crispy to the touch.
Step 5: Rest and Serve
Transfer the ribs to a cutting board and let them rest for 10 minutes before slicing. This allows the juices to redistribute, ensuring each bite is moist and flavorful. The sauce should have thickened into a sticky, finger-licking glaze.
Slice between the bones and serve immediately. The ideal result is meat that pulls away from the bone with minimal effort, with crispy, caramelized edges that provide a satisfying contrast to the tender interior.
Pro Tips For Making Pork Finger Ribs Recipe Oven
- Preheat the Oven: I learned this the hard way—always preheat to 400°F before putting the ribs in, or you’ll end up with uneven cooking and a sad, pale crust.
- Dry the Ribs: Pat those finger ribs bone-dry with paper towels before seasoning. Sounds tedious, but it’s the only way to get that crispy, caramelized exterior.
- Don’t Overcrowd: Give each rib space on the baking sheet—at least an inch apart—or they’ll steam instead of roast. I skip this when I’m lazy, and the texture suffers every time.
- Season Twice: Hit the ribs with salt and spices before roasting, then again right out of the oven. That second dusting of garlic and onion powder sticks to the hot surface and adds a serious flavor punch.
Make-Ahead Tips for This pork finger ribs recipe oven
Prep the Night Before
Trim and dry the 2.5 lb pork finger ribs the evening before cooking. Mix the dry rub—1.5 tbsp kosher salt, 1 tbsp black pepper, and other spices—and store in an airtight container. This saves 20 minutes on cooking day. 💡
Marinate Overnight
After applying the rub and mustard binder, wrap the ribs tightly in plastic and refrigerate. The flavors penetrate deeper during 8-12 hours of marination. I often prep them Sunday night for Monday dinner.
Partial Cooking Method
Bake the ribs covered at 300°F for 2 hours, then cool and refrigerate. The next day, finish the last 30 minutes of baking and broil. This breaks the work into manageable steps.
Freeze for Later
Fully cook the ribs, cool completely, and freeze in vacuum-sealed bags for up to 3 months. Reheat in a 350°F oven for 20-25 minutes, brushing with extra BBQ sauce.
Sauce Prep
Mix your 1 cup BBQ sauce ahead and store in the fridge. I like Stubb’s Original for this. Warm it slightly before glazing to help it adhere better to the ribs. ❄️
Reheating Tips
For leftovers, wrap ribs in foil with 2 tbsp apple cider vinegar and reheat at 300°F for 15-20 minutes. This keeps them moist and tender.
Nutrition Facts
Frequently Asked Questions
What temperature should I use for fall-off-the-bone tenderness?
Start with 300°F for the slow bake to break down connective tissue, then finish at 400°F for crispy edges. This two-step process ensures both texture and flavor.
Can I use a different type of vinegar?
Yes, but apple cider vinegar adds the right balance of acidity and fruitiness. White vinegar works in a pinch but may taste sharper. Avoid balsamic—it’s too sweet and dark.
How do I prevent the ribs from drying out?
Keep them covered with foil during the 2.5-hour bake, and add the braising liquid around (not over) the ribs. This traps steam for moisture.
Is the mustard necessary in the rub?
It acts as a binder to help the dry rub stick. Dijon or yellow mustard both work—you won’t taste it in the final dish. Skip it only if absolutely needed.

- Potato Candy Recipe 1933: Vintage Peanut Butter Roll Delight - October 30, 2026
- Potato Chip Cookie Recipe With Pecans: Buttery Crunch Meets Nutty Richness - October 30, 2026
- Potato Patty Recipe No Egg: Crispy Edges Without the Binder - October 30, 2026