
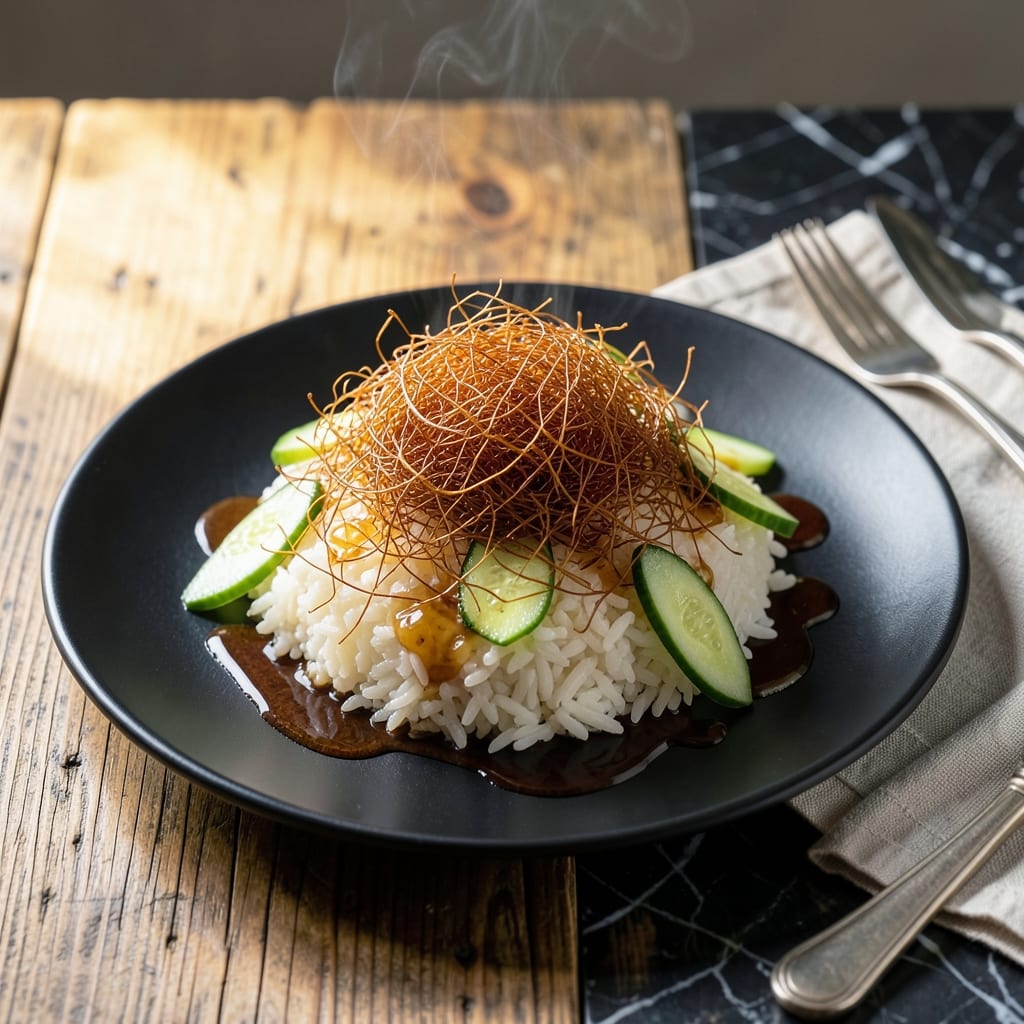
Transform ordinary dishes with this versatile technique for making pork floss at home. I developed this method after tasting it in Asian markets and realizing how it elevates everything from rice to salads.
The process involves slow-cooking pork shoulder until tender, then shredding and frying it until crispy. This creates light, airy strands that add texture and umami to any meal. It’s simpler than it sounds and requires no special equipment.
What you get is a golden, crispy topping that stays fresh for days in an airtight container. The strands melt in your mouth while adding a satisfying crunch to soups, noodles, or even mashed potatoes.
Make a batch and experiment with different dishes. The possibilities are endless.
Ingredients for Pork Floss Recipe Ideas
Simple ingredients transform into that magical crispy topping you crave. Nothing exotic here.
| Ingredient | Amount | Notes |
|---|---|---|
| Pork Shoulder 🐖 | 2 lb | Boneless, skin-on preferred |
| Kosher Salt 🧂 | 2 tsp | Diamond Crystal preferred |
| Black Pepper 🌶️ | 1 tsp | Freshly ground coarse |
| Garlic Cloves 🧄 | 4 cloves | Smashed, peeled |
| Light Brown Sugar 🍚 | 2 tbsp | Packed, for caramelization |
| Soy Sauce 🫙 | ¼ cup | Low-sodium preferred |
| Shaoxing Wine 🍶 | 2 tbsp | Or dry sherry substitute |
| Five-Spice Powder 🌿 | 1 tsp | Authentic flavor essential |
| Neutral Oil 🫒 | 2 cups | For frying, high smoke point |
| Green Onions 🧅 | 3 whole | Thinly sliced for garnish |
| Sesame Oil 🫒 | 1 tsp | Toasted, for finishing |
| Ginger Root 🧄 | 1 whole | 2-inch piece, sliced |
The pork shoulder is non-negotiable here—look for well-marbled cuts at Costco or your butcher (they’ll often cube it for you if you ask nicely). I’ve tried it with pork loin and it just doesn’t shred right. The fat content in shoulder renders out perfectly during cooking, which is what gives you those airy, crispy strands. Skin-on adds extra texture, but skinless works too.
No Shaoxing wine? Dry sherry is your best bet—avoid cooking wine (too salty). Short on time? Skip the slow cooker and use an Instant Pot (45 minutes on high pressure). The soy sauce can be tamari for gluten-free, but watch the salt since tamari is stronger. Five-spice is at most Asian markets or Amazon, but one teaspoon of cinnamon plus a pinch of star anise works in a pinch.
The floss keeps in an airtight container at room temperature for 1 week (though it never lasts that long at my house). Freeze for up to 3 months—spread on a tray first to prevent clumping, then transfer to a bag. Re-crisp in a dry pan or oven before serving (the microwave makes it soggy, don’t bother).
Why You’ll Love This Recipe
- One Pan Magic: I slow-cook the pork shoulder with just salt, pepper, garlic, and brown sugar—then shred and crisp it all in the same pan.
- Sweet-Savory Perfection: The brown sugar caramelizes with the garlic and pork juices, creating this sticky, umami-packed floss I can’t stop snacking on.
- Endless Possibilities: I toss it into fried rice, stuff it in bao buns, or even sprinkle it over salads for a protein punch.
- Budget-Friendly Batch: A single pork shoulder makes enough floss to last a week, and it costs less than buying pre-made.
Step-by-Step Instructions for Pork Floss
Here’s my tried-and-true method that turns pork shoulder into airy, crispy goodness.
Step 1: Season and Braise the Pork Shoulder
Pat the 2 lb Pork Shoulder dry with paper towels, then rub it with the 2 tsp Kosher Salt, 1 tsp Black Pepper, 2 tbsp Light Brown Sugar, and 1 tsp Five-Spice Powder. I press the spices in so they form a good crust. Place the seasoned pork in a pot, add the 0.25 cup Soy Sauce, 2 tbsp Shaoxing Wine, 4 cloves Garlic Cloves, and a few slices of the Ginger Root.
Cover with water and bring to a boil, then reduce to a simmer. Cook for 1.5-2 hours until the pork shreds easily with a fork. You’ll know it’s done when the meat falls apart with gentle pressure. This braising step infuses the pork with flavor and makes it tender enough to pull apart effortlessly.
Step 2: Shred and Dry the Pork
Remove the pork from the liquid and let it cool slightly. Shred it into fine threads using two forks or your fingers. Spread the shredded pork on a baking sheet in a thin, even layer. I like to pull it as fine as possible for the flossiest texture.
Let it air-dry for 30-60 minutes at room temperature, or speed it up in a 200°F oven for 20-30 minutes. The pork should look dry to the touch and slightly stiff. This drying step is crucial—it prevents splattering when you fry it and ensures maximum crispiness.
Step 3: Fry Until Crispy and Light
Heat the 2 cups Neutral Oil in a deep pot to 350°F. Test the temperature with a small piece of pork—it should sizzle immediately. Working in batches, add the dried pork shreds and fry for 3-5 minutes, stirring frequently to prevent clumping.
The pork floss will puff up and turn golden brown as it fries. Use a slotted spoon to remove it from the oil and drain on paper towels. It should be light, crispy, and almost feathery. If it’s not crispy enough, pop it back in the oil for another minute—it crisps up fast once it starts.
Step 4: Finish and Store
While the pork floss is still warm, toss it with the 1 tsp Sesame Oil for extra fragrance. Thinly slice the 3 whole Green Onions and sprinkle them over the floss for a fresh finish. The sesame oil adds a nutty aroma that complements the savory pork perfectly.
Let it cool completely before storing in an airtight container. It’ll keep for up to 2 weeks at room temperature, though I doubt it’ll last that long. The floss should stay crispy and dry—if it loses its crunch, just pop it back in a 350°F oven for 5 minutes to revive it.
Pro Tips For Making Pork Floss Recipe Ideas
- Slow Cook Low: I learned this the hard way—pork shoulder needs 4-5 hours at 300°F to become tender enough to shred into floss. Higher heat dries it out.
- Shred While Hot: Pull the pork apart straight from the oven while it’s still juicy, then mix in the brown sugar. Waiting makes it clump.
- Use Fat Cap: Leave the fat cap on the pork shoulder—it renders down and bastes the meat as it cooks, no extra oil needed.
- Skip the Water: Sounds weird, but it works: don’t add liquid. The pork releases enough moisture on its own, and you want it dry for floss.
Creative Variations of pork floss recipe ideas
Sweet and Spicy Twist
Add 1 tbsp gochujang and 1 tbsp honey to the braising liquid for a Korean-inspired kick. The heat from the gochujang balances beautifully with the sweetness, creating a floss that’s perfect over rice bowls or bibimbap. I first tried this variation at a Boston food festival. 🌶️
Herb-Infused Floss
Mix 1 tbsp dried rosemary and 1 tbsp dried thyme into the five-spice rub. This gives the floss an aromatic, almost piney note that works wonderfully with roasted vegetables or mashed potatoes. The herbs crisp up beautifully during frying.
Citrus Zing Version
Add the zest of 1 orange and 1 lime to the braising liquid. The citrus brightens the rich pork flavor, making it ideal for topping tacos or ceviche. I love how the zest adds a pop of color to the finished floss.
Umami Bomb
Stir 1 tbsp miso paste into the braising liquid. This creates a deeper, more complex flavor profile that’s amazing in ramen or on top of miso soup. The miso adds a subtle fermented note that takes the floss to another level.
Breakfast Floss
Add 1 tsp cinnamon and 1 tsp nutmeg to the rub for a sweet-savory floss perfect on pancakes or French toast. This was inspired by my Nonna’s love of sweet and savory combinations. The spices make it smell like a cozy Boston morning. 💛
Smoky BBQ Style
Replace the soy sauce with ½ cup BBQ sauce in the braising liquid. This creates a floss with deep, smoky flavors that’s incredible on baked potatoes or mac and cheese. I use Stubb’s Original for this variation.
Nutrition Facts
Frequently Asked Questions
What’s the best way to store leftovers?
Keep in an airtight container at room temperature for up to 2 weeks. For longer storage, freeze for up to 3 months.
Can I use a different cut of pork?
Stick with pork shoulder for best results—it has the right fat content. Pork loin is too lean and won’t shred as well.
Why isn’t my floss crispy?
It likely wasn’t dried enough before frying. Spread it thinly and dry at 200°F for 20-30 minutes or air-dry for 1 hour.
How do I revive soggy floss?
Spread it on a baking sheet and crisp in a 350°F oven for 5 minutes. Avoid the microwave—it makes it soggier.

- Potato Candy Recipe 1933: Vintage Peanut Butter Roll Delight - October 30, 2026
- Potato Chip Cookie Recipe With Pecans: Buttery Crunch Meets Nutty Richness - October 30, 2026
- Potato Patty Recipe No Egg: Crispy Edges Without the Binder - October 30, 2026