
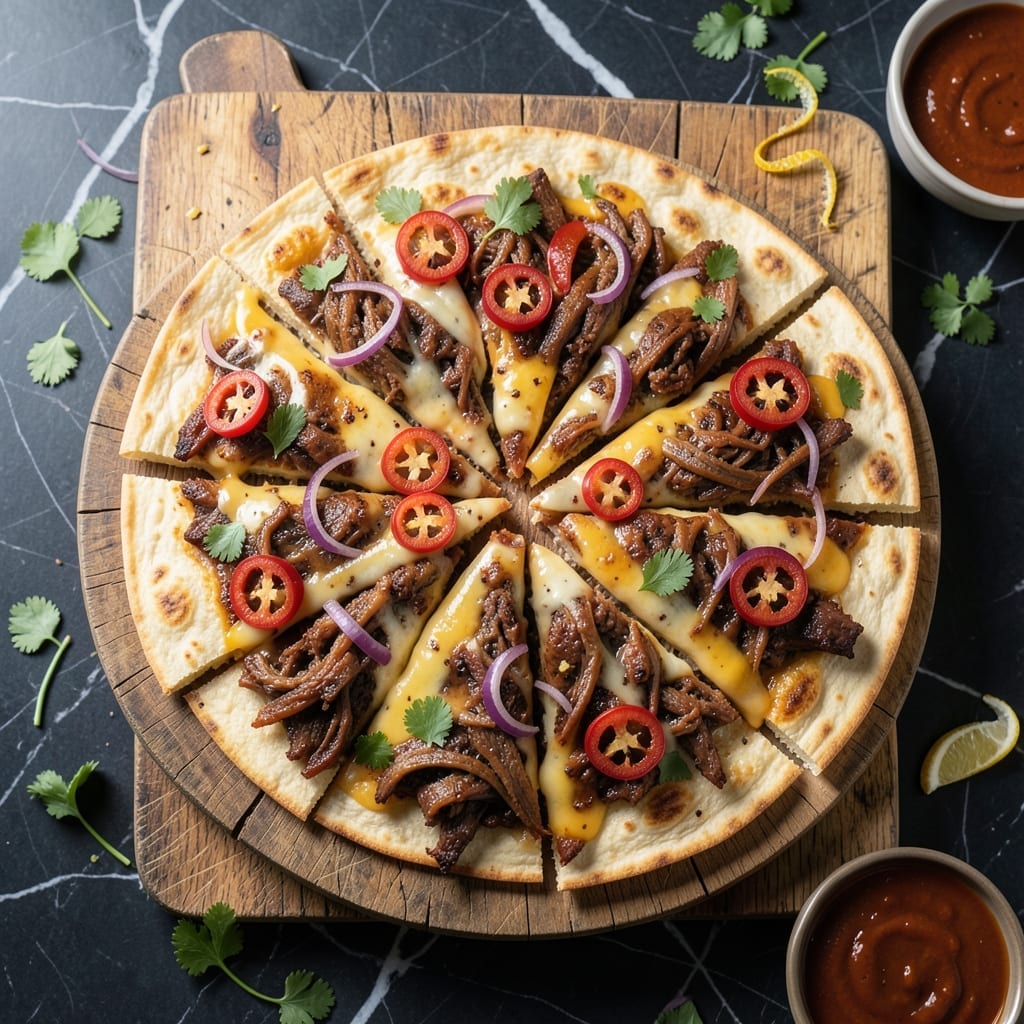
Growing up in Georgia, I learned early that pork belongs in every great meal. This version combines tender pulled pork with melted cheese and a bold, spicy kick that transforms a simple dish into something extraordinary.
What makes this work is the balance—slow-cooked pork, sharp cheddar, and just enough heat to wake up your taste buds. The tortillas crisp to golden perfection while the filling stays melted and gooey.
The result is a handheld meal with layers of smoky, cheesy, and fiery flavors in every bite. It’s the kind of dish that disappears fast at gatherings or makes a weekday dinner feel special.
Serve with cool sour cream or pickled jalapeños to tame the heat. Here’s how to build them right.
Ingredients for Pork Quesadillas Recipe Spicy
Tender pork, sharp cheese, and fiery jalapeños make these quesadillas irresistible.
| Ingredient | Amount | Notes |
|---|---|---|
| Pulled Pork 🐷 | 2 cups | Slow-cooked, shredded |
| Sharp Cheddar Cheese 🧀 | 8 oz | Shredded from block |
| Monterey Jack Cheese 🧀 | 4 oz | Shredded for melt |
| Flour Tortillas 🌮 | 8 pieces | Large, burrito size |
| Jalapeño Peppers 🌶️ | 2 whole | Sliced, seeds removed |
| Red Onion 🧅 | ½ whole | Thinly sliced |
| Cilantro 🌿 | ¼ cup | Fresh, chopped |
| Lime 🍋 | 1 whole | Juiced for brightness |
| Sour Cream 🥣 | ½ cup | For serving |
| Pickled Jalapeños 🌶️ | ½ cup | For garnish |
| Olive Oil 🫒 | 2 tbsp | For cooking tortillas |
| Chipotle Powder 🌶️ | 1 tsp | For smoky heat |
| Garlic Powder 🧄 | ½ tsp | For seasoning |
| Salt 🧂 | ½ tsp | To taste |
The pork is the foundation here—use leftovers from a slow-cooked shoulder (that’s what I do) or grab pre-shredded from Costco or Whole Foods. For the cheese, sharp cheddar is non-negotiable for that tangy bite, but the Monterey Jack keeps it melty. Tortillas should be soft and pliable—Mission brand holds up well to the heat and filling.
No pulled pork? Shredded rotisserie chicken works in a pinch, though it won’t have the same smoky depth. Out of fresh jalapeños? Pickled jalapeños plus a pinch of cayenne gets you close. The cheddar can be swapped for Pepper Jack if you want extra heat. For the tortillas, corn works but won’t crisp the same way (worth the trade-off for the flavor).
Assemble just before cooking to keep the tortillas from getting soggy. Leftovers reheat well in a skillet—store in the fridge for up to 3 days. The pickled jalapeños and sour cream keep for 1 week in the fridge (the jalapeños even get better).
Why You’ll Love This Recipe
- I’ll be real: leftover pulled pork gets a second life here, and it’s even better the next day.
- No-Fuss Assembly: I just layer the pulled pork, cheeses, and jalapeños between tortillas—no fancy techniques required.
- Crave-Worthy Heat: The mix of sharp cheddar and Monterey Jack with jalapeños gives that perfect spicy, melty kick.
- Weeknight Hero: Between us, this is my go-to for busy evenings when I need dinner on the table fast.
Step-by-Step Instructions for Pork Quesadillas
Here’s the method I use to build these cheesy, spicy quesadillas with maximum flavor in every bite.
Step 1: Season and Warm the Pulled Pork
In a skillet over medium heat, warm the 2 cups Pulled Pork with 1 tsp Chipotle Powder, 0.5 tsp Garlic Powder, and 0.5 tsp Salt. Stir occasionally until the pork is heated through and the spices are evenly distributed—this takes about 3-4 minutes.
You’ll notice the pork start to sizzle and the smoky aroma of the chipotle will fill your kitchen. This seasoning step ensures every bite of your quesadillas has that signature fiery kick. Remove from heat and set aside while you prep the other ingredients.
Step 2: Prepare the Tortillas and Cheese Blend
Lay out the 8 pieces Flour Tortillas on a clean work surface. In a bowl, combine the 8 oz Sharp Cheddar Cheese and 4 oz Monterey Jack Cheese—this blend gives you the perfect balance of sharpness and meltiness.
Thinly slice the 0.5 whole Red Onion and slice the 2 whole Jalapeño Peppers (seeds removed for less heat if preferred). Chop the 0.25 cup Cilantro and juice the 1 whole Lime. Having everything ready to go makes assembly quick and efficient.
Step 3: Assemble and Cook the Quesadillas
On half of each tortilla, layer a generous portion of the cheese blend, then top with the seasoned pulled pork, sliced onion, and sliced jalapeños. Sprinkle a little more cheese on top—this helps everything stick together. Fold the tortillas over to close.
Heat 2 tbsp Olive Oil in a large skillet over medium heat. Cook each quesadilla for 2-3 minutes per side until the tortillas are golden brown and the cheese is fully melted. Press down gently with a spatula as they cook to ensure even contact with the pan.
Step 4: Add Final Touches and Serve
Transfer the cooked quesadillas to a cutting board and let them rest for 1-2 minutes—this helps the cheese set so it doesn’t all ooze out when you cut them. Slice each quesadilla into wedges and arrange on a serving platter.
Garnish with the chopped cilantro and a squeeze of lime juice for brightness. Serve immediately with 0.5 cup Sour Cream and 0.5 cup Pickled Jalapeños on the side for dipping and extra heat. These quesadillas are best enjoyed fresh and hot, with all that melty cheese and spicy pork in every bite.
Pro Tips For Making Pork Quesadillas Recipe Spicy
- Pre-cook the peppers: Sauté the jalapeños for 2-3 minutes in a dry pan before adding to the quesadilla—raw peppers can make the tortilla soggy and the heat uneven.
- Use medium-low heat: I learned this the hard way—high heat burns the tortillas before the cheese melts, so keep it steady at medium-low for an even, crispy finish.
- Drain the pork: If your pulled pork is saucy, give it a quick drain or pat with a paper towel to prevent a wet, gummy quesadilla.
- Mix the cheeses: Combine sharp cheddar and Monterey Jack in equal parts for the perfect balance of melt and tang—skip the pre-shredded stuff, as it doesn’t melt as well.
Storing and Reheating This pork quesadillas recipe spicy
Fridge Storage Tips
Let quesadillas cool completely before storing—I spread them on a wire rack for 20 minutes to prevent sogginess. Stack in an airtight container with parchment between layers. They keep 3-4 days at 40°F or below. The cheese firms up but reheats beautifully. ❄️
Freezer Method
Wrap individual quesadillas tightly in plastic wrap, then place in a freezer bag. Squeeze out all air to prevent freezer burn. They stay fresh for 2-3 months. I label mine with the date using masking tape—trust me, you’ll forget otherwise.
Skillet Reheating
My favorite method: heat a dry skillet over medium-low for 2 minutes. Add quesadilla and cook 2-3 minutes per side until crisp. Spritz with 1 tsp water and cover for 30 seconds to steam-melt the cheese. 🔥
Oven Revival
Preheat to 375°F and place quesadillas on a baking sheet. Bake for 8-10 minutes, flipping halfway. This works best for multiple servings. For extra crispiness, broil for 1-2 minutes at the end—watch closely!
Microwave Quick Fix
Place on a microwave-safe plate, cover with a damp paper towel, and heat on 50% power for 1-2 minutes. The towel adds moisture to prevent dryness. Not as crispy, but perfect for a quick lunch.
Serving Refresh
Always garnish reheated quesadillas with fresh cilantro and a lime squeeze. The acidity brightens the flavors. Serve with fresh sour cream and pickled jalapeños—these don’t freeze well, so add them fresh.
Nutrition Facts
Frequently Asked Questions
Can I use pre-shredded cheese for easier prep?
Pre-shredded works but won’t melt as smoothly. It contains anti-caking agents that affect texture. For best results, shred cheese from a block yourself—it only takes 5 minutes and makes a noticeable difference.
How do I adjust the heat level?
For milder flavor, remove all jalapeño seeds and reduce chipotle powder to ½ tsp. For extra heat, keep seeds in and add ¼ tsp cayenne. Always taste the pork mixture before assembling to gauge spice.
What’s the best way to keep them from getting soggy?
Assemble right before cooking and use medium heat to avoid steaming the tortillas. Press gently with a spatula to create even contact. Letting them rest 1-2 minutes after cooking helps the cheese set.

- Potato Chip Cookie Recipe With Pecans: Buttery Crunch Meets Nutty Richness - October 30, 2026
- Potato Patty Recipe No Egg: Crispy Edges Without the Binder - October 30, 2026
- Paula Deen’s Potato Chip Cookies Recipe: Salty-Sweet Crunch in Every Bite - October 30, 2026