
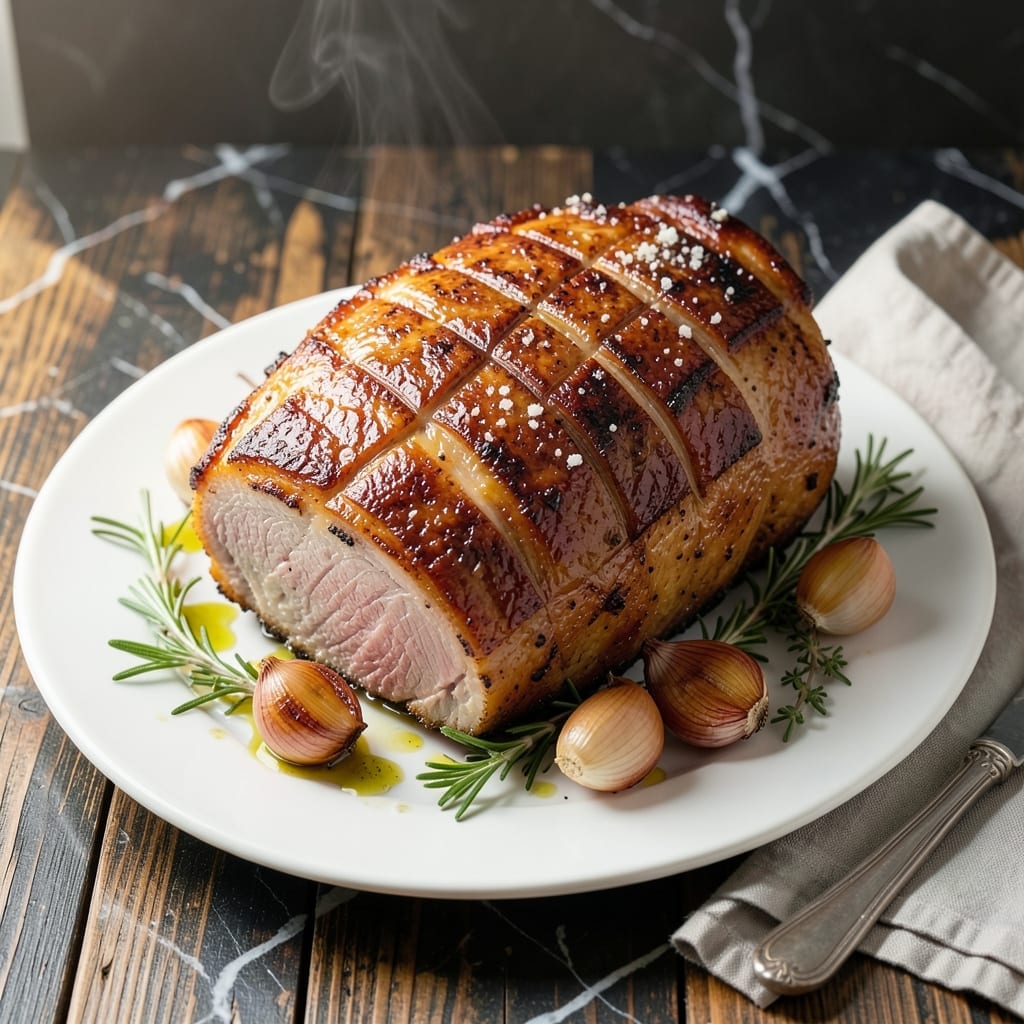
Achieving crispy skin on pork shoulder requires patience and precision, not luck. I learned this while preparing 2,000 pounds weekly at The Smoky Pig.
The process begins with proper scoring and drying of the skin, followed by a hot oven start to render fat and create that golden crackle.
Slow roasting at lower temperatures ensures the meat stays tender while the skin transforms into shatteringly crispy perfection.
This method, refined through years of professional experience, delivers restaurant-quality results every time.
Ingredients for Pork Shoulder Roast Recipe Crispy Skin
Professional-grade ingredients for restaurant-quality crispy skin pork shoulder roast at home.
| Ingredient | Amount | Notes |
|---|---|---|
| Bone-In Pork Shoulder 🐖 | 4 lb | Skin-on, fat cap intact |
| Kosher Salt 🧂 | 2 tbsp | Diamond Crystal preferred |
| Black Pepper 🌶️ | 1 tbsp | Freshly ground, coarse |
| Garlic Cloves 🧄 | 6 cloves | Smashed, peeled |
| Fresh Rosemary Sprigs 🌿 | 4 whole | Woody stems removed |
| Fresh Thyme Sprigs 🍃 | 4 whole | Woody stems removed |
| Olive Oil 🫒 | 2 tbsp | Extra-virgin for rubbing |
| Apple Cider Vinegar 🍏 | 1 tbsp | For skin crisping |
| Yellow Onion 🧅 | 1 whole | Quartered for roasting |
| Carrots 🥕 | 3 whole | Peeled, cut into chunks |
| Celery Stalks 🥬 | 3 whole | Cut into large pieces |
| Chicken Stock 🍲 | 1 cup | Low-sodium preferred |
The pork shoulder is non-negotiable—bone-in, skin-on is essential for both flavor and that shatteringly crisp finish. Source from a reputable butcher or high-turnover markets like Whole Foods where the meat hasn’t languished. Look for even marbling and skin that’s thick but pliable. At The Smoky Pig, we used 12-15 lb shoulders, but this 4 lb size delivers the same technique at home scale.
No fresh herbs? Dried at one-third the amount, but the flavor won’t be as bright. Swap apple cider vinegar for white wine vinegar or lemon juice—acid is key for breaking down collagen. Chicken stock can be vegetable stock for a lighter touch. The garlic must be fresh; jarred lacks the punch. For the salt, Diamond Crystal’s texture adheres better to the skin than Morton’s.
Pork shoulder keeps in the fridge 3-4 days before cooking. Post-roast, leftovers stay fresh 5 days refrigerated or freeze for 3 months. The crispy skin loses texture when stored, but reheating in a dry oven at 375°F for 10 minutes restores most of its crackle.
Why You’ll Love This Recipe
- Hands-Off Cooking: I just rub the pork with salt, pepper, garlic, and rosemary, then let the oven do the work.
- Crispy, Herby Bite: The skin crackles like a perfect chip, while the garlic and rosemary infuse every juicy bite.
- Feeds a Crowd: One shoulder roast and I’ve got dinner for six, with leftovers for sandwiches the next day.
- Budget-Friendly Star: Pork shoulder is cheap, but this turns it into something that tastes like a weekend splurge.
Step-by-Step Instructions for Pork Shoulder Roast Crispy Skin
This method guarantees crackling skin and fall-apart tender meat with proper technique.
Step 1: Score and Dry the Pork Shoulder
Pat the 4 lb Bone-In Pork Shoulder completely dry with paper towels, focusing on the skin surface. I can’t stress this enough—moisture is the enemy of crispiness. Using a sharp knife, score the skin in a crosshatch pattern, cutting through the skin and fat but not into the meat.
This scoring creates more surface area for the skin to crisp and allows the 2 tbsp Kosher Salt and 1 tbsp Black Pepper to penetrate deeply. Rub the salt and pepper aggressively into every crevice, including the scored lines. Let the pork sit uncovered in the refrigerator for 12-24 hours to dry the skin thoroughly.
Step 2: Prepare the Aromatics and Rub
In a mortar and pestle, crush the 6 cloves Garlic Cloves with the leaves stripped from 4 whole Fresh Rosemary Sprigs and 4 whole Fresh Thyme Sprigs. This releases the essential oils for maximum flavor. Combine with the 2 tbsp Olive Oil and 1 tbsp Apple Cider Vinegar to create a paste.
Rub this aromatic mixture all over the pork, working it into the scored skin and any exposed meat. The vinegar helps break down proteins in the skin, promoting better crisping. Let the pork sit at room temperature for 1 hour before roasting to ensure even cooking.
Step 3: Roast at High Heat for Crispy Skin
Preheat your oven to 450°F. Place the 1 whole Yellow Onion, 3 whole Carrots, and 3 whole Celery Stalks in the bottom of a roasting pan to create a rack. This elevates the pork, allowing hot air to circulate underneath for even crisping.
Position the pork skin-side up on the vegetables and roast for 45 minutes at 450°F. You’ll see the skin start to puff and blister—this is exactly what you want. The high heat is crucial for developing that signature crackling texture.
Step 4: Lower Temperature and Finish Cooking
After the initial high-heat roast, reduce the oven temperature to 325°F and continue cooking. Add the 1 cup Chicken Stock to the pan to create steam, which keeps the meat moist while the skin continues to crisp. Baste the pork occasionally with the pan juices.
Roast for an additional 2-2.5 hours until the internal temperature reaches 195°F in the thickest part. At this temperature, the connective tissue breaks down into gelatin, giving you that melt-in-your-mouth texture while maintaining crisp skin.
Step 5: Rest and Serve
Transfer the pork to a cutting board and let it rest for 20-30 minutes before serving. This allows the juices to redistribute throughout the meat. The skin should be deep golden brown, audibly crisp when tapped, and the meat should pull apart easily with a fork.
Serve with the roasted vegetables and some of the pan juices spooned over the top. The contrast between the crisp skin and tender meat is what makes this dish exceptional. Save any leftover pan juices for making gravy or serving on the side.
Pro Tips For Making Pork Shoulder Roast Recipe Crispy Skin
- Dry the Skin: Pat the pork shoulder completely dry with paper towels before seasoning—I learned this the hard way after my first three attempts came out soggy instead of crisp.
- Start Hot: Roast at 425°F for the first 45 minutes to jumpstart the Maillard reaction, then drop to 325°F to finish cooking through.
- Skip the Cover: Resist the urge to tent with foil during the first half of cooking, or you’ll steam the skin instead of crisping it.
- Salt Overnight: Rub the kosher salt into the skin at least 12 hours ahead—this draws out moisture and guarantees a crackling crust when roasted.
Common Mistakes When Making Perfect Results
Skipping the Dry
Never skip the 12-24 hour uncovered fridge drying step. I learned this the hard way early at The Smoky Pig—moisture prevents crispiness. Even 1 hour of drying makes a noticeable difference, but overnight is ideal. 💡
Shallow Scoring
Avoid shallow scoring that doesn’t penetrate the fat layer. Your crosshatch cuts need to go through skin and fat down to the meat. Use a sharp chef’s knife and apply firm pressure. Shallow scores won’t create enough surface area for proper crisping.
Low Starting Temp
Starting at anything below 450°F won’t render enough fat for crisp skin. The initial high heat is non-negotiable for creating that puff and blister. I’ve tried 400°F starts—it simply doesn’t produce the same crackle. trust me on this one.
Overcrowding the Pan
Don’t cram the pork into a small roasting pan. The vegetables should elevate the meat, not surround it. Use a pan that gives the pork at least 2 inches of space on all sides for proper air circulation. This prevents steaming instead of roasting.
Skipping the Rest
Cutting immediately after roasting causes all the juices to spill out. The 20-30 minute rest is crucial for the meat to reabsorb its moisture. I know it’s tempting when it smells so good, but patience here separates good pork from exceptional pork. 🌟
Ignoring Internal Temp
Don’t rely on time alone—195°F internal temperature is your target. Pulling at 185°F means the collagen hasn’t fully broken down. Use an instant-read thermometer in the thickest part, avoiding the bone. The skin may look done before the meat is.
Nutrition Facts
Frequently Asked Questions
Why dry the skin overnight?
Drying removes moisture that prevents crisping. Even 1 hour helps, but 12-24 hours in the fridge guarantees shatteringly crisp skin by allowing the surface to dehydrate completely.
How deep should I score the skin?
Cut through the skin and fat layer down to the meat. Shallow scores won’t create enough surface area for proper crisping. Use a sharp knife for clean, deep crosshatches.
Can I use a different cut of pork?
Stick with bone-in, skin-on pork shoulder for best results. Other cuts lack the fat and collagen needed for tender meat and crisp skin. Pork belly works but has a different texture.
How do I know when it’s done?
Use a meat thermometer—195°F internal temperature is ideal. The skin should be deep golden and audibly crisp when tapped. Rest 20-30 minutes before serving.

- Potato Patty Recipe No Egg: Crispy Edges Without the Binder - October 30, 2026
- Paula Deen’s Potato Chip Cookies Recipe: Salty-Sweet Crunch in Every Bite - October 30, 2026
- Potato Gnocchi Recipe Ideas: Pillowy Soft Dumplings With Rustic Charm - October 30, 2026