
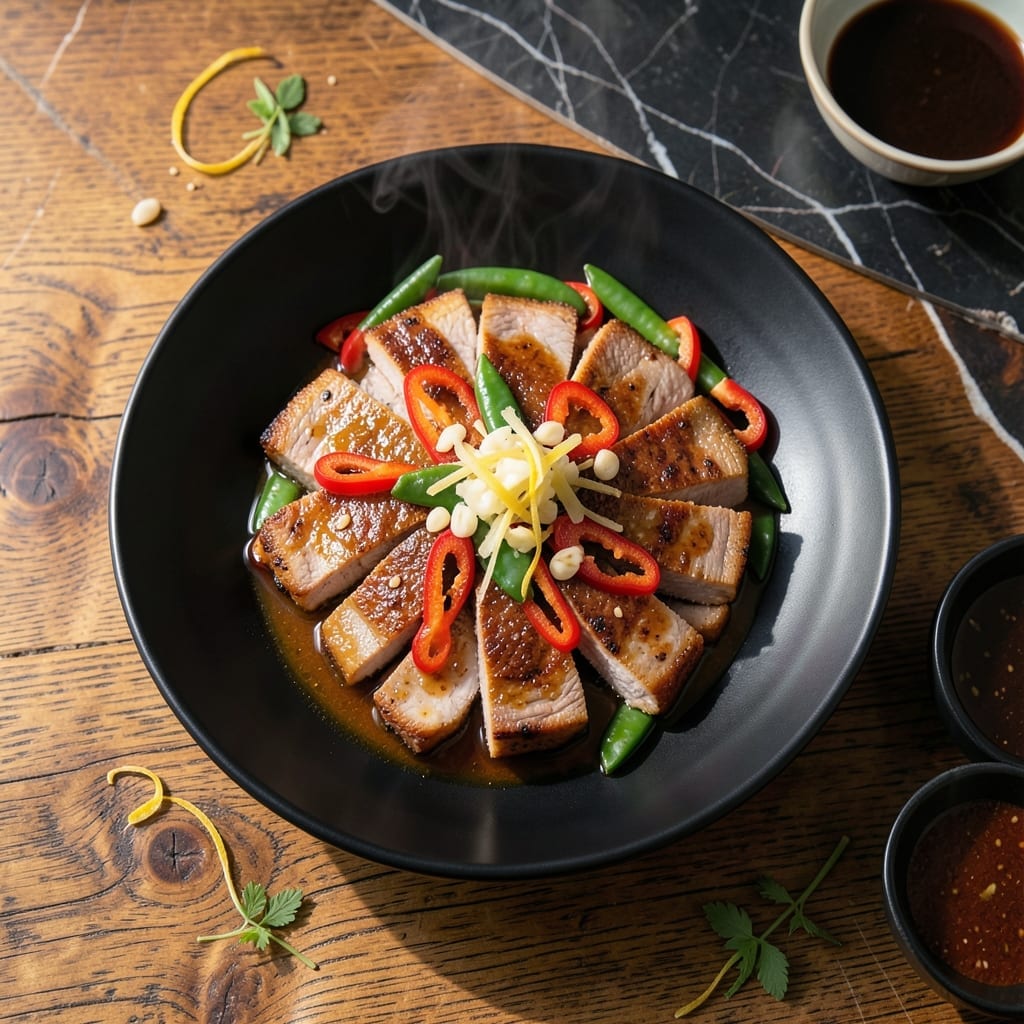
I developed this method after years of testing to achieve tender pork with maximum flavor. The secret lies in a quick marinade and high-heat searing that locks in juices while building a rich crust.
This approach transforms affordable pork tenderloin into a restaurant-quality dish with minimal effort. A simple glaze of soy sauce, honey, and garlic creates that signature umami depth without complicated techniques.
The result is succulent meat with a glossy, caramelized exterior that impresses every time. Perfect for busy weeknights when you want something special without the fuss.
Serve with steamed rice and quick-pickled vegetables for a complete meal. Here’s how to make it exactly right.
Ingredients for Pork Tenderloin Recipe Asian Style
Affordable pork tenderloin gets the star treatment with bold Asian-inspired flavors and a quick marinade.
| Ingredient | Amount | Notes |
|---|---|---|
| Pork Tenderloin 🐷 | 1 ½ lb | Trimmed of silver skin |
| Soy Sauce 🥄 | ½ cup | Low-sodium preferred for balance |
| Honey 🍯 | 3 tbsp | Or sub maple syrup for depth |
| Garlic Cloves 🧄 | 6 cloves | Minced for maximum flavor |
| Fresh Ginger 🌿 | 1 tbsp | Peeled and finely grated |
| Rice Vinegar 🍚 | 2 tbsp | Adds essential tang to glaze |
| Sesame Oil 🫒 | 1 tbsp | Toasted variety for nuttiness |
| Cornstarch 🌾 | 1 tbsp | For thickening the glaze |
| Vegetable Oil 💧 | 2 tbsp | High smoke point for searing |
| Green Onions 🧅 | 4 whole | Thinly sliced for garnish |
| Sesame Seeds 🌰 | 1 tbsp | Toasted for garnish texture |
| Red Pepper Flakes 🌶️ | ½ tsp | Optional for heat adjustment |
The pork tenderloin is the star here—look for 1.5 lb pieces at Costco or your butcher (they often have the best prices). Trim off the silver skin yourself if it’s not pre-done; it takes two minutes and ensures even cooking. I’ve had luck with Snake River Farms for mail-order if you want next-level quality. The glaze ingredients are all shelf-stable, so grab them once and you’re set for months.
No honey? Maple syrup or agave swap in perfectly. Out of rice vinegar? Apple cider vinegar works in a pinch (just a touch sharper). Fresh ginger is ideal, but ground ginger at half the amount gets you 80% there. If you’re avoiding gluten, tamari instead of soy sauce does the trick—just check the label. The sesame oil is worth the splurge; Kadoya brand is my go-to.
The tenderloin cooks fast, so have your rice ready to go. Leftovers keep 4 days in the fridge or freeze for up to 3 months (slice first for easy reheating). The glaze thickens as it cools—thin with a splash of water before reheating if needed.
Why You’ll Love This Recipe
- One Pan Wonder: I just toss the pork with soy sauce, honey, garlic, and ginger, then let the oven do the work.
- Sweet-Savory Magic: The honey caramelizes while the soy sauce and garlic create that deep umami flavor I crave.
- Meal Prep Hero: I make a double batch on Sunday and it reheats beautifully for lunches all week.
- Budget Stretch: A single tenderloin feeds my family of four with leftovers for sandwiches the next day.
Step-by-Step Instructions for Asian Style Pork Tenderloin
This method delivers that perfect balance of sweet, salty, and umami in record time.
Step 1: Prepare the Marinade Base
In a medium bowl, whisk together the 0.5 cup soy sauce, 3 tbsp honey, 2 tbsp rice vinegar, and 1 tbsp sesame oil until the honey fully dissolves. The soy sauce provides the salty backbone, while the honey adds that signature caramelized sheen.
Stir in the 6 cloves minced garlic and 1 tbsp grated fresh ginger. These aromatics infuse the marinade with depth. I always let this sit for 5 minutes to allow the flavors to meld before using it on the pork.
Step 2: Sear the Tenderloin for Maximum Flavor
Pat the 1.5 lb pork tenderloin completely dry with paper towels—this ensures a proper sear. Heat the 2 tbsp vegetable oil in a large oven-safe skillet over medium-high heat until shimmering. Sear the tenderloin on all sides for 2-3 minutes per side until golden brown.
Don’t rush this step. You want a deep, even crust that locks in the juices. The pork should release easily from the pan when it’s ready to turn. Remove it to a plate and let it rest while you prepare the glaze.
Step 3: Create the Glossy Umami Glaze
Pour the marinade into the same skillet and bring it to a simmer over medium heat. In a small bowl, mix the 1 tbsp cornstarch with 1 tbsp water to create a slurry. Slowly whisk the slurry into the simmering marinade.
Cook for 2-3 minutes, stirring constantly, until the glaze thickens enough to coat the back of a spoon. It should look glossy and slightly syrupy—this is the magic that will make your tenderloin irresistible.
Step 4: Finish and Garnish
Return the seared tenderloin to the skillet and spoon the thickened glaze over it, turning to coat all sides. Reduce the heat to low and let it cook for another 3-4 minutes, basting frequently, until the internal temperature reaches 145°F.
Transfer the pork to a cutting board and let it rest for 5 minutes. This ensures the juices redistribute for maximum tenderness. Slice the pork into ½-inch thick medallions and arrange on a serving platter.
Garnish with the 4 thinly sliced green onions, 1 tbsp toasted sesame seeds, and a sprinkle of 0.5 tsp red pepper flakes for a hint of heat. Serve immediately with the remaining glaze spooned over the top.
Pro Tips For Making Pork Tenderloin Recipe Asian Style
- Sear Hot, Finish Low: Crank the pan to high for the initial sear to lock in juices—2 minutes per side until golden—then drop to medium-low to cook through without burning the honey glaze.
- Slice Ginger Thin: I learned this the hard way: thick ginger pieces won’t infuse the marinade. Grate or finely mince it so the flavor actually penetrates the pork.
- Don’t Overcook: Pork tenderloin turns dry fast. Pull it at 145°F internal temp, then let it rest 5 minutes under foil—it’ll rise to 150°F and stay juicy.
- Use Fresh Garlic: Sounds obvious, but pre-minced garlic in a jar just doesn’t cut it here. Fresh cloves crushed just before marinating give that sharp, bright kick the dish needs.
Health Benefits of This Recipe
Lean Protein Power
Pork tenderloin is one of the leanest cuts available, with a 3-ounce serving containing only about 140 calories and 24 grams of protein. This makes it ideal for maintaining muscle while keeping saturated fat intake low. I love that it delivers so much nutrition without weighing you down. 💪
Rich in B Vitamins
This cut is packed with essential B vitamins, particularly thiamine (B1), riboflavin (B2), and niacin (B3), which support energy metabolism and nervous system health. A single serving provides over 20% of your daily needs for several of these vital nutrients.
Iron and Zinc Boost
Pork tenderloin offers a good source of heme iron, which is more easily absorbed by your body than plant-based iron. It also provides zinc, crucial for immune function and wound healing. I notice I feel more energized when I include lean meats like this in my diet.
Low Fat, High Flavor
With only about 3 grams of fat per serving, most of which is heart-healthy unsaturated fat, this dish lets you enjoy rich flavors without excess calories. The Asian-style glaze adds minimal fat while maximizing taste impact.
Selenium Source
You’ll get a healthy dose of selenium from pork tenderloin, an antioxidant mineral that supports thyroid function and protects cells from damage. Just 3 ounces provides about 35% of your daily value for this important nutrient. 🥗
Quick Nutrient Delivery
Because this dish cooks quickly at high heat, it preserves more heat-sensitive vitamins like B12 compared to longer cooking methods. The short cook time also helps maintain the meat’s natural moisture and nutritional integrity.
Nutrition Facts
Frequently Asked Questions
Can I use a different cut of pork?
Pork loin works but needs 10-15 minutes more cooking. Avoid tougher cuts like shoulder—they won’t absorb the glaze as well. Tenderloin’s leanness makes it ideal for quick, high-heat cooking.
How do I know when it’s done?
Use a meat thermometer for accuracy. Remove at 145°F—it’ll rise to 150°F while resting. The meat should feel slightly firm but still springy to the touch.
Can I make the glaze ahead?
Yes! Prepare the glaze up to 2 days early. Store in an airtight container in the fridge. Reheat gently before using to restore its glossy texture.

- Potato Patty Recipe No Egg: Crispy Edges Without the Binder - October 30, 2026
- Paula Deen’s Potato Chip Cookies Recipe: Salty-Sweet Crunch in Every Bite - October 30, 2026
- Potato Gnocchi Recipe Ideas: Pillowy Soft Dumplings With Rustic Charm - October 30, 2026