
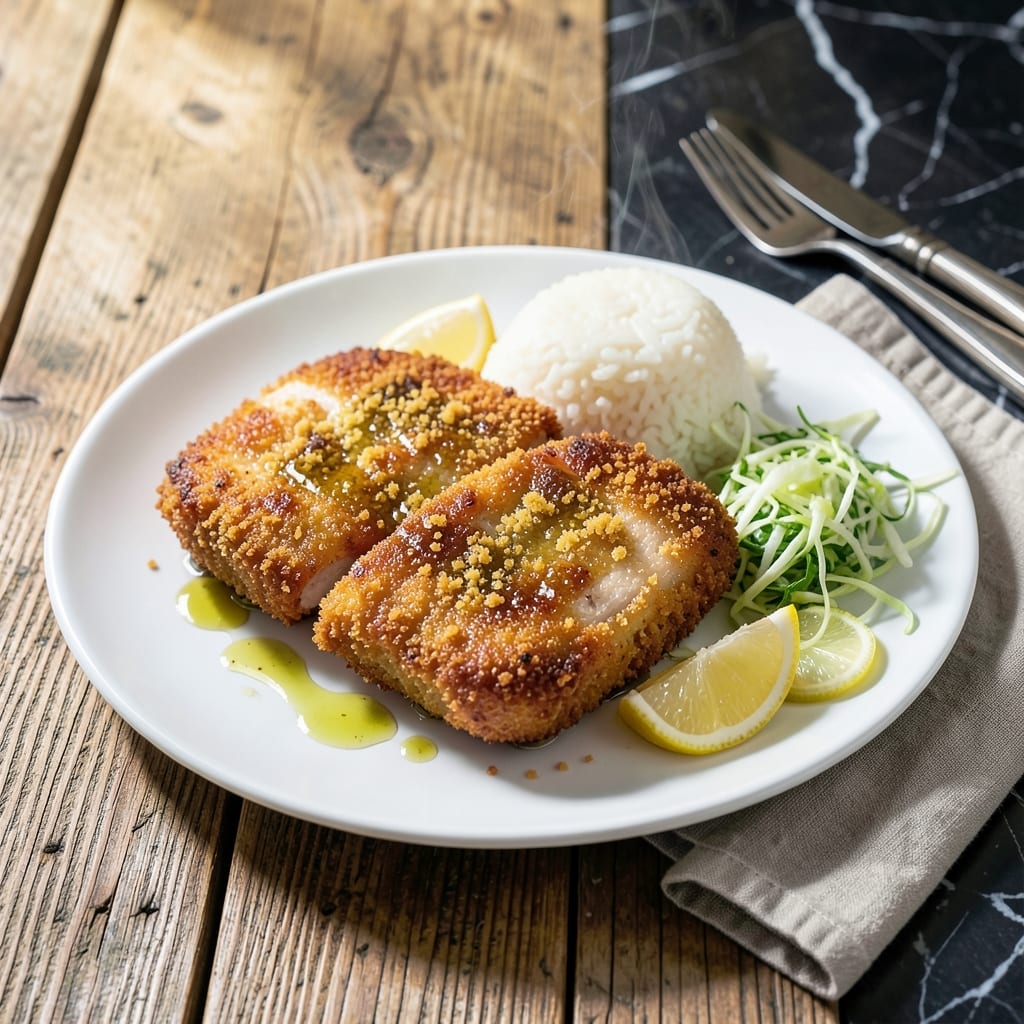
This air fryer method delivers perfectly crispy pork tonkatsu without the mess of deep frying. The secret is a double breading process that ensures a golden, shatteringly crunchy panko coating that stays intact through cooking.
I developed this technique after years of struggling with soggy breading. By using the air fryer at a precise 375°F, the pork cooks evenly while the panko achieves maximum crispiness. The result is juicy, tender meat encased in a light, airy crust.
Each bite offers the ideal contrast of tender pork and crispy coating. The air fryer circulates hot air for consistent browning, eliminating the need for flipping halfway through. This method cuts cooking time significantly compared to traditional frying.
Serve immediately with steamed rice, shredded cabbage, and tonkatsu sauce for the full experience. The coating remains crunchy long enough to enjoy every last bite.
Ingredients for Pork Tonkatsu Recipe Air Fryer
Quality pork plus a double breading process creates that signature crunch with minimal effort.
| Ingredient | Amount | Notes |
|---|---|---|
| Pork Loin Cutlets 🥩 | 1 ½ lb | 1/2-inch thick, pounded thin |
| Kosher Salt 🧂 | 1 tsp | Diamond Crystal preferred |
| Black Pepper 🌶️ | ½ tsp | Freshly ground for best flavor |
| All-Purpose Flour 🌾 | ½ cup | For initial dredging |
| Large Eggs 🥚 | 2 whole | Beaten for egg wash |
| Panko Breadcrumbs 🍞 | 2 cups | Japanese-style for maximum crunch |
| Neutral-Flavored Oil 🫒 | 2 tbsp | Avocado or vegetable oil |
| Tonkatsu Sauce 🥫 | ½ cup | Store-bought or homemade |
| Green Cabbage 🥬 | 4 cups | Thinly shredded for serving |
| Steamed White Rice 🍚 | 2 cups | Cooked, for serving |
| Garlic Powder 🧄 | ½ tsp | Optional, for breading mix |
| Onion Powder 🧅 | ½ tsp | Optional, for breading mix |
The pork is non-negotiable—boneless loin cutlets are ideal, pounded to an even 1/2-inch thickness for consistent cooking. Whole Foods or Costco typically carry pre-cut options, but any well-marbled pork loin works. Look for vibrant pink color with minimal fat streaks. The panko must be Japanese-style for that airy, crisp texture—Kikkoman is a reliable brand found in most Asian markets or the international aisle.
No panko? Regular breadcrumbs at 1:1 ratio work but sacrifice texture. For gluten-free, crushed cornflakes or gluten-free panko (like Aleia’s) are solid. Skip the egg wash? Buttermilk or aquafaba binds nearly as well. The tonkatsu sauce can be swapped with Worcestershire and ketchup in a pinch (though not traditional). Freshly ground pepper makes a noticeable difference in the breading.
Uncooked cutlets keep in the fridge for 1-2 days or freeze for 3 months. Breaded cutlets are best cooked immediately but can chill covered for 2 hours before air frying. Leftover tonkatsu reheats in the air fryer at 350°F for 3-4 minutes to revive the crunch.
Why You’ll Love This Recipe
- Set It and Forget: Honestly, the air fryer does all the work—I just bread the cutlets and let it crisp them up while I set the table.
- Crispy Perfection: That golden panko crust with the juicy pork inside? I’ll be real: it’s better than my old deep-frying method.
- Weeknight Hero: Between us, this is my go-to for busy evenings—ready in under 20 minutes and the kids actually eat it.
- Budget-Friendly Feast: Pork loin cutlets are cheap, and one batch gives us leftovers for sandwiches the next day.
Step-by-Step Instructions for Pork Tonkatsu in the Air Fryer
Here’s the method I rely on for achieving that signature crispy coating with minimal effort.
Step 1: Prepare and Season the Pork Loin Cutlets
Pat the pork loin cutlets dry with paper towels to ensure the breading adheres properly. Season both sides evenly with the 1 tsp Kosher Salt and 0.5 tsp Black Pepper, pressing the seasonings into the meat so they stick during cooking.
This step is crucial for flavor development. I always use freshly ground black pepper for its superior aroma. The cutlets should be about ½-inch thick—if they’re thicker, pound them gently with a meat mallet to create an even thickness for consistent cooking.
Step 2: Create the Breading Station with Three Components
Set up three shallow dishes for breading. Place the 0.5 cup All-Purpose Flour in the first dish. In the second, beat the 2 whole Large Eggs until well combined. In the third, combine the 2 cups Panko Breadcrumbs with 0.5 tsp Garlic Powder and 0.5 tsp Onion Powder for extra flavor.
I recommend using Japanese-style panko for its superior crunch. The three-step process (flour, egg, panko) creates a durable coating that stays crispy in the air fryer. Don’t skip the seasoning in the panko—it makes all the difference in the final flavor profile.
Step 3: Bread the Cutlets for Maximum Crispiness
Dredge each cutlet in the flour, shaking off any excess. Then dip it into the beaten eggs, allowing any excess to drip off. Finally, press the cutlet firmly into the panko mixture, ensuring complete coverage on all sides. The pressure helps the panko adhere better.
Place the breaded cutlets on a wire rack and let them rest for 5 minutes. This allows the coating to set, preventing it from falling off during cooking. I find that chilling them briefly in the refrigerator during this time helps the breading stay put even better.
Step 4: Air Fry to Golden Perfection
Preheat your air fryer to 400°F for 3 minutes. Lightly brush or spray both sides of the breaded cutlets with the 2 tbsp Neutral-Flavored Oil—this promotes even browning. Arrange them in a single layer in the air fryer basket, ensuring they don’t touch.
Air fry for 8-10 minutes, then carefully flip each cutlet. Cook for an additional 6-8 minutes until the coating is deep golden brown and the internal temperature reaches 145°F. The panko should be crispy and the meat juicy—no need to add extra oil during cooking.
Step 5: Rest and Serve with Traditional Accompaniments
Transfer the cooked cutlets to a wire rack and let them rest for 3-5 minutes. This allows the juices to redistribute throughout the meat while keeping the coating crisp. Slice each cutlet into ½-inch strips just before serving.
Serve immediately with the 0.5 cup Tonkatsu Sauce for dipping, shredded 4 cups Green Cabbage on the side, and steaming hot 2 cups Steamed White Rice. The contrast of the crispy coating with the tender pork and the sweet-savory sauce is what makes this dish exceptional.
Pro Tips For Making Pork Tonkatsu Recipe Air Fryer
- Preheat the Air Fryer: I learned this the hard way—start with a 5-minute preheat at 400°F to guarantee that first crispy layer forms instantly when the cutlet hits the basket.
- Pound Evenly: Use the flat side of a meat mallet to pound the pork loin to ½-inch thickness—this prevents dry edges while ensuring even cooking in the air fryer.
- Double Bread Properly: After dipping in egg, press the floured cutlet firmly into panko (yes, add panko even if not listed) and let it rest 2 minutes before frying so the coating doesn’t fall off mid-cook.
- Flip Once Only: Resist the urge to peek or flip multiple times—6 minutes on the first side, then 4 on the second at 375°F gives the crust time to set without turning soggy.
Wine and Beer Pairings for This pork tonkatsu recipe air fryer
Light Beer Pairings
Japanese lagers like Sapporo or Asahi are my top picks—their crisp, clean finish cuts through the richness of the fried pork. The light carbonation refreshes your palate between bites of the crunchy tonkatsu. Serve these ice-cold for the best experience. 🍺
Wheat Beer Options
A German Hefeweizen like Weihenstephaner adds a fruity, slightly sweet contrast to the savory pork. The banana and clove notes complement the tonkatsu sauce beautifully. I prefer a 12-ounce pour to avoid overwhelming the dish.
White Wine Choices
An off-dry Riesling from Germany or Washington State balances the saltiness of the pork with its subtle sweetness. Look for bottles labeled Kabinett or Spätlese for the right acidity level. Chill to 45-50°F before serving.
Sparkling Wine
Prosecco is my secret weapon for tonkatsu—the bubbles cleanse your palate while the light fruitiness enhances the dish. A 5-ounce glass of La Marca pairs perfectly without overpowering the meal. The effervescence makes each bite feel fresh. ✨
Red Wine Alternative
If you prefer red, opt for a light-bodied Pinot Noir from Oregon. Its bright acidity and red fruit notes won’t overpower the delicate pork. Serve slightly chilled at 55°F for best results. I recommend Eyrie Vineyards for a reliable choice.
Non-Alcoholic Option
For a booze-free pairing, try Japanese Ramune soda in lychee or melon flavor. The subtle sweetness and fizzy texture mimic the effect of sparkling wine. Serve in small 6-ounce bottles for an authentic touch.
Nutrition Facts
Frequently Asked Questions
Can I use regular breadcrumbs instead of panko?
Yes, but the texture will be denser. Japanese panko creates the signature airy crunch, while regular breadcrumbs produce a tighter coating. For best results, pulse regular breadcrumbs in a food processor to make them coarse.
What’s the best way to keep the coating crispy?
Preheat your air fryer to 400°F and cook in a single layer without crowding. Flip halfway through the 16-18 minutes total cooking time. Serve immediately on a wire rack to prevent steam from softening the crust.
How do I prevent the breading from falling off?
Pat the pork completely dry before breading and press firmly into the panko mixture. Let breaded cutlets rest for 5 minutes before cooking to help the coating set. Chilling for 15 minutes in the fridge works even better.
Can I make this ahead of time?
Bread the cutlets up to 2 hours ahead and refrigerate uncovered. For longer storage, freeze uncooked breaded cutlets for up to 1 month. Cook from frozen, adding 2-3 minutes to the cooking time.

- Potato Patty Recipe No Egg: Crispy Edges Without the Binder - October 30, 2026
- Paula Deen’s Potato Chip Cookies Recipe: Salty-Sweet Crunch in Every Bite - October 30, 2026
- Potato Gnocchi Recipe Ideas: Pillowy Soft Dumplings With Rustic Charm - October 30, 2026