
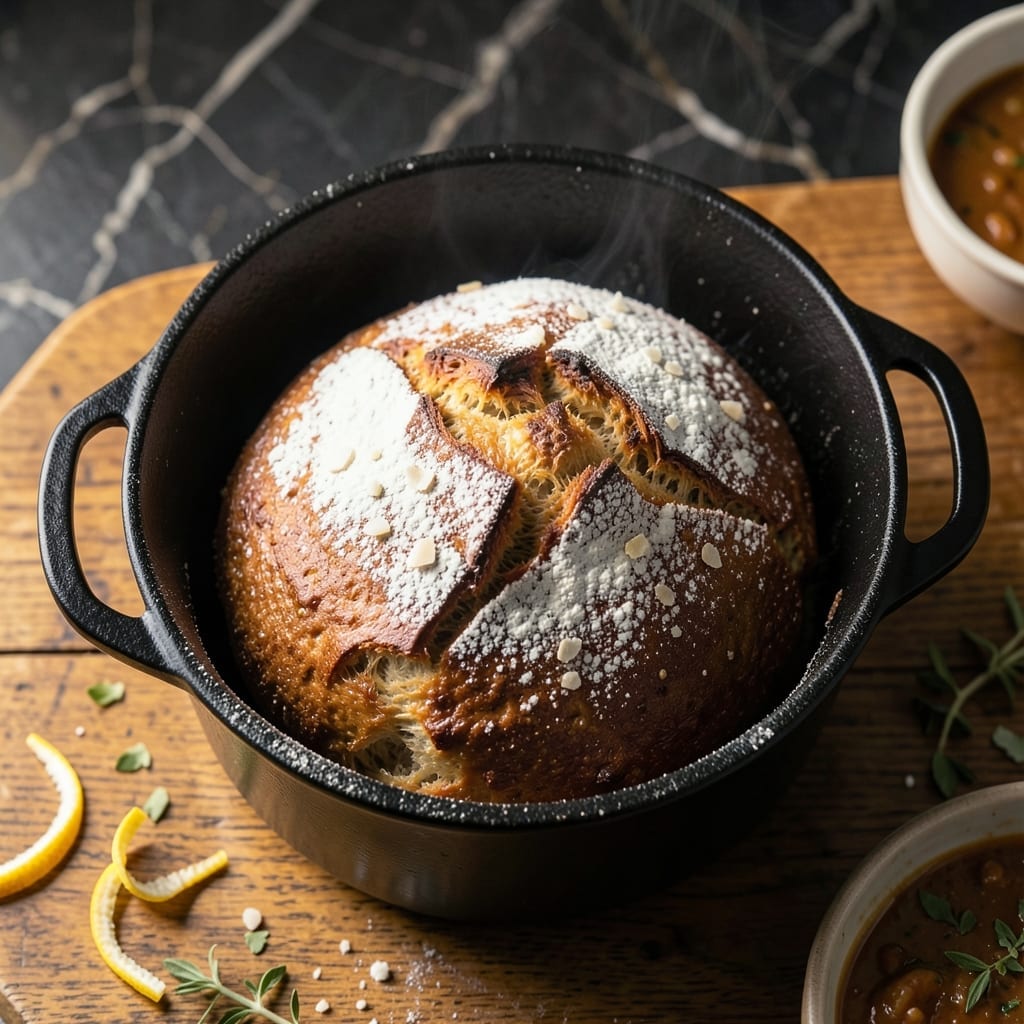
There’s something deeply satisfying about baking bread in a cast iron pot, creating a rustic loaf with a crust that crackles like autumn leaves. This method transforms simple ingredients into artisanal quality without specialized equipment.
The cast iron pot traps steam during baking, producing a golden crust and tender crumb that rivals professional bakeries. The technique is foolproof and requires minimal hands-on time, making it perfect for beginners and experienced bakers alike.
You’ll achieve a loaf with a crisp exterior and airy interior, filled with the aroma of freshly baked bread. The process takes about 2 hours from start to finish, with most of that time being inactive.
This bread is versatile enough for sandwiches, toast, or serving alongside your favorite soup. The cast iron method ensures consistent results every time.
Ingredients for Pot Bread Recipe Cast Iron Pot
Simple ingredients transform into artisanal bread with cast iron magic and steam.
| Ingredient | Amount | Notes |
|---|---|---|
| Bread Flour 🌾 | 3 ½ cups | High protein content preferred |
| Active Dry Yeast 🍞 | 2 ¼ tsp | Proofed in warm water first |
| Sea Salt 🧂 | 2 tsp | Fine grain for even distribution |
| Granulated Sugar 🍚 | 1 tbsp | Feeds the yeast activation |
| Warm Water 💧 | 1 ½ cups | 105-110°F for yeast |
| Olive Oil 🫒 | 2 tbsp | For greasing and dough |
| Cornmeal 🌽 | 2 tbsp | For dusting the pot |
| All-Purpose Flour 🌾 | ½ cup | For dusting work surface |
| Honey 🍯 | 1 tbsp | Optional for sweetness |
| Vital Wheat Gluten 🌾 | 1 tbsp | Optional for chewier texture |
Bread flour is non-negotiable here. King Arthur offers the most consistent protein content (12-13%) for that perfect chewy crumb. Proof your yeast in the warm water with sugar first—if it doesn’t foam within 5-10 minutes, start over with fresh yeast. A kitchen scale is ideal, but volume measurements work fine for this foolproof method. The olive oil adds tenderness without overwhelming the crust.
No bread flour? All-purpose plus 1 tbsp vital wheat gluten per cup mimics the protein boost. Swap honey for sugar if you prefer a neutral sweetness. Instant yeast can replace active dry at a 1:1 ratio—skip the proofing step. For a darker crust, add 1 tbsp molasses to the dough. The cornmeal prevents sticking but semolina or extra flour work too.
Store flour in airtight containers to prevent rancidity (keeps 6-8 months at room temperature). Yeast lasts 1 year unopened in the pantry, 4 months once opened in the fridge. Baked loaves stay fresh wrapped in foil for 3 days, or freeze for 3 months.
Why You’ll Love This Recipe
- One Bowl Wonder: I just dump flour, yeast, salt, sugar and warm water in my cast iron, stir, and let it rise—no kneading, no mess.
- Crispy Golden Crust: The cast iron gives it that deep golden edge with a soft, pillowy center that’s pure comfort food.
- Feeds a Crowd: One pot makes a loaf big enough for sandwiches today and toast tomorrow.
- Pantry Staples Only: Flour, yeast, sugar, salt—things I always have on hand, so I can bake fresh bread on a whim.
Step-by-Step Instructions for Dutch Oven Pot Bread
Master this technique for a rustic, artisanal loaf with minimal effort and maximum flavor.
Step 1: Activate the Yeast and Prepare the Dough
In a large mixing bowl, combine the 1.5 cups Warm Water, 1 tbsp Granulated Sugar, and 2.25 tsp Active Dry Yeast. Let it sit for 5-10 minutes until the mixture becomes frothy and cloudy—this confirms the yeast is active and ready to work.
Add the 3.5 cups Bread Flour, 2 tsp Sea Salt, 2 tbsp Olive Oil, 1 tbsp Honey, and 1 tbsp Vital Wheat Gluten. Stir with a wooden spoon until a shaggy dough forms. The dough will be sticky—that’s normal and ensures a light, airy texture.
Step 2: Knead and First Rise
Turn the dough onto a surface lightly dusted with the 0.5 cup All-Purpose Flour. Knead for 8-10 minutes until smooth and elastic. You’ll notice the dough becomes less sticky as the gluten develops, but resist adding too much flour—this keeps the crumb tender.
Place the dough in a lightly oiled bowl, cover with a damp towel, and let it rise in a warm, draft-free place for 1-2 hours, or until doubled in size. The dough should spring back slowly when gently pressed, indicating it’s properly proofed.
Step 3: Shape and Second Rise
Punch down the risen dough to release air, then shape it into a round loaf. Dust a cast iron pot or Dutch oven with the 2 tbsp Cornmeal to prevent sticking and add a rustic texture to the crust. Place the dough seam-side down into the pot.
Cover the pot and let the dough rise again for 30-45 minutes until it has puffed up noticeably. Preheat your oven to 450°F during this time so it’s fully heated when you’re ready to bake.
Step 4: Bake to Golden Perfection
Score the top of the dough with a sharp knife or razor—this allows the bread to expand properly without cracking. Cover the pot with its lid and bake in the preheated oven for 30 minutes.
Remove the lid and bake for another 15-20 minutes until the loaf is deep golden brown and the internal temperature reaches 200-210°F. The crust should sound hollow when tapped—a sure sign it’s fully baked.
Step 5: Cool and Serve
Transfer the bread to a wire rack and let it cool for at least 1 hour before slicing. I know it’s tempting to dive in right away, but cooling allows the crumb to set and develop its full texture.
Serve warm with butter or olive oil for dipping. The crust should be thick and crisp, while the interior remains soft and slightly chewy, with an open, airy structure. This bread is best enjoyed fresh but will keep for 2-3 days in an airtight container.
Pro Tips For Making Pot Bread Recipe Cast Iron Pot
- Preheat the Pot: I learned this the hard way—always preheat your cast iron for at least 10 minutes at 450°F before adding the dough. A hot pot guarantees that initial rise and crust formation.
- Check Yeast Freshness: After a few failed loaves, I now proof my yeast in the warm water with sugar first. If it doesn’t foam within 5-10 minutes, the yeast is dead and your bread won’t rise.
- Don’t Overflour: Resist the urge to dump extra flour when shaping. Just enough to prevent sticking—about 1-2 tablespoons max—otherwise your bread turns dense.
- Use Parchment Paper: Sounds weird, but it works: line your pot with parchment before adding the dough. The bread releases cleanly every time, and you skip the scrubbing later.
Wine and Beer Pairings for This Recipe
Wine Pairings
A crisp Sauvignon Blanc works beautifully with this rustic bread. Its citrus notes and bright acidity cut through the richness of the crust. I love pairing it with a New Zealand variety for extra zing. 🍷
Red Wine Options
For red lovers, a light Pinot Noir from Oregon complements without overpowering. The earthy notes harmonize with the bread’s rustic character. Serve slightly chilled for best results.
Beer Pairings
A Hefeweizen with its banana and clove notes pairs surprisingly well. The wheat beer’s effervescence cleanses your palate between bites. Weihenstephaner is my go-to choice. 🍺
Cider Selection
Hard cider offers a refreshing alternative. A dry English-style cider with apple complexity balances the bread’s simplicity. Look for brands like Strongbow Dry.
Non-Alcoholic
Sparkling water with a squeeze of lemon enhances the crust’s texture. For tea lovers, a chilled hibiscus iced tea provides tart contrast. Both options are perfect for daytime enjoyment.
Nutrition Facts
Frequently Asked Questions
What if my dough doesn’t rise?
Check your yeast first—it may be expired. Ensure your water is 105-110°F and the room is warm. If all else fails, try adding 1/4 tsp more yeast to the dough.
Can I use a different pot?
Yes, but cast iron is ideal for heat retention. A heavy Dutch oven works too. Avoid thin metal pots as they won’t distribute heat evenly.
How do I prevent a dense loaf?
Avoid over-kneading and ensure proper rising time. The dough should double in size before baking. Steam during baking is key for a light texture.
Why is my crust too thick?
This happens if the pot is too small or the dough over-rises. Use a 4-6 quart pot and bake immediately after the second rise.

- Potato Patty Recipe No Egg: Crispy Edges Without the Binder - October 30, 2026
- Paula Deen’s Potato Chip Cookies Recipe: Salty-Sweet Crunch in Every Bite - October 30, 2026
- Potato Gnocchi Recipe Ideas: Pillowy Soft Dumplings With Rustic Charm - October 30, 2026