
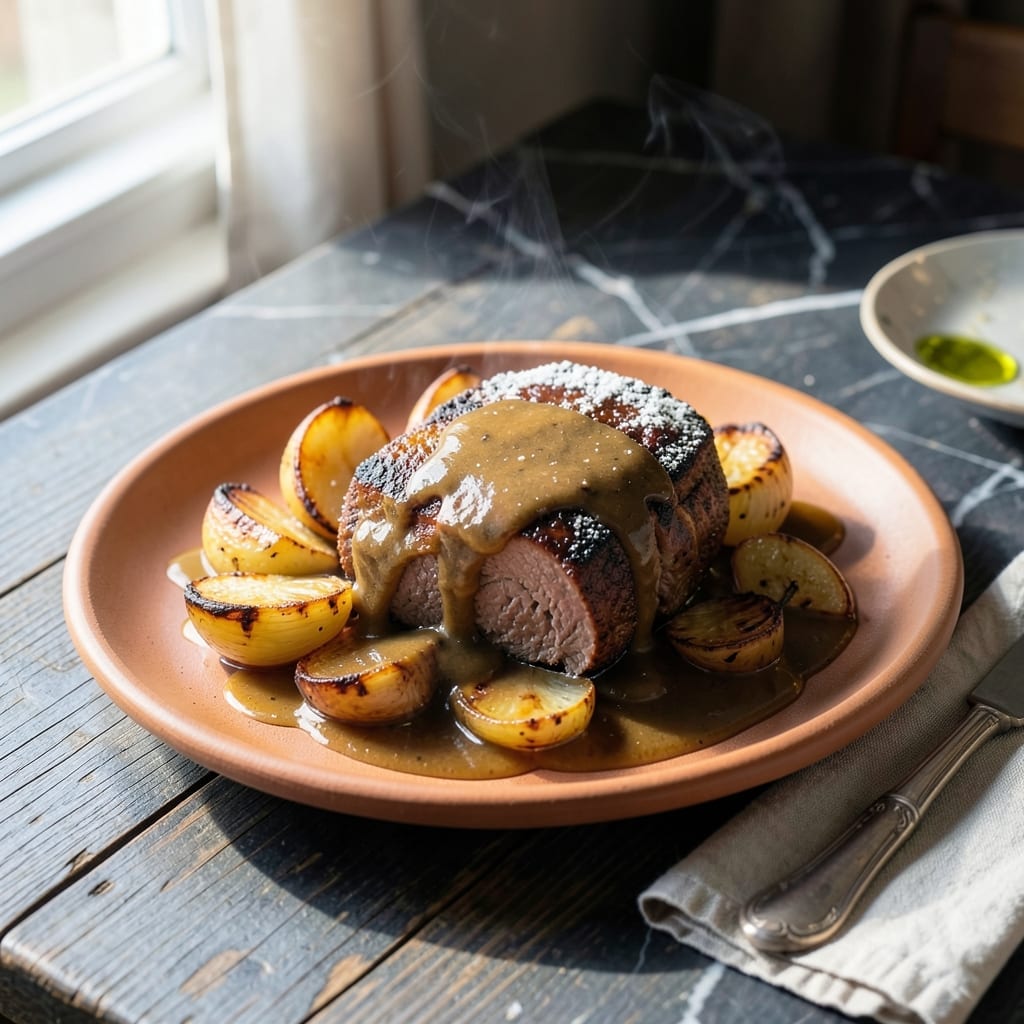
There’s something deeply satisfying about a perfectly cooked pot roast, and this stove-top version delivers tender, fall-apart meat without a drop of wine. I’ve refined this method over years, focusing on low heat and patience to coax maximum flavor from simple ingredients.
The secret lies in browning the beef thoroughly before the slow simmer, which builds a rich foundation for the gravy. A blend of beef broth and aromatic vegetables replaces the wine, creating a savory depth that still feels indulgent.
What you’ll end up with is meat so tender it nearly dissolves on your tongue, surrounded by a velvety sauce that soaks into every bite. The stove-top approach ensures even cooking and easy monitoring, so you can adjust as needed.
This is comfort food at its most reliable—no special equipment, just time and technique.
Ingredients for Pot Roast Recipe Stove Top No Wine
Simple, hearty ingredients transform into a melt-in-your-mouth classic with rich, deep flavor.
| Ingredient | Amount | Notes |
|---|---|---|
| Chuck Roast 🥩 | 3 lb | Well-marbled, trimmed of excess fat |
| Kosher Salt 🧂 | 1 ½ tsp | Diamond Crystal preferred |
| Black Pepper 🌶️ | 1 tsp | Freshly ground for best flavor |
| All-Purpose Flour 🌾 | ¼ cup | For dusting beef before browning |
| Olive Oil 🫒 | 2 tbsp | Divided for browning and sautéing |
| Yellow Onion 🧅 | 1 whole | Large, diced into chunks |
| Carrots 🥕 | 3 whole | Peeled, cut into large pieces |
| Celery Stalks 🌿 | 2 whole | Cut into 2-inch pieces |
| Garlic Cloves 🧄 | 4 cloves | Smashed, skin removed |
| Low-Sodium Beef Broth 🥘 | 3 cups | Quality brand for rich flavor |
| Tomato Paste 🍅 | 2 tbsp | For depth of flavor |
| Dried Thyme 🌿 | 1 tsp | Rubbed between fingers to release aroma |
| Bay Leaf 🍃 | 1 whole | Removed before serving |
| Fresh Parsley 🌿 | ¼ cup | Chopped, for garnish |
The beef is everything here. Chuck roast with good marbling breaks down beautifully during the slow cook—avoid lean cuts like sirloin. I grab mine from Costco for the best price per pound, but any grocery store with a solid butcher counter works. Look for bright red meat with visible fat streaks (that’s the marbling). Ask them to trim excess fat if you’re not comfortable doing it yourself.
No beef broth? Mushroom broth or a mix of water and soy sauce (2 tbsp per cup) gives a similar umami punch. Out of tomato paste? 1/4 cup ketchup works in a pinch. Fresh thyme can replace dried at three times the amount, but dried is easier to find year-round. The flour for dusting can be swapped for cornstarch if you need gluten-free—just use half the quantity.
Leftovers taste even better the next day. Store in an airtight container for up to 4 days in the fridge or freeze portions for 3 months. Reheat gently on the stove with a splash of water to thin the gravy (it thickens when cold).
Why You’ll Love This Recipe
- One Pot Wonder: I love that I can sear the chuck roast and let it simmer all in the same pot—no extra dishes to wash.
- Rich and Hearty: The flour crust on the beef locks in juices, making every bite tender and packed with savory depth.
- Feeds a Crowd: Honestly, this makes enough for dinner tonight and leftovers for sandwiches tomorrow—my family’s favorite.
- Budget Friendly: A chuck roast and pantry staples like olive oil and flour keep costs low without sacrificing flavor.
Step-by-Step Instructions for Pot Roast Stove Top No Wine
Here’s the method that turns tough chuck roast into fall-apart tender perfection on your stovetop.
Step 1: Season and Brown the Chuck Roast
Pat the 3 lb Chuck Roast dry with paper towels, then season generously with 1.5 tsp Kosher Salt and 1 tsp Black Pepper on all sides. I rub the seasoning in firmly to ensure every bite is well-flavored.
Dust the roast lightly with 0.25 cup All-Purpose Flour, tapping off any excess. Heat 1 tbsp Olive Oil in a large Dutch oven over medium-high heat. When the oil shimmers, add the roast and sear for 4-5 minutes per side until deeply browned. You’ll know it’s ready to flip when it releases easily from the pot. This creates a flavorful fond that will enrich your sauce later.
Step 2: Sauté the Aromatic Vegetables
Remove the roast and set aside. In the same pot, add the remaining 1 tbsp Olive Oil. Toss in the 1 whole Yellow Onion (diced), 3 whole Carrots (peeled and chunked), and 2 whole Celery Stalks (cut into pieces). Sauté for 5-6 minutes until the onion softens and edges brown.
Add the 4 cloves Garlic Cloves (smashed) and cook for 1 minute until fragrant. Stir in 2 tbsp Tomato Paste and cook for 2 minutes, stirring constantly. This step deepens the flavor base and prevents the tomato paste from tasting raw in the final dish.
Step 3: Deglaze and Build the Braising Liquid
Pour in 3 cups Low-Sodium Beef Broth, scraping up all the browned bits from the bottom of the pot with a wooden spoon. These caramelized bits are pure flavor and will dissolve into your braising liquid.
Add 1 tsp Dried Thyme (rubbed between your fingers to release its aroma) and 1 whole Bay Leaf. Return the roast to the pot, along with any accumulated juices. The liquid should come about halfway up the roast—if it doesn’t, add a splash of water.
Step 4: Simmer Until Fork-Tender
Bring the liquid to a gentle simmer, then reduce heat to low. Cover the pot and let it cook for 2.5 to 3 hours, turning the roast every 45 minutes to ensure even cooking. You’ll know it’s done when a fork slides in and out with no resistance.
Resist the urge to lift the lid too often—each peek releases heat and extends your cooking time. The low, steady simmer is what transforms the chuck roast from tough to buttery tender. If the liquid reduces too much, add a bit more broth or water.
Step 5: Rest and Serve
Once the roast is tender, remove it from the pot and let it rest on a cutting board for 15 minutes. This allows the juices to redistribute, ensuring every slice is moist and flavorful.
Discard the Bay Leaf, then slice the roast against the grain. Arrange the slices on a platter with the vegetables, and spoon some of the braising liquid over the top. Garnish with 0.25 cup Fresh Parsley for a bright finish. Serve with the remaining braising liquid on the side for dipping.
Pro Tips For Making Pot Roast Recipe Stove Top No Wine
- Sear the Chuck Hard: Get your oil smoking hot before adding the roast—this builds a deep crust that locks in flavor. I used to pull it off too soon, and the meat always tasted flat.
- Season the Flour: Mix a teaspoon each of salt and pepper into your flour before dredging. Sounds small, but it makes the coating actually taste like something.
- Skip the Crowded Pan: If your pot isn’t big enough for all the meat in one layer, sear it in batches. Steaming from overcrowding ruins the crust every time.
- Use a Splatter Screen: That flour coating creates a messy, spattery sear—cover with a screen to keep your stovetop clean. I learned this the hard way after scrubbing grease off my walls.
Pro Cooking Tips for This Recipe
Perfect Browning Technique
Don’t rush the searing step—this is where deep flavor develops. I use a heavy Dutch oven (my Le Creuset is perfect) to ensure even heat distribution. The beef should be dry before seasoning to prevent steaming instead of browning. 🔥
Low and Slow Simmer
Maintain the gentlest simmer possible—barely a bubble breaking the surface. If your stove runs hot, use a diffuser plate or move the pot partially off the burner. This steady, low heat is what breaks down the collagen into that melting tenderness.
Liquid Level Management
Check the braising liquid every 45 minutes. If it drops below halfway up the roast, add ½ cup hot water or broth. Too much liquid and you’ll end up with boiled meat; too little and it’ll dry out. I keep a kettle simmering nearby for quick adjustments.
Turning the Roast
Turn the chuck roast every 45 minutes to ensure even cooking and prevent sticking. Use tongs to avoid piercing the meat, which would let precious juices escape. The sides that were submerged will brown beautifully when exposed to the heat.
Resting Matters
Let the roast rest for a full 15 minutes after cooking. This isn’t optional—it’s what keeps the meat moist. I tent it loosely with foil to retain warmth while the juices redistribute. Slicing too soon will send all that flavor onto the cutting board. 💡
Gravy Enhancement
For a richer sauce, skim excess fat from the braising liquid, then simmer uncovered for 5-10 minutes to reduce slightly. A splash of apple cider vinegar brightens the flavors right before serving. Stir in any resting juices from the cutting board—they’re pure gold.
Nutrition Facts
Frequently Asked Questions
What cut of beef works best for this method?
Chuck roast is ideal due to its marbling and connective tissue that breaks down beautifully during slow cooking. Avoid lean cuts like sirloin as they can become dry.
How do I know when it’s done?
The roast is ready when a fork slides in and out with no resistance, typically after 2.5 to 3 hours. The meat should pull apart easily when tested.
Can I use a different liquid instead of broth?
Yes! Try mushroom broth or a mix of water and 2 tbsp soy sauce per cup for umami depth. Avoid water alone as it lacks flavor.
Why is resting the meat important?
Resting for 15 minutes allows juices to redistribute throughout the meat. Slicing too soon causes flavor loss and dryness.

- Pressure Cooker Ketchup Recipe With Canned Tomatoes: Homemade Tangy Richness in Half the Time - October 30, 2026
- Pottukadalai Sweet Recipe in Tamil: Festive Roasted Gram Delight - October 30, 2026
- Potato Salad Recipe With Egg and Sour Cream: Creamy Tang With Classic Crunch - October 30, 2026