
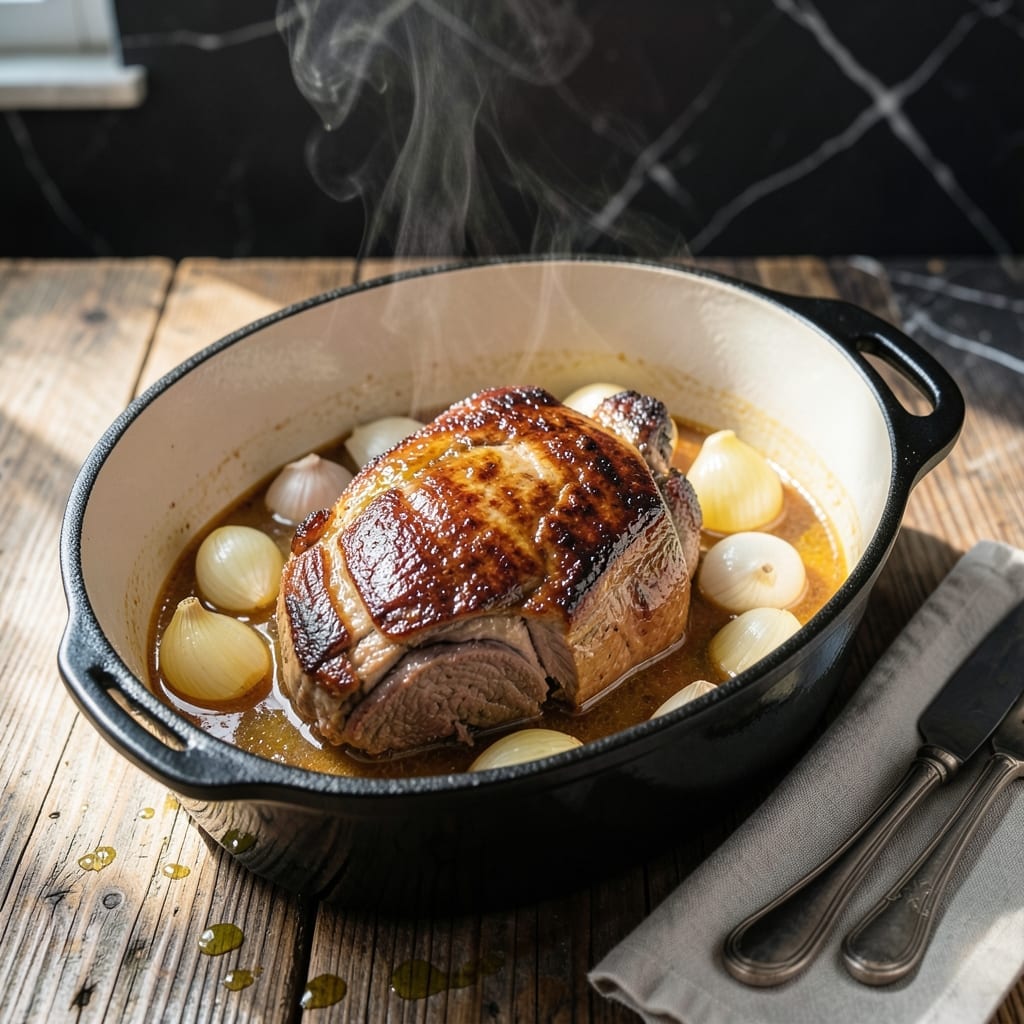
This pot roast delivers slow-simmered tenderness using the simplest method I know—just meat, water, and time.
I developed this technique after years of overcomplicating things with wine and broth. The water creates steam that breaks down tough fibers, resulting in fall-apart meat without masking its natural flavor.
By the end of cooking, the liquid reduces to a rich, concentrated gravy that coats every bite. The secret is maintaining a steady simmer, never a boil, for perfectly tender results.
Serve with mashed potatoes or crusty bread to soak up every drop. Here’s how to make it.
Ingredients for Pot Roast Recipe with Water
A handful of humble ingredients transforms into melt-in-your-mouth pot roast with rich, natural gravy.
| Ingredient | Amount | Notes |
|---|---|---|
| Chuck Roast 🥩 | 3 lb | Well-marbled for tenderness |
| Water 💧 | 4 cups | For slow simmering |
| Kosher Salt 🧂 | 2 tsp | Diamond Crystal preferred |
| Black Pepper 🌶️ | 1 tsp | Freshly ground preferred |
| Yellow Onion 🧅 | 1 whole | Large, quartered |
| Garlic Cloves 🧄 | 6 cloves | Smashed, unpeeled |
| Carrots 🥕 | 3 whole | Peeled, cut into chunks |
| Celery Stalks 🌿 | 2 whole | Cut into large pieces |
| Bay Leaves 🍃 | 2 pieces | Dried, whole |
| Fresh Thyme Sprigs 🌿 | 4 pieces | Or 1 tsp dried thyme |
| Olive Oil 🫒 | 2 tbsp | For searing roast |
| All-Purpose Flour 🌾 | 2 tbsp | Optional, for thickening gravy |
The chuck roast is non-negotiable for this method. Look for heavy marbling—this fat renders down during the long simmer, creating that unctuous texture. Costco carries excellent pre-packaged chuck roasts, or ask your butcher for a well-marbled cut. Avoid leaner options like round roast; they’ll stay tough no matter how long you cook them. The water should be cold when you start for even heat distribution.
No chuck? Short ribs or brisket work beautifully with this technique. Out of fresh thyme? Dried at one-third the amount gets the job done. The onion and celery add depth to the gravy, but shallots or leeks can stand in. For extra richness, add a splash of Worcestershire sauce (just check for anchovies if that’s a concern). Skip the flour if you’re gluten-free—the gravy will just be thinner.
This keeps 4-5 days in the fridge, and the flavors deepen with time. Freeze for up to 3 months—portion the meat with some gravy for easy reheating. The gravy will thicken as it cools, so thin with a little water when reheating. Always store in airtight containers to prevent freezer burn.
Why You’ll Love This Recipe
- Set It and Forget It: I just sear the chuck roast, add water, salt, pepper, and onion, then let the oven do the work.
- Rich, Simple Flavor: The onion and beef slow-cook in their own juices for a deep, savory taste without fancy ingredients.
- Sunday Dinner, Any Day: This feels special enough for company but I make it on random Wednesdays too.
- Leftovers for Days: One pot roast means sandwiches, tacos, or stew for the rest of the week.
Step-by-Step Instructions for Pot Roast With Water
This method guarantees fall-apart tenderness through precise slow simmering and proper seasoning.
Step 1: Sear the Chuck Roast for Depth of Flavor
Heat the 2 tbsp Olive Oil in a heavy Dutch oven over medium-high heat until shimmering but not smoking. Pat the 3 lb Chuck Roast completely dry with paper towels—this ensures a proper sear rather than steaming the meat.
Season all sides generously with the 2 tsp Kosher Salt and 1 tsp Black Pepper. Place the roast in the hot oil and sear undisturbed for 4-5 minutes per side until deeply browned. You want a rich, dark crust that forms the flavor foundation for your dish.
This searing step creates the Maillard reaction, developing complex flavors that water-based cooking alone cannot achieve. Don’t rush this process—proper browning takes time and patience.
Step 2: Build the Aromatic Base
Remove the seared chuck roast and set aside. In the same Dutch oven, add the 1 whole Yellow Onion (quartered), 6 cloves Garlic Cloves (smashed, unpeeled), 3 whole Carrots (peeled and cut into chunks), and 2 whole Celery Stalks (cut into large pieces).
Cook for 5-7 minutes over medium heat, stirring occasionally, until the vegetables begin to soften and develop some color. This builds another layer of flavor before the liquid is added.
The unpeeled garlic will mellow and sweeten as it cooks, infusing the entire pot with its essence. The large vegetable pieces will soften during the long simmer but maintain their shape.
Step 3: Deglaze and Begin the Slow Simmer
Return the chuck roast to the Dutch oven. Add the 4 cups Water, 2 pieces Bay Leaves, and 4 pieces Fresh Thyme Sprigs. The water should come about halfway up the roast—this creates the perfect environment for slow, even cooking.
Bring the liquid to a boil, then immediately reduce the heat to low. Cover and maintain a gentle simmer—you should see just an occasional bubble breaking the surface. This low-and-slow approach is what transforms the tough chuck roast into fork-tender perfection.
Simmer for 2.5 to 3 hours, turning the roast every 45 minutes to ensure even cooking. The meat is done when it pulls apart easily with a fork and reaches an internal temperature of 195-205°F.
Step 4: Optional Gravy Thickening and Final Adjustments
Carefully remove the chuck roast and vegetables to a serving platter, keeping them warm. For a thicker gravy, whisk the 2 tbsp All-Purpose Flour with ¼ cup of the cooking liquid until smooth, then stir this slurry into the remaining liquid in the Dutch oven.
Simmer the gravy for 3-5 minutes until it thickens to your desired consistency. Taste and adjust seasoning with additional Kosher Salt or Black Pepper if needed. The flour will create a velvety texture that beautifully coats the meat and vegetables.
Strain the gravy if you prefer a smooth consistency, or leave the vegetables in for a rustic presentation. Serve the pot roast with the vegetables and gravy for a complete, comforting meal.
Pro Tips For Making Pot Roast Recipe With Water
- Sear the Chuck: I learned this the hard way—skipping the sear leaves your pot roast bland and pale. Crank the heat to medium-high and brown that chuck roast on all sides until it’s deep brown, about 3-4 minutes per side.
- Use Enough Water: Sounds simple, but most people underdo it. Add water until it comes about halfway up the roast—usually 2-3 cups for a 3-4 lb chuck—to guarantee even cooking and tender meat.
- Don’t Rush the Cook: After burning a few batches by cranking the heat, I finally figured out low and slow is non-negotiable. Keep it at a gentle simmer—barely bubbling—for 3-4 hours until the meat falls apart.
- Slice Against Grain: My grandmother swore by this, and she was right: always slice the roast against the grain after cooking. It makes the meat noticeably more tender, even if it looks a little messy on the cutting board.
Creative Variations of This Recipe
Herb-Infused Water
Swap plain water for herb-infused liquid by adding 4 sprigs fresh rosemary and 6 sprigs parsley to the 4 cups Water before simmering. This adds aromatic depth without overpowering the natural beef flavor. I tie herbs with twine for easy removal later. 🌿
Asian-Inspired Twist
Add ¼ cup soy sauce, 2 tbsp brown sugar, and 1-inch ginger slice to the water for an umami-rich variation. The soy sauce tenderizes while adding savory depth. Serve with steamed rice instead of potatoes for a complete Asian-inspired meal.
Spicy Southwestern
Stir in 1 chopped chipotle pepper and 1 tsp cumin with the water. The smoky heat complements the beef beautifully. I use canned chipotles in adobo for convenience. Top with fresh cilantro and lime wedges when serving. 🌶️
Beer Braised
Replace 2 cups Water with 2 cups dark beer like Guinness. The maltiness adds richness while the carbonation helps tenderize. Reduce the liquid by ¼ before serving for a thicker, more concentrated sauce.
Mediterranean Style
Add ½ cup kalamata olives, 1 tbsp capers, and 1 tsp oregano to the water. The briny elements cut through the richness. I love this with crusty sourdough from New Seasons Market for dipping.
Tomato-Water Blend
Mix 2 cups Water with 2 cups crushed tomatoes for a lighter gravy with bright acidity. The tomatoes add natural sweetness that balances the beef. This version reminds me of Sunday dinners growing up in Cincinnati. 💛
Nutrition Facts
Frequently Asked Questions
Why use water instead of broth?
Water lets the beef’s natural flavors shine without competition. As it simmers, the meat releases its own rich juices and collagen, creating a pure, concentrated gravy that broth can’t match.
Can I use a different cut of meat?
Stick with well-marbled cuts like brisket or short ribs for best results. Lean cuts like round roast won’t break down properly. The fat content is key for that melt-in-your-mouth texture.
How do I know when it’s done?
The meat is ready when it reaches 195-205°F internally and pulls apart easily with a fork. This usually takes 2.5-3 hours of gentle simmering. Never boil—keep it at a lazy bubble.
What if my gravy is too thin?
Mix 2 tbsp flour with ¼ cup cold water, then stir into the hot liquid. Simmer for 3-5 minutes until thickened. For gluten-free, try a cornstarch slurry instead.

- Potato Patty Recipe No Egg: Crispy Edges Without the Binder - October 30, 2026
- Paula Deen’s Potato Chip Cookies Recipe: Salty-Sweet Crunch in Every Bite - October 30, 2026
- Potato Gnocchi Recipe Ideas: Pillowy Soft Dumplings With Rustic Charm - October 30, 2026